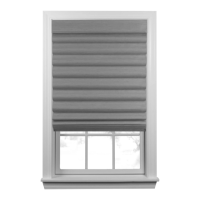
REMOVING THE SHADE (IF NECESSARY)
•
Lower the shade approximately 4".
• While holding the headrail, push
back on the bottom tab of the
installation bracket to release
the bottom edge of the headrail.
• After releasing the bottom edge,
roll the back of the headrail
down and out from the bracket.
Remove
Bracket
Back of
Shade
Headrail
Bottom
Tab
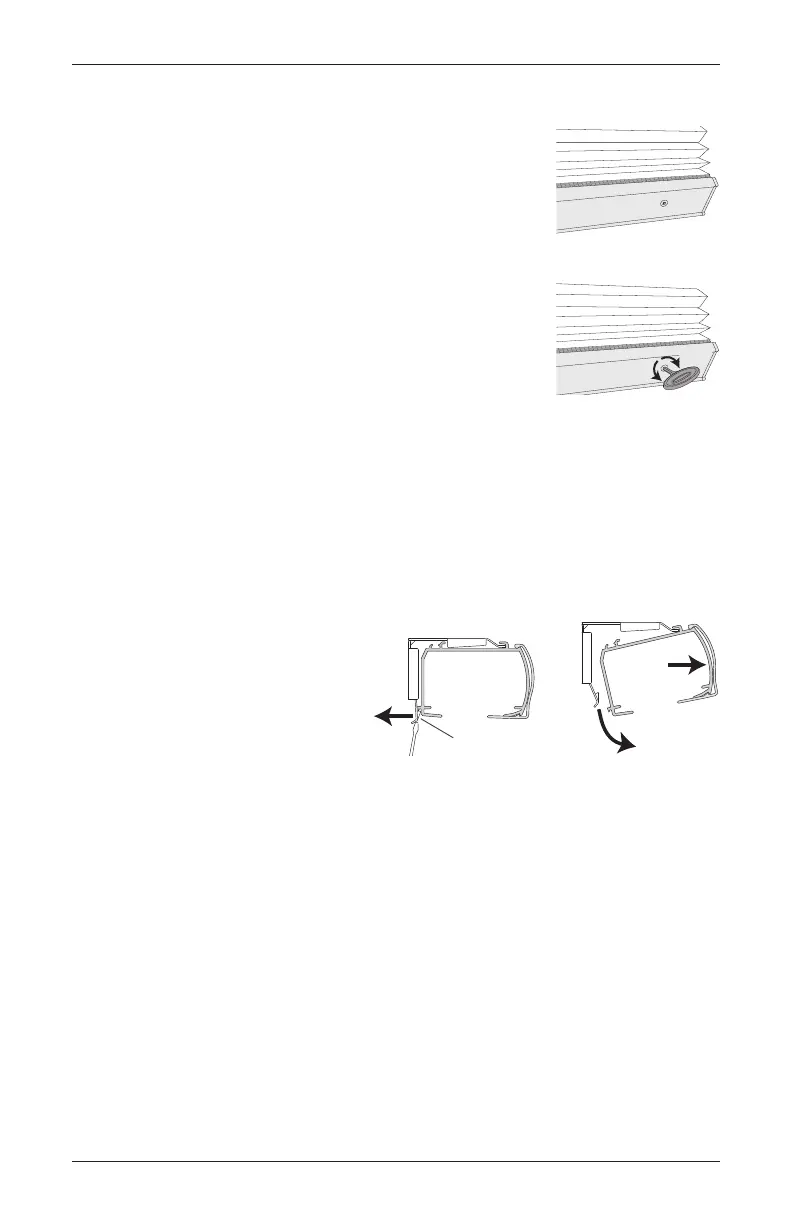
LEVEL THE BOTTOM RAIL (IF NECESSARY)
• Lift the bottom rail to locate the pockets on the underside
of the rail.
• Gently pull down on the bottom rail to fully insert the
7
⁄64"
Allen wrench key into the pocket. The key is fully inserted
when the ring on the key abuts to the pocket.
— Lift up the bottom rail slightly before turning the Allen
wrench key. Turn the key clockwise to raise that side of
the bottom rail, or counter-clockwise to lower it.
— One quarter turn of the key equals approximately
1
⁄4".
IMPORTANT: The Allen wrench key must be fully
inserted to avoid stripping the mechanism. Do not
pull down on the bottom rail while turning the key.
• If more than two pockets exist, adjust the outer pockets first. Then adjust inner
pockets as necessary, to maintain equal tension across the bottom rail. As pocket
adjustments are made, it is recommended that the shade be raised and lowered to
check that it is level.
Pocket
Lower
Raise
Underside of Bottom Rail
Allen Wrench Key
OPERATION
17Cellular Shades Motorized Control Lift