OUTSIDE MOUNT (OM) –BEFORE YOU BEGIN
OUTSIDE MOUNT (OM)
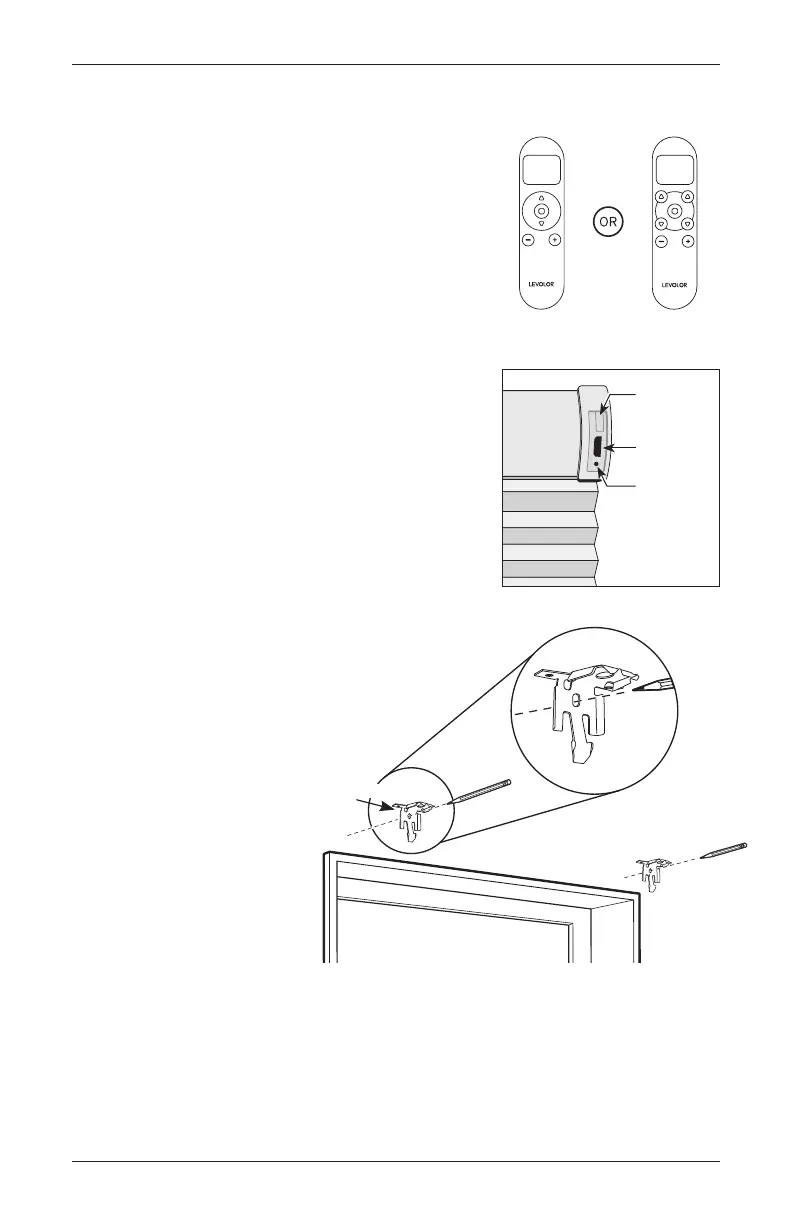
STEP 1: MARKING THE BRACKET
LOCATIONS
NOTE: The rear of the brackets must
be flush against a flat mounting
surface. Do NOT mount brackets
on curved molding.
• Center the headrail over
the window opening at
the desired height.
• Use a pencil to lightly mark
each end of the headrail.
— Alternatively, measure the width of the headrail and use that width to mark
the headrail end points over the window opening.
• Mark approximately 1 – 2" in from each end of headrail for the installation
bracket locations.
— Allow a minimum of
1
⁄4 in between the bottom of the installation bracket and the
top of the window molding.
Bracket
PAIR SHADE BEFORE INSTALLING
REMOTE CONTROL
• Use the – and + buttons to select the channel
to pair to.
• Press and hold the programming button on the
window covering for about 2 seconds until the
shade jogs once.
• In the next 10 seconds, press and hold the on
the remote until the shade jogs twice.
USING THE INMOTION APP
• If you purchased a hub, download the LEVOLOR
InMotion
™
app to get started.
• Shade can be directly paired to app, but it is
recommended to pair to remote first.
Standard
Remote Control
Top-Down/Bottom-Up,
Day/Night Remote Control
Micro-USB
Charging Port
Indicator
Light
Programming
Button
INSTALLATION
11Cellular Shades Motorized Control Lift