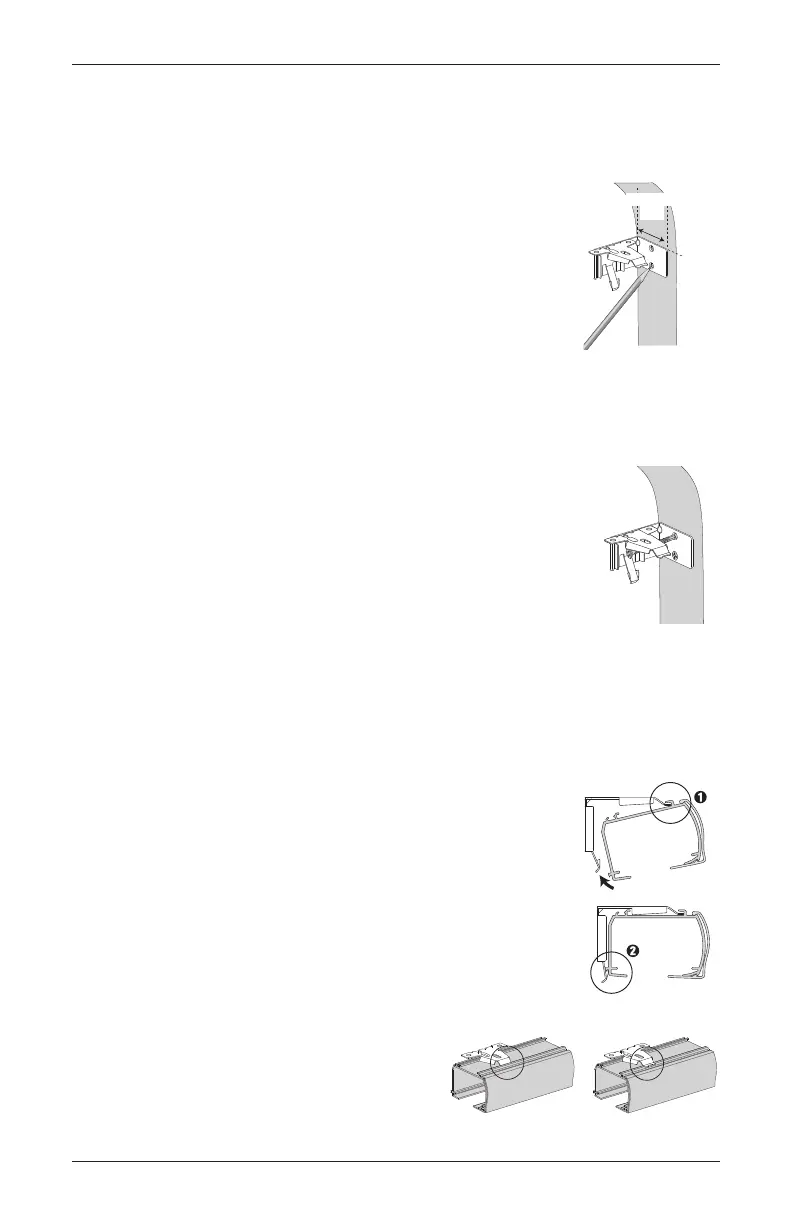
STEP 3: INSTALLING THE SHADE–MOUNTING THE HEADRAIL
•
Fit the front channel on top of the headrail onto the front
lip of installation brackets.
• Push the headrail up and back until it snaps into place.
• Check to ensure the headrail is securely in the brackets.
— Check that the bottom of the headrail is snapped into
the base of each bracket.
— Check that the front lip of each bracket is in the front
channel of the headrail.
— If any brackets are not installed correctly,
release the shade and reinstall. See
“Removing the Shade (If Necessary)”
on page 17.
Snap in
Place
Headrail
Bracket
Good Bad
The front of the bracket
fits under the groove.
STEP 1: MARKING THE BRACKET LOCATIONS
End mount the headrail when conventional mounting techniques
will not work — for example, in an arched window opening.
• Position the end mount brackets so that the top of the attached
installation brackets is at the ordered height of the shade.
IMPORTANT: Both brackets must be installed at the same
depth and height.
• Mark both screw holes.
— The mounting surface must be vertical and flat, not part of an archedcurve.
STEP 2: INSTALLING THE BRACKETS
•
Drill the holes using a
3
⁄32" drill bit.
• Attach the end mount installation brackets usingthe flat head
screwsprovided.
NOTE: Drywall mounting is not recommended.
SIDE MOUNT
Ordered
Shade
Height
Minimum
1
1
⁄4"
INSTALLATION
15Cellular Shades Motorized Control Lift