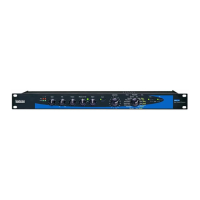
MPX G2 Service Manual
4-28
6. Set the Analyzer back to measure level.
Signal To Noise Ratio:
1. Apply a 1kHz-sinewave signal at +1.75dBu (.95Vrms).
2. Set the Analyzer for a 0dB reference (@ 1kHz).
3. Turn off the oscillator.
4. Verify an output level reading between -92.94 to-120.00 dBu (18.0 to 0.8 uVRMS).
5. Move the cable from the Right Main Output jack to the Left Main Output Jack.
6. Verify an output level reading between -92.94 to-120.00 dBu (18.0 to 0.8rms).
7. Turn the oscillator back on.
Signal Level with Insert Set to PreOut:
1. Press the No button 21 times. The display reads: Devel InsertType Left. Turn the knob CCW to set the
MPX G2 for PreOut.
2. Apply a 1kHz-sinewave signal at +1dBu (870 mVRMS).
3. Verify an output level reading between 27.56 to -24.94 dBu (18.5 to .57 Vrms).
4. Move the cable from the Left Main Output jack to the Right Main Output Jack.
5. Verify an output level reading between 27.56 to -24.94 dBu (18.5 to .57 Vrms).
THD+N Measurement with Insert Set to Pre Out:
1. Set the Analyzer to measure THD+N.
2. Apply a 1kHz-sinewave signal at -1dBu (690 mVRMS).
3. Verify an output THD+N reading is between (0.01 to 0.0007%) at the following frequency settings.
20,000Hz 15,000Hz 10,000Hz 5,000Hz
3,000Hz 997Hz 100Hz 20Hz
4. Move the cable from the Right Main Output jack to the Left Main Output Jack.
5. Verify an output THD+N reading is between (0.01 to 0.0007%) at the following frequency settings.
20,000Hz 15,000Hz 10,000Hz 5,000Hz
3,000Hz 997Hz 100Hz 20Hz
Signal To Noise Ratio with DSP and GTone Circuit On:
1. Press the No button 5 times. The display reads: Devel DSP Bypass Byp 0. Turn the knob CW to set it
to On 1.
2. Press the Yes button 21 times. The display reads: Devel GTone Byp 0. Turn the knob CW to set it to
On 1.
3. Apply a 1kHz-sinewave signal at +2.2dBu (1 Vrms).
4. Set the Analyzer for a 0dB reference (@ 1kHz).
5. Turn off the oscillator.
6. Verify an output level reading between -92.94 to-120.00 dBu (18.0 to 0.8 uVRMS).
7. Move the cable from the Left Main Output jack to the Right Main Output Jack.
8. Verify an output level reading between -92.94 to-120.00 dBu (18.0 to 0.8 uVRMS).
9. Turn the oscillator back on.
Input to Output Display Noise Test:
Setup:
1. Turn the Gain knobs Lo, Mid, and Hi on the front panel to the following levels: Lo (0) Mid (+4) Hi (25).
2. Press the Edit button once. Next press the Gain button. It will start to flash and the display reads: Gain
select Church.