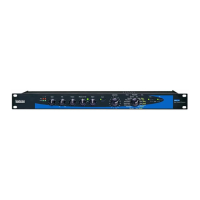
MPX G2 Service Manual
5-26
View DRAM
This utility allows the operator to view the data stored in the DRAMs (U78-U82). The utility becomes useful
when the operator determines which bit is at fault when using the information stored in the Last Test Result
utility. By using the encoder, the data can be viewed at each of the 256 memory locations (addresses),
00000 - 000FF.
When selected, the display will read the following:
DRAM Adr: 00000
<> Data: 00000
Pressing the >YES button will display the following:
(This is an example where LD2 is bad.)
┌─ This is the address 40000. Turning
│ the encoder will scroll through
│ 256 memory locations.
DRAM Adr: 00000
<> Data: 55551 ──── Data Received. To view Data Sent, use the Last Test utility.
Here are some helpful hints to determine the type of failure (Address or Data). If the values in the Data
Field remain the same when scrolling through the 256 memory locations, the failure is likely to be a data
failure (check data lines (LD0-LD19). If the values in the Data Field change when scrolling through the 256
memory locations, the failure is likely to be an address failure (check address lines LABUS0-LABUS8).
To exit, press the OPTIONS button and the previous selection will be displayed.
MIDI Scope
This tool monitors the incoming MIDI data. When selected, the display will read the following:
Scrolls through Displays the last address the MIDI Data came the
data 0-256* in at. Starts at 7800, ends at 78FF.
MIDI Of -0 7800
< 32 6F C3 F3 00 ────── MIDI Data received
└─ Last byte entered is displayed here and
moves to the left each time a byte is entered
* To scroll the data, turn the encoder CW/CCW respectively. The data will be shifted one byte each time the
encoder is turned.
EMERGENCY DIAGNOSTICS
This is another troubleshooting tool used for clearing the SRAM and enabling the Display Read and Write
scope loops.
To access the Emergency Diagnostics, the STORE button must be held down while powering on the unit.
When the right 7-segment display has a "d" displayed, the STORE button can be released. This will indicate
the system is in the Emergency Diagnostic mode.
The -24, -18, 0 and Clip Right Headroom LEDs are lit in case the 7-segment display isn't working.