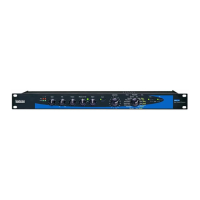
MPX G2 Service Manual
5-4
Press the Program Button on the front panel to continue the Power On Diagnostics sequence.
or
Press the Store Button, which will start a walking 1’s pattern that is applied to the Address and Data
busses of the CPU to help in troubleshooting the problem.
7 Sample Rate Test:
This test verifies the relative frequencies of the DSP’s (ADSP2186) master clock crystal Y2 and the sample
rate (44.1kHz). The range of the frequency is read and must be between 44.078k to 44.124kHz. When the
DSP counts the samples the range must be between (22663 and 22687ns)
Before the test is executed, a 7 is displayed in the rightmost 7-segment display on the MPX G2.
If a failure occurs, E is then displayed in the leftmost 7-segment display along with the 7, indicating an Error
E 7 has occurred. The display will also read the following:
SRATE Test
Failed
If an error occurs, there are two options:
Press the Program Button on the front panel to continue the Power On Diagnostics sequence.
or
Press the Store Button, which will start a walking 1’s pattern that is applied to the Address and Data
busses of the CPU to help in troubleshooting the problem.
8 Digipot Test:
This test will verify that one section of the 18 Digipots are working. The digipots are tested more thoroughly
during Audio Precision testing. In this test, the ASDP2186 sends data to the Digipots and verifies the data
received is the same as the data sent. There are 2 Digipots per package for a total of 9 components.
During the test, the ADSP2186 sends 3 signals to the Digipots. Digipot_Clk, Digipot_Data and Digipot_Rst.
The Digipot_Clk and Digipot_Rst signals are sent to the Digipots in parallel. The Digipot_Data signal is sent
to the Digipots serially. For example, the data input (pin 12) of Digipot U14 is connected to the Digipot_Data
signal. The data output signal of U14 (pin 2 COUT) is named DP_DATA1. This signal is connected to the
data input (pin 12) of Digipot U13. The data output signal of U13 (pin 2) is named DP_DATA2 and so on.
The following is a table that describes the order in which the Digipots are tested along with the Data Input
and Data Output signal names.
Digipot IC Data_Input Name Data_Output Name Schmatic Page Number
U14 DIGIPOT_DATA DP_DATA1 11 & 12
U13 DP_DATA1 DP_DATA2 11
U12 DP_DATA2 DP_DATA3 11
U31 DP_DATA3 DP_DATA4 10
U41 DP_DATA4 DP_DATA5 10
U42 DP_DATA5 DP_DATA6 8
U43 DP_DATA6 DP_DATA7 8
U44 DP_DATA7 DP_DATA8 9
U3 DP_DATA8 DIGIPOT_FB* 17
* This is the last data output in the chain. It has a -2.5VDC offset. The offset is removed by Q13 and it's
associated circuit. The signal name becomes DP_FBK and this signal reports back to the ADSP2186 to
verify the data is correct.