4-46
7014-xxx
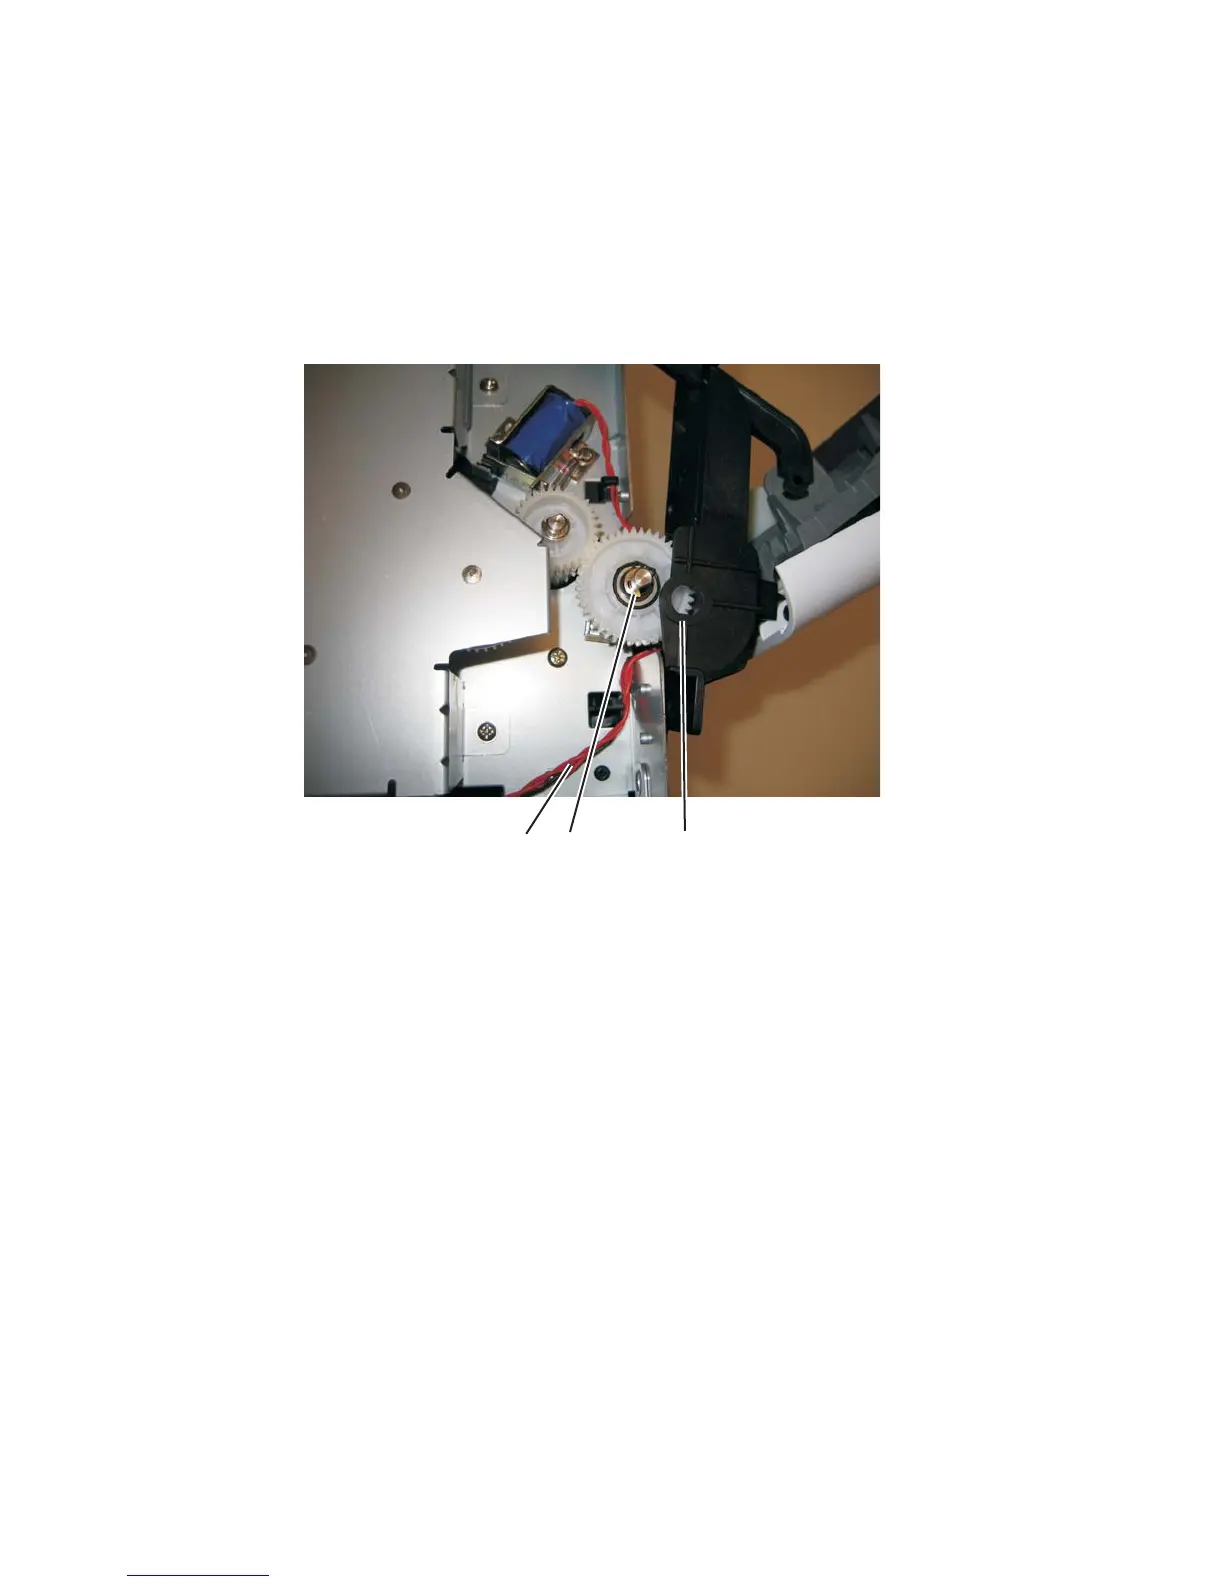
6. Lift and remove the left door mount (C) away from the side frame, and un route the cable (D) with a spring
hook.
7. Reinstall the left door mount, and place the printer on its top.
Note: Be careful to not mar the finish of the printer.
8. Disconnect the cable (D) from J25 on the engine board.
Installation note:
• Install the two screws holding the new solenoid in place, and route the cable (D) behind the MPF clutch (E).
• After disconnecting the old solenoid cable, connect the new solenoid cable to J25 on the engine board.




 To Next Page