EasyManua.ls Logo

Lexmark B3340dw - User Manual

Lexmark B3340dw
11 pages
Print Icon
To Next Page IconTo Next Page
Loading...
Quick Reference
Print
Printing from a computer
Note: For labels, card stock, and envelopes, set the paper size
and type in the printer before printing the document.
1
From the document that you are trying to print, open the Print
dialog.
2
If necessary, adjust the settings.
3
Print the document.
Printing from a mobile device
Printing from a mobile device using Google
Cloud Print
Google Cloud Print
TM
is a printing service that allows you to print
to any Google Cloud Print
ready printer.
Before you begin, make sure that:
The printer is registered to the Google Cloud Print server.
The Cloud Print plugin is downloaded from the Google Play
TM
store and is enabled in the mobile device.
1
From your Android
TM
mobile device, open a document or
select a document from your file manager.
2
Tap > Print.
3
Select a printer, and then tap .
Printing from a mobile device using Mopria
Print Service
Mopria
®
Print Service is a mobile printing solution for mobile
devices running on Android version 5.0 or later. It allows you to
print directly to any Mopria
certified printer.
Note: Make sure that you download the Mopria Print Service
application from the Google Play store and enable it in the
mobile device.
1
From your Android mobile device, launch a compatible
application or select a document from your file manager.
2
Tap > Print.
3
Select a printer, and then adjust the settings, if necessary.
4
Tap .
Printing from a mobile device using AirPrint
The AirPrint software feature is a mobile printing solution that
allows you to print directly from Apple devices to an
AirPrint
certified printer.
Notes:
Make sure that the Apple device and the printer are
connected to the same network. If the network has multiple
wireless hubs, then make sure that both devices are
connected to the same subnet.
This application is supported only in some Apple devices.
1
From your mobile device, select a document from your file
manager or launch a compatible application.
2
Tap > Print.
3
Select a printer, and then adjust the settings, if necessary.
4
Print the document.
Printing from a mobile device using WiFi
Direct®
Wi
Fi Direct
®
is a printing service that lets you print to any Wi
Fi
Direct
ready printer.
Note: Make sure that the mobile device is connected to the
printer wireless network. For more information, see
“Connecting
a mobile device to the printer” on page 4.
1
From your mobile device, launch a compatible application or
select a document from your file manager.
2
Depending on your mobile device, do one of the following:
Tap > Print.
Tap > Print.
Tap > Print.
3
Select a printer, and then adjust the settings, if necessary.
4
Print the document.
Printing confidential and other held
jobs
For Windows users
1
With a document open, click File > Print.
2
Click Properties, Preferences, Options, or Setup.
3
Click Print and Hold.
4
Select Use Print and Hold, and then assign a user name.
5
Select the print job type (Confidential, Repeat, Reserve, or
Verify).
If the print job is
confidential,
then enter a four
digit PIN.
6
Click OK or Print.
7
From the printer home screen, release the print job.
For confidential print jobs, navigate to:
Held jobs > select your user name >
Confidential
> enter
the PIN > select the print job > configure the settings >
Print
For other print jobs, navigate to:
Held jobs > select your user name > select the print job >
configure the settings > Print
For Macintosh users
1
With a document open, choose File > Print.
If necessary, click the disclosure triangle to see more options.
2
From the print options or Copies & Pages menu, choose Job
Routing.
3
Select the print job type (Confidential, Repeat, Reserve, or
Verify).
If the print job is
confidential,
then assign a user name and a
four
digit PIN.
4
Click OK or Print.
5
From the printer home screen, release the print job.
For confidential print jobs, navigate to:
1
Question and Answer IconNeed help?

Do you have a question about the Lexmark B3340dw and is the answer not in the manual?

Summary

Print

Maintain the printer

Replacing the toner cartridge

Detailed steps for removing the old and installing a new toner cartridge.

Paper Handling and Loading

Connectivity

Troubleshooting Paper Jams

Clearing paper jams

General guidance and methods for clearing paper jams from the printer.

Paper jam in the standard bin

Procedure for removing jammed paper from the standard paper bin.

Paper jam in the multipurpose feeder

Steps to clear paper jams from the multipurpose feeder.

Paper jam in trays

Instructions for removing jammed paper from the printer trays.

Paper jam in the duplex unit

Guide to clearing paper jams located within the duplex unit.

Overview

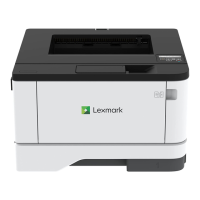
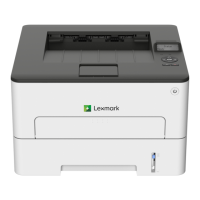
This document provides a comprehensive guide to operating and maintaining a printing device, covering various printing methods, handling confidential jobs, and resolving common issues like paper jams and toner cartridge replacement.

The device's primary function is to print documents from various sources, including computers and mobile devices. It supports several mobile printing solutions, enhancing its versatility and ease of use in modern environments.

Printing from a Computer

For standard printing from a computer, users initiate the print process from their document's print dialog. The device allows for adjustments to settings before printing, ensuring flexibility for different print jobs. It's important to note that for specific media like labels, card stock, and envelopes, users must set the correct paper size and type on the printer itself to ensure proper output and prevent issues.

Printing from Mobile Devices

The device offers multiple options for mobile printing, catering to different operating systems and connectivity preferences:

  • Google Cloud Print: This service enables printing from any Google Cloud Print-ready printer. To use this feature, the printer must be registered to the Google Cloud Print server, and the Cloud Print plugin must be downloaded and enabled on the Android mobile device. Users can open a document from their device or file manager, tap the print icon, select the printer, and then initiate the print job.
  • Mopria Print Service: Designed for Android devices running version 5.0 or later, Mopria Print Service allows direct printing to any Mopria-certified printer. Users need to download and enable the Mopria Print Service application from the Google Play store. The process involves launching a compatible application or selecting a document, tapping the print icon, choosing a printer, adjusting settings if needed, and then printing.
  • AirPrint: This feature provides a mobile printing solution for Apple devices, allowing direct printing to AirPrint-certified printers. For AirPrint to function correctly, both the Apple device and the printer must be connected to the same network and subnet if multiple wireless hubs are present. Users select a document, tap the print icon, choose a printer, adjust settings, and then print.
  • Wi-Fi Direct®: This service enables direct printing to any Wi-Fi Direct-ready printer without needing a router. Users must ensure their mobile device is connected to the printer's wireless network. The process involves launching an application or selecting a document, tapping the print icon (the exact icon may vary by mobile device), selecting the printer, adjusting settings, and then printing.

Printing Confidential and Other Held Jobs

The device supports secure printing for confidential documents and allows users to hold print jobs for later release. This feature is available for both Windows and Macintosh users.

  • For Windows Users: From an open document, users navigate to File > Print, then click Properties, Preferences, Options, or Setup. They select "Print and Hold," assign a user name, and choose the print job type (Confidential, Repeat, Reserve, or Verify). For confidential jobs, a four-digit PIN is required. After clicking OK or Print, the job is sent to the printer. To release the job from the printer's home screen, users navigate to "Held jobs," select their user name, and then choose the job type. For confidential jobs, the PIN must be entered before configuring settings and printing.
  • For Macintosh Users: From an open document, users choose File > Print. If necessary, they click the disclosure triangle for more options. From the print options or Copies & Pages menu, they select "Job Routing" and choose the print job type. For confidential jobs, a user name and a four-digit PIN are assigned. After clicking OK or Print, the job is sent to the printer. To release the job from the printer's home screen, users navigate to "Held jobs," select their user name, and then choose the job type. For confidential jobs, the PIN must be entered before configuring settings and printing.

Maintenance Features

Regular maintenance is crucial for the device's optimal performance, particularly replacing the toner cartridge and clearing paper jams.

Replacing the Toner Cartridge

The process involves several steps to ensure safe and effective replacement:

  1. Open the front door: This provides access to the printer's interior.
  2. Electrostatic Discharge Precaution: Before touching any interior areas, users must touch any exposed metal frame of the printer to prevent damage from electrostatic discharge.
  3. Remove the imaging unit: This component houses the toner cartridge.
  4. Remove the used toner cartridge: Twist the blue latch to release the cartridge from the imaging unit.
  5. Light Exposure Warning: The imaging unit should not be exposed to direct light for more than 10 minutes, as extended exposure can cause print quality problems.
  6. Photoconductor Drum Precaution: Users must avoid touching the photoconductor drum, as doing so can affect the quality of future print jobs.
  7. Unpack the new toner cartridge: Prepare the new cartridge for installation.
  8. Redistribute toner: Shake the new toner cartridge to ensure the toner is evenly distributed.
  9. Insert the new toner cartridge: Place the new cartridge into the imaging unit until it clicks into place.
  10. Insert the imaging unit: Reinstall the imaging unit into the printer.
  11. Close the door: Secure the front door of the printer.

Loading Trays

Proper paper loading is essential to prevent jams and ensure smooth printing:

  1. Remove the tray: Users should not remove the tray while the printer is busy to avoid paper jams.
  2. Adjust guides: Match the guides to the size of the paper being loaded.
  3. Prepare paper: Flex, fan, and align the paper edges before loading.
  4. Load paper stack: Load the paper stack with the printable side facedown, ensuring guides fit snugly.
    • Notes for Letterhead: For one-sided printing, load letterhead facedown with the header toward the front. For two-sided printing, load letterhead faceup with the header toward the back.
    • General Precautions: Do not slide paper into the tray. Ensure the stack height is below the maximum paper fill indicator to avoid jams.

Loading the Multipurpose Feeder

The multipurpose feeder handles various media types:

  1. Open the multipurpose feeder: Access the feeder.
  2. Envelope Precaution: Do not use envelopes with stamps, clasps, snaps, windows, coated linings, or self-stick adhesives, as these can cause damage.
  3. Adjust the guide: Match the guide to the size of the paper being loaded.
  4. Set paper size and type: From the control panel, set the paper size and type to match the loaded paper.
  5. Flex, fan, and align paper edges: Prepare the paper before loading.
  6. Load paper: Load paper with the printable side faceup.
    • Notes for Letterhead: For one-sided printing, load letterhead faceup with the header toward the rear. For two-sided printing, load letterhead facedown with the header toward the front.
    • Envelopes: Load envelopes with the flap facedown on the left side.

Setting the Paper Size and Type

From the control panel, navigate to Settings > Paper > Tray Configuration > Paper Size/Type, and then select the appropriate paper source, size, and type.

Connecting a Mobile Device to the Printer

This feature is model-dependent. Before connecting, ensure Wi-Fi Direct is enabled on the printer (Settings > Network/Ports > Wireless > Enable Wi-Fi Direct > On). Also, view the Wi-Fi Direct SSID from the control panel.

  • Using Wi-Fi Direct: On the mobile device, go to settings, enable Wi-Fi, tap Wi-Fi Direct, select the printer SSID, and confirm the connection on the printer control panel.
  • Using Wi-Fi: On the mobile device, go to settings, tap Wi-Fi, select the printer SSID (which will have "DIRECT-xy" appended), and enter the preshared key (password).

Clearing Jams

Preventing jams is key to smooth operation.

Avoiding Jams

  • Load paper properly: Ensure paper lies flat in the tray. Paper guides should be positioned correctly without pressing tightly against the paper or envelopes. Push the tray firmly into the printer.
  • Use recommended paper: Only use recommended paper or specialty media. Avoid wrinkled, creased, damp, bent, or curled paper.
  • Loading Precautions: Do not load or remove a tray while printing. Do not overload the tray; ensure the stack height is below the maximum fill indicator. Do not slide paper into the tray.
  • Paper Quality: Do not use hand-cut or trimmed paper. Do not mix paper sizes, weights, or types in the same tray.
  • Settings: Ensure paper size and type settings on the computer or printer control panel are correct.
  • Storage: Store paper according to manufacturer recommendations.

Identifying Jam Locations

The device indicates jam locations. When "Jam Assist" is on, the printer flushes blank pages or pages with partial prints after a jam is cleared. When "Jam Recovery" is on or auto, the printer reprints jammed pages.

Paper Jam in the Standard Bin

Remove the jammed paper, ensuring all fragments are removed.

Paper Jam in the Multipurpose Feeder

  1. Remove paper from the multipurpose feeder.
  2. Remove the jammed paper, ensuring all fragments are removed.
  3. Close the multipurpose feeder.
  4. Open the front door.
  5. Electrostatic Discharge Precaution: Touch any exposed metal frame of the printer.
  6. Remove the imaging unit.
  7. Light Exposure Warning: Do not expose the imaging unit to direct light for more than 10 minutes.
  8. Photoconductor Drum Precaution: Do not touch the photoconductor drum.
  9. Remove the jammed paper.
  10. Hot Surface Warning: The inside of the printer might be hot; allow it to cool before touching.
  11. Insert the imaging unit.
  12. Close the door.
  13. Open the multipurpose feeder.
  14. Flex, fan, and align paper edges.
  15. Reload paper.

Paper Jam in Trays

  1. Remove the tray.
  2. Open the front door.
  3. Electrostatic Discharge Precaution: Touch any exposed metal frame of the printer.
  4. Remove the imaging unit.
  5. Light Exposure Warning: Do not expose the imaging unit to direct light for more than 10 minutes.
  6. Photoconductor Drum Precaution: Do not touch the photoconductor drum.
  7. Remove the jammed paper.
  8. Hot Surface Warning: The inside of the printer might be hot; allow it to cool before touching.
  9. Insert the imaging unit.
  10. Close the front door, and then insert the tray.
  11. Open the rear door.
  12. Remove the jammed paper.
  13. Close the rear door.
  14. Remove the optional tray.
  15. Remove the jammed paper.
  16. Insert the tray.

Paper Jam in the Duplex Unit

  1. Open the front door.
  2. Electrostatic Discharge Precaution: Touch any exposed metal frame of the printer.
  3. Remove the imaging unit.
  4. Light Exposure Warning: Do not expose the imaging unit to direct light for more than 10 minutes.
  5. Photoconductor Drum Precaution: Do not touch the photoconductor drum.
  6. Remove the jammed paper.
  7. Hot Surface Warning: The inside of the printer might be hot; allow it to cool before touching.
  8. Insert the imaging unit.
  9. Close the door.
  10. Remove the tray.
  11. Push the duplex unit latch to open the duplex unit.
  12. Remove the jammed paper.
  13. Close the duplex unit.
  14. Insert the tray.
  15. Remove the imaging unit.
  16. Insert the imaging unit.
  17. Close the front door.

This comprehensive guide ensures users can effectively operate, maintain, and troubleshoot their printing device for a seamless printing experience.

Lexmark B3340dw Specifications

General IconGeneral
ColorNo
Duplex printingYes
Print technologyLaser
Duplex printing modeAuto
Time to first page (black, normal)6.2 s
Print speed (black, normal quality, A4/US Letter)40 ppm
Duplex print speed (black, normal quality, A4/US Letter)17 ppm
Package depth420.1 mm
Package width409.9 mm
Package height279.9 mm
Package weight10518 g
Cables includedAC
Included cartridge capacity (black)1500 pages
Operating altitude0 - 2896 m
Operating temperature (T-T)10 - 32 °C
Operating relative humidity (H-H)8 - 80 %
Mac operating systems supportedMac OS X 10.10 Yosemite, Mac OS X 10.11 El Capitan, Mac OS X 10.12 Sierra, Mac OS X 10.13 High Sierra, Mac OS X 10.6 Snow Leopard, Mac OS X 10.7 Lion, Mac OS X 10.8 Mountain Lion, Mac OS X 10.9 Mavericks
Linux operating systems supportedDebian 7.0, Debian 8.0, Fedora 23, Fedora 24, Red Hat Enterprise Linux WS 6.0, Red Hat Enterprise Linux WS 7.0, Ubuntu 16.04, openSUSE 13.2
Other operating systems supportedNovell Distributed Print Services (NDPS), Novell NetWare 5.x, Novell NetWare 6.x, Novell Open Enterprise Server
Server operating systems supportedSUSE Linux Enterprise Server 10, SUSE Linux Enterprise Server 11, Windows Server 2003, Windows Server 2003 x64, Windows Server 2008, Windows Server 2008 R2, Windows Server 2008 x64, Windows Server 2012, Windows Server 2012 R2
Windows operating systems supportedWindows 10, Windows 7, Windows 8, Windows 8 x64, Windows 8.1, Windows 8.1 x64, Windows RT, Windows RT 8.1, Windows Vista, Windows Vista x64
Power consumption (off)0.9 W
Power consumption (ready)5.5 W
Power consumption (standby)0.1 W
Power consumption (printing)550 W
Energy Star Typical Electricity Consumption (TEC)0.45 kWh/week
Sustainability certificatesENERGY STAR
DisplayLCD
CertificationICES-003 Class B, BSMI Class B, US FDA, UL 60950-1, FCC Class B, cUL CAN/CSA-C22.2 60950-1, NOM, CB EN/IEC 60950-1, CB EN/IEC 60825-1, CE DoC (EN 62301 Class B, EN 62311, CE EN/IEC 60950-1, CE EN/IEC 60825-1, EN 61000-3, EN 55022 Class B, EuP, EN 55024, UL), EFTA (CE), KCC, CCC, CECP, CEL, C-tick DoC, UL-AR, KC mark, UL GS mark, EC 1275, MET-I, ISO 532B, ECMA-370, TED, GOST-R, SII, TER, DE-UZ 205
Product colorBlack, White
Display diagonal2 \
Market positioningBusiness
Sound power level (standby)14 dB
Sound pressure level (printing)53 dB
Sound pressure level (duplex printing)50 dB
Cabling technology10/100Base-T(X)
Security algorithms802.1x RADIUS, LEAP, MD5, MSCHAPv2, PEAP, SNMPv3, TLS, TTLS
Ethernet LAN data rates10, 100, 1000 Mbit/s
Mobile printing technologiesApple AirPrint
Total input capacity350 sheets
Total output capacity150 sheets
Maximum input capacity900 sheets
Total number of input trays2
Multi-Purpose tray input capacity100 sheets
Printing colorsBlack
Maximum duty cycle5000 pages per month
Recommended duty cycle500 - 5000 pages per month
Number of print cartridges1
Page description languagesPCL 5c, PCL 5e, PCL 6, PDF 1.7, PPDS, PostScript 3
Envelopes sizes7 3/4, 9, 10, B5, C5, DL
Paper tray media typesCard stock, Envelopes, Labels, Plain paper
ISO A-series sizes (A0...A9)A4, A5, A6
JIS B-series sizes (B0...B9)B5
Maximum ISO A-series paper sizeA4
Direct printing-
Weight and Dimensions IconWeight and Dimensions
Depth363.2 mm
Width368.3 mm
Height220.9 mm

Related product manuals