Step 12
Slide the doctor bar down toward the
developer roller opening and remove the
bar.
(See Photo 13)
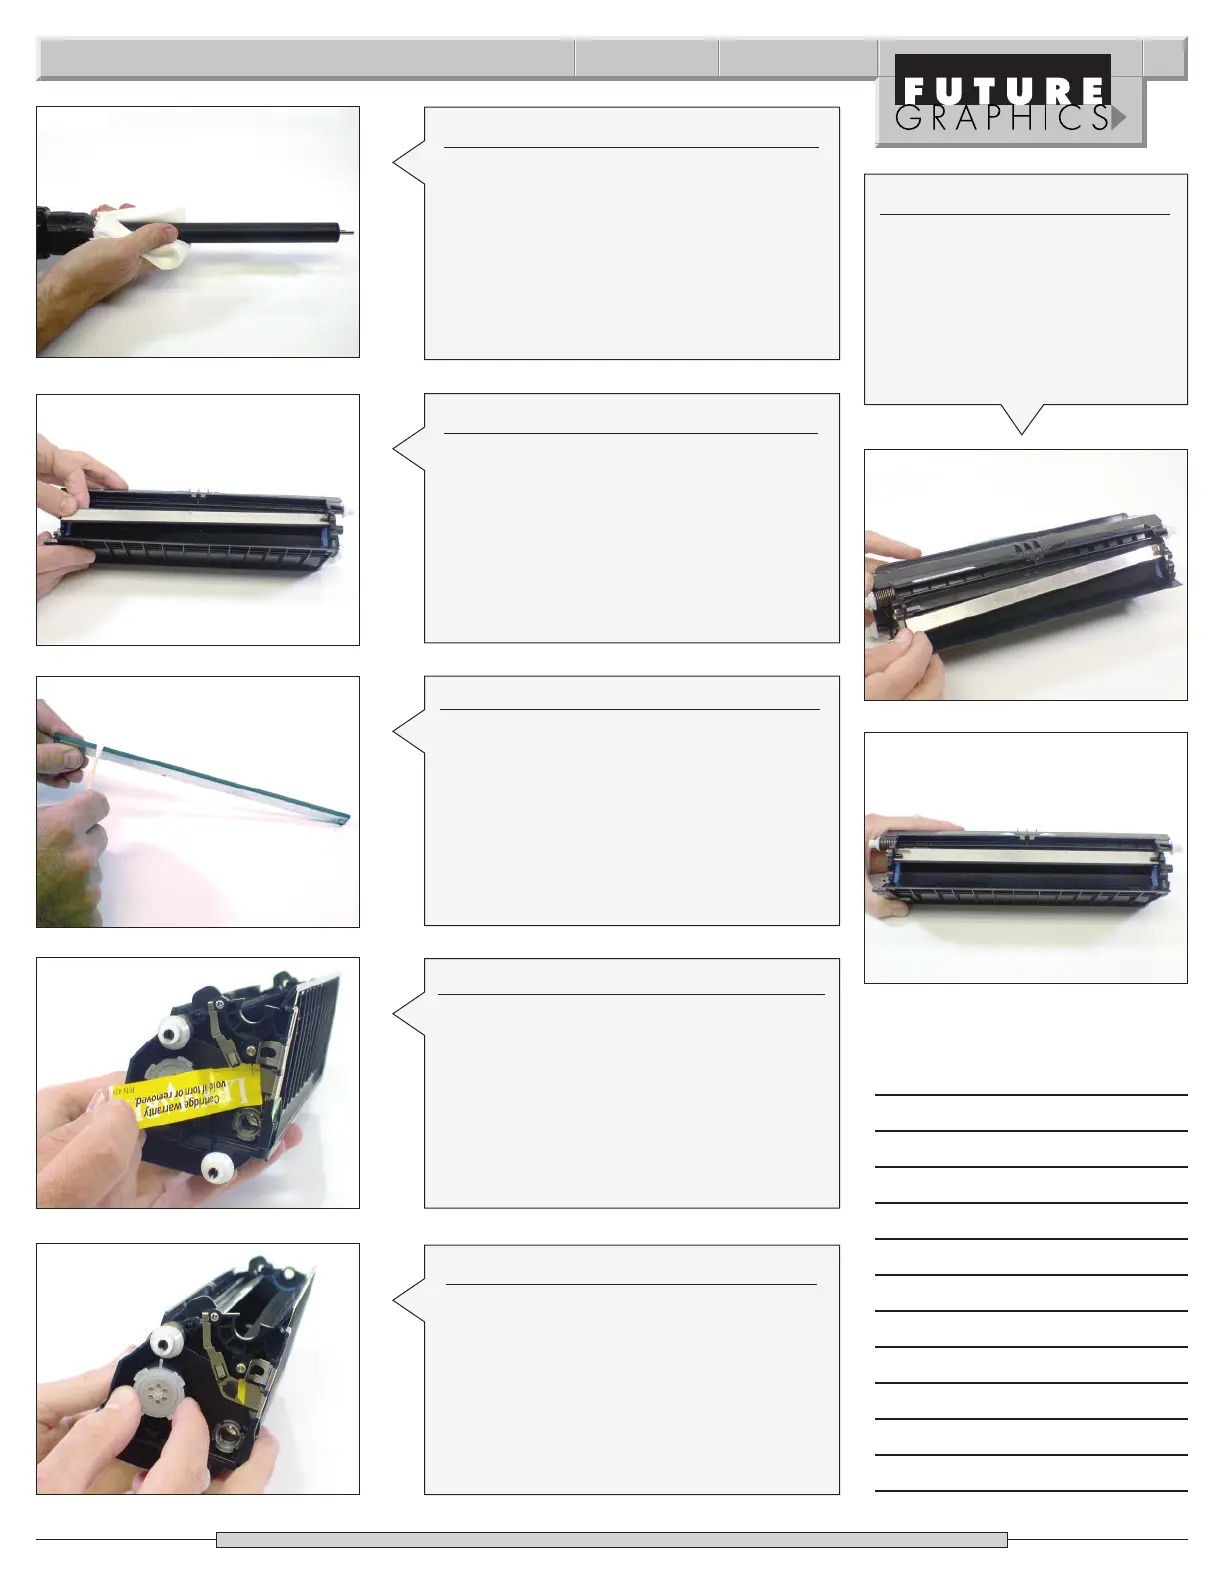
Photo 12
Photo 13
Lexmark E232/330/332 Technical Instructions 3
Step 11
To clean the developer roller, take a lint-
free cloth, add a small amount of alcohol
and soak the cloth in distilled water. Place
t
he developer roller axle into a drill. Clean
the developer roller using the lint-free
c
loth while the roller is rotating in the
drill.
(See Photo 12)
Photo 14
Step 13
Remove the toner from the doctor
bar using compressed air or a vacuum.
Clean the contact edge of the bar using a
cotton swab and Acetone.
(See Photo 14)
Step 14
Remove the cartridge warranty sticker
fr
om the side of the c
artridge.
(See Photo 15)
St
ep 15
Remove the toner hopper fill cap from
the end of the cartridge. (See Photo 16)
Carefully clean the hopper using dry
compressed air or a vacuum. Do not
damage the developer roller sealing
blade that sits under the developer roller.
Photo 15
Photo 16
Photo 17
Photo 18
Step 16
I
nstall the doctor bar so the bar
sits over the doctor bar sealing
b
lade attached to the toner
hopper, (See Photo 17) and
under the positioning posts on
both side of the hopper.
(See Photo 18)
Notes