J
James MillerSep 3, 2025
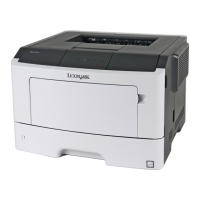
How to clear bin full message on Lexmark MS317 Printer?
- SSteven WebbSep 3, 2025
To resolve the 'Bin full' error on your Lexmark Printer, remove the paper stack from the standard bin.
How to clear bin full message on Lexmark MS317 Printer?
To resolve the 'Bin full' error on your Lexmark Printer, remove the paper stack from the standard bin.
How to remove paper from standard output bin on Lexmark Printer?
To resolve the 'Remove paper from standard output bin' message on your Lexmark Printer, remove the paper stack from the standard bin.
What to do if Lexmark MS317 cannot collate large document?
To resolve the 'Cannot collate large document' error on your Lexmark Printer, you can press on the printer control panel to print the portion of the job already stored and begin collating the rest of the print job. Alternatively, you can cancel the current print job.
How to fix cannot defrag flash memory on Lexmark MS317?
To resolve the 'Cannot defrag flash memory' error on your Lexmark Printer, you can press on the printer control panel to stop the defragmentation and continue printing. You can also delete fonts, macros, and other data in the printer memory by navigating to Settings > Print Settings > Utilities Menu > Format Flash > Yes on the printer control panel. Alternatively, install additional printer memory.
How to resolve change [paper source] to [custom string] load [orientation] on Lexmark Printer?
To resolve the 'Change [paper source] to [custom string] load [orientation]' error on your Lexmark Printer, load the correct size and type of paper in the tray or feeder, specify the paper size and type in the Paper menu on the control panel, and then press . Alternatively, select Ignore to use the available paper size and type in the tray or feeder, or cancel the print job.
What to do if Lexmark MS317 says defective flash memory?
To resolve the 'Defective flash memory' error on your Lexmark Printer, replace the defective flash memory card. You can also press on the printer control panel to ignore the message and continue printing, or cancel the current print job.
How to fix flash memory unformatted on Lexmark Printer?
To resolve the 'Flash memory unformatted' error on your Lexmark Printer, you can press on the printer control panel to stop the defragmentation and continue printing. You can also format the flash memory device.
How to fix memory low, no resource save on Lexmark MS317?
To resolve the 'Memory low, no Resource Save' error on your Lexmark Printer, you can press on the printer control panel to disable Resource Save, clear the message, and continue printing. You can also install additional printer memory.
How to enable rear USB port on Lexmark MS317 Printer?
To resolve the 'Rear USB port disabled' message on your Lexmark Printer, you can press on the printer control panel to clear the message and continue printing. You can also set USB Buffer to Auto from the printer control panel.
Defines symbols and terms used in safety warnings to enhance understanding.
Instructions for installing internal hardware components like memory or cards.
Instructions for installing and configuring the necessary software for printer operation.
Detailed steps to obtain and install the printer software on your computer.
Information and procedures for connecting the printer to a network.
Steps to prepare for setting up the printer connection using an Ethernet network.
Information needed and steps to prepare for wireless network setup.
Explanation of the printer's control panel buttons and their functions.
Details the functions and operations of the printer's control panel interface.
Basic instructions for printing documents from your computer.
Steps to send a print job from a computer application to the printer.
Methods for canceling active print jobs from the printer or computer.
Steps to cancel a print job directly using the printer's control panel interface.
Procedure to set a PIN for restricting access to the printer's control panel menus.
Tips and procedures designed to prevent paper jams from occurring.
Instructions for loading paper correctly to ensure smooth feeding and prevent jams.
Helps users locate where paper jams might occur within the printer.
Step-by-step guide to clear paper jams accessible from the front door.
Instructions to clear paper jams accessible from the rear door of the printer.
Steps to clear paper jams from the printer's standard paper bin.
Procedure to clear paper jams located within the duplex printing unit.
Instructions to clear paper jams from any of the printer's paper trays.
Steps to clear paper jams from the multipurpose feeder.
Explains common printer error messages and provides troubleshooting steps.
Specific error messages and their corresponding troubleshooting procedures.
A guide to diagnosing and resolving common printer operational issues.
Initial troubleshooting steps for fundamental printer operational issues.
Steps to diagnose and fix issues when the printer does not power on or respond.
Troubleshooting steps when the printer's display screen is not showing any information.
Troubleshooting issues related to paper trays not feeding or being recognized.
Specific troubleshooting steps for paper feeding issues on these models.
Steps to resolve issues when print jobs are sent but do not print.
Resolving issues where incorrect characters appear in the printed output.
Troubleshooting common printing issues specific to these models.
Addressing print jobs that take an excessive amount of time to complete.
Troubleshooting common printing issues specific to these models.
Comprehensive guide to diagnosing and fixing various print quality issues.
Troubleshooting when parts of pages or images are cut off in the printout.
Diagnosing and fixing faint duplicate images appearing on printed pages.
Troubleshooting unwanted gray shading appearing on printed pages.
Resolving issues with incorrect or inconsistent margins on printed pages.
Troubleshooting paper curling issues that affect printing.
Diagnosing and fixing minor imperfections in the print output quality.
Troubleshooting recurring patterns of defects on printed pages.
Troubleshooting when the printed output appears too dark or dense.
Troubleshooting when the printed output appears too light or faint.
Diagnosing and fixing issues where the printer outputs blank pages.
Troubleshooting when printed pages are misaligned or skewed.
Diagnosing and fixing issues where the printer outputs solid black pages.
Diagnosing and fixing vertical streaks appearing on printed output.
Diagnosing and fixing horizontal blank areas or voids in print output.
Diagnosing and fixing vertical blank areas or voids in print output.
Troubleshooting small specks or dots appearing on printed pages.
Diagnosing and fixing faint background shading or fogging on prints.
Diagnosing and fixing variations in print density across the printed page.
Troubleshooting steps when the printer's web interface cannot be accessed.
Information on how to contact Lexmark support for technical assistance.
The full text of the limited warranty statement applicable to Lexmark printers.
Outlines the terms, conditions, and duration of the product's limited warranty.
Details on limitations and exclusions to the product's warranty coverage.
Legal statement defining Lexmark's liability for damages related to product use.
| Print Technology | Monochrome Laser |
|---|---|
| Print Speed | Up to 35 ppm |
| Print Resolution | 1200 x 1200 dpi |
| Monthly Duty Cycle | Up to 50, 000 pages |
| Standard Connectivity | USB 2.0, Ethernet |
| Standard Memory | 128 MB |
| Processor | 800 MHz |
| Duplex Printing | Manual |
| Input Capacity | 250 sheets |
| Output Capacity | Up to 150 sheets |
| First Page Out Time | 6.5 seconds |
| Network Connectivity | Ethernet |
| Operating System Compatibility | Windows, Linux, Mac |