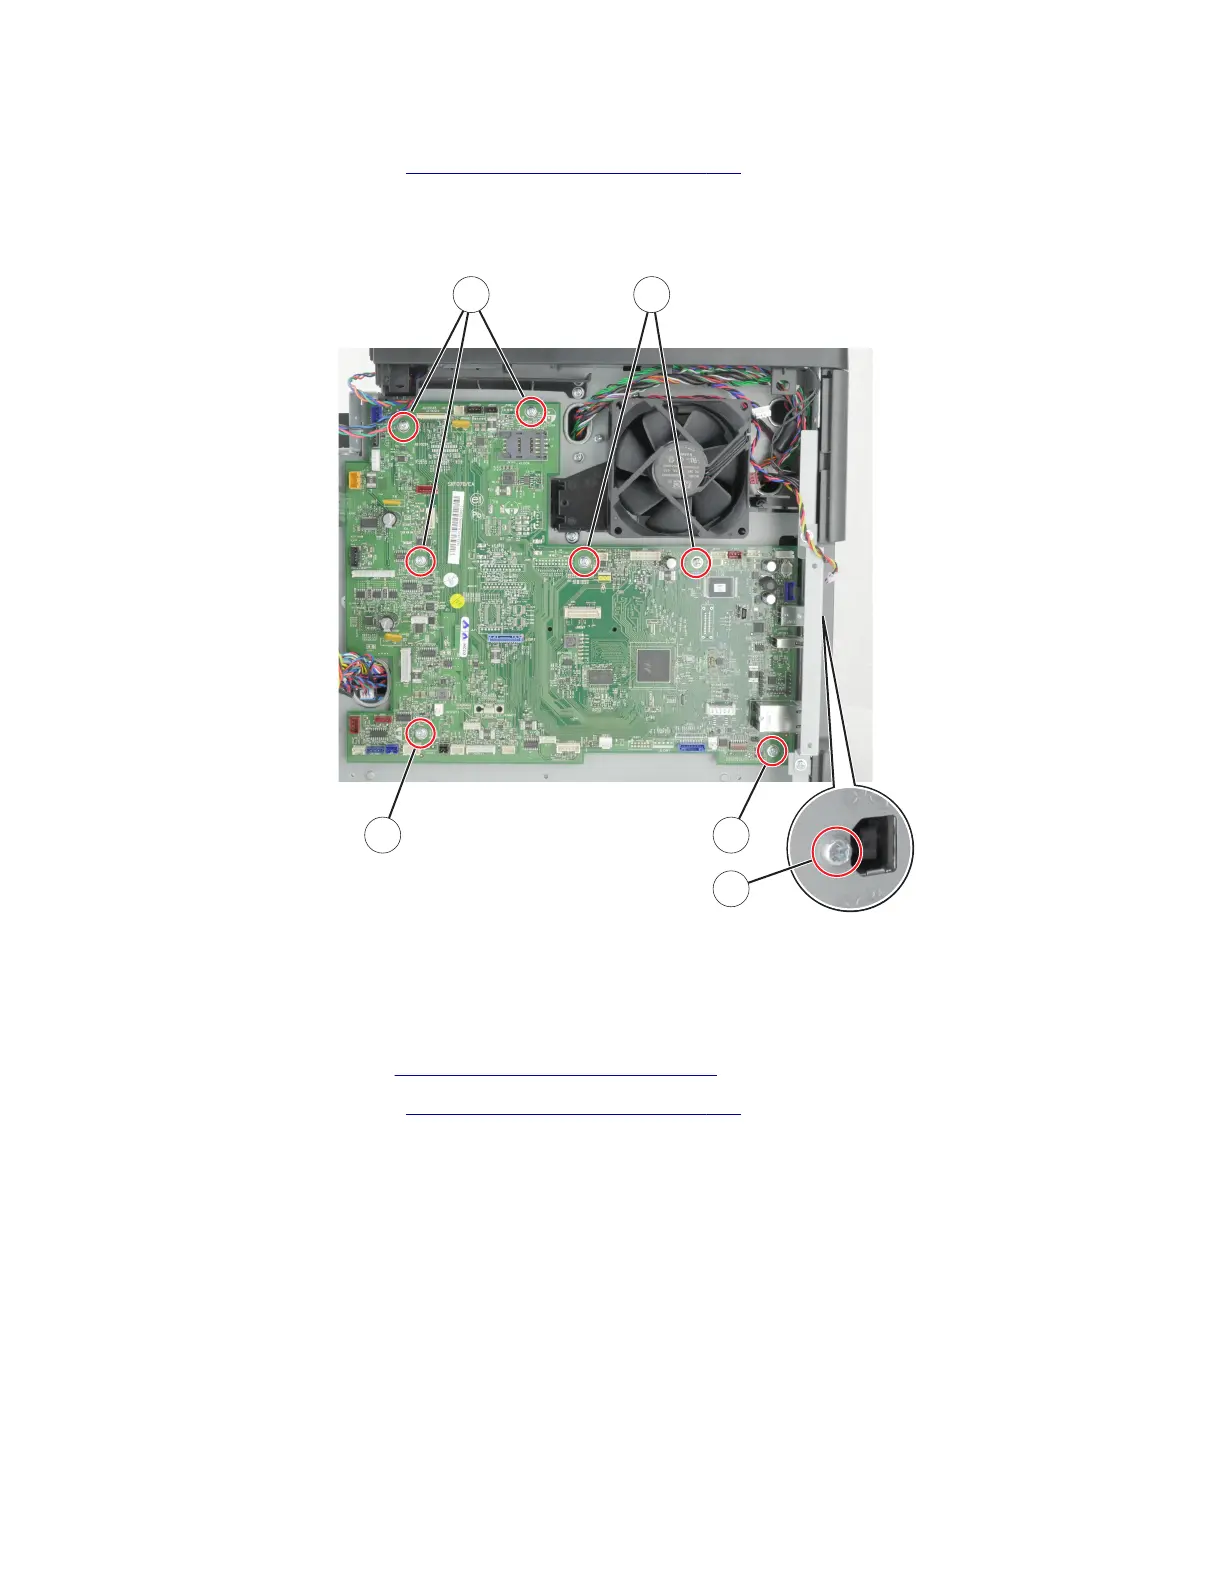
MS622 controller board
1 Remove the right cover. See “Right cover removal” on page 186.
2 Disconnect all the cables.
3 Remove the seven screws (A) and the screw (B) from the rear of the printer.
A
B
AA
A
4 Remove the controller board.
Toner cartridge smart chip contact removal
1 Remove the top cover. See “Top cover removal” on page 238.
2 Remove the right cover. See “Right cover removal” on page 186.
3 Disconnect the cable JBARR1 from the controller board.
4600-830, -835, -895
Parts removal
195