Installation
54 GA02411_002_C0 - 10/2016 - © Leybold
3.8 Connecting the Electro-pneumatic Gas Ballast Valve
(only for certain pump versions, see Section 1.4)
Connect the valve as shown in the Figs. below. The valve is normally closed.
3.8.1 Retrofitting the Manual Gas Ballast with a 24 V DC Valve
(for variants delivered with manual gas ballast only,
see Fig. on the next page)
When loosening and tightening the union nuts, always use a second span-
ner above the union nut for holding back. No torque may be applied to the
non-return valve. The non-return valve has been glued in ensuring a tight
seal.
Unscrew the union nuts (30 mm spanner) and remove the manual gas ballast
actuator.
Reassemble the entire unit with the solenoid actuator.
NOTICE
Fig. 3.10 Electrical connection at the solenoid valve
with Varistor
Power consumption when switching
on amounts to 80 W.
Fig. 3.11 Fitting the connector Bürkert 8376 for the gas ballast valve
• Take the contact insert out of the cap
• Run the cable through the union nut
• Cable connection - see wiring diagram
• Press the contact insert into the cap again
• Screw the union nut home
• Push the flat gasket onto the connector pins
• Insert the connector socket up to the stop
• Secure with cylinder head screw M 3 x 30
Flat gasket
Contact insert
Cylinder head screw M 3 x 30
Cap
Compression ring
Sealing ring
Collet
Union nut
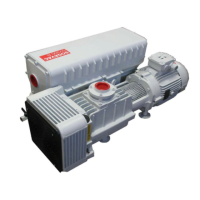
Fig. 3.9 Gas ballast valve
Solenoid valve
Voltage Cont. current
24 Volt / AC/DC max. 6 A
 Loading...