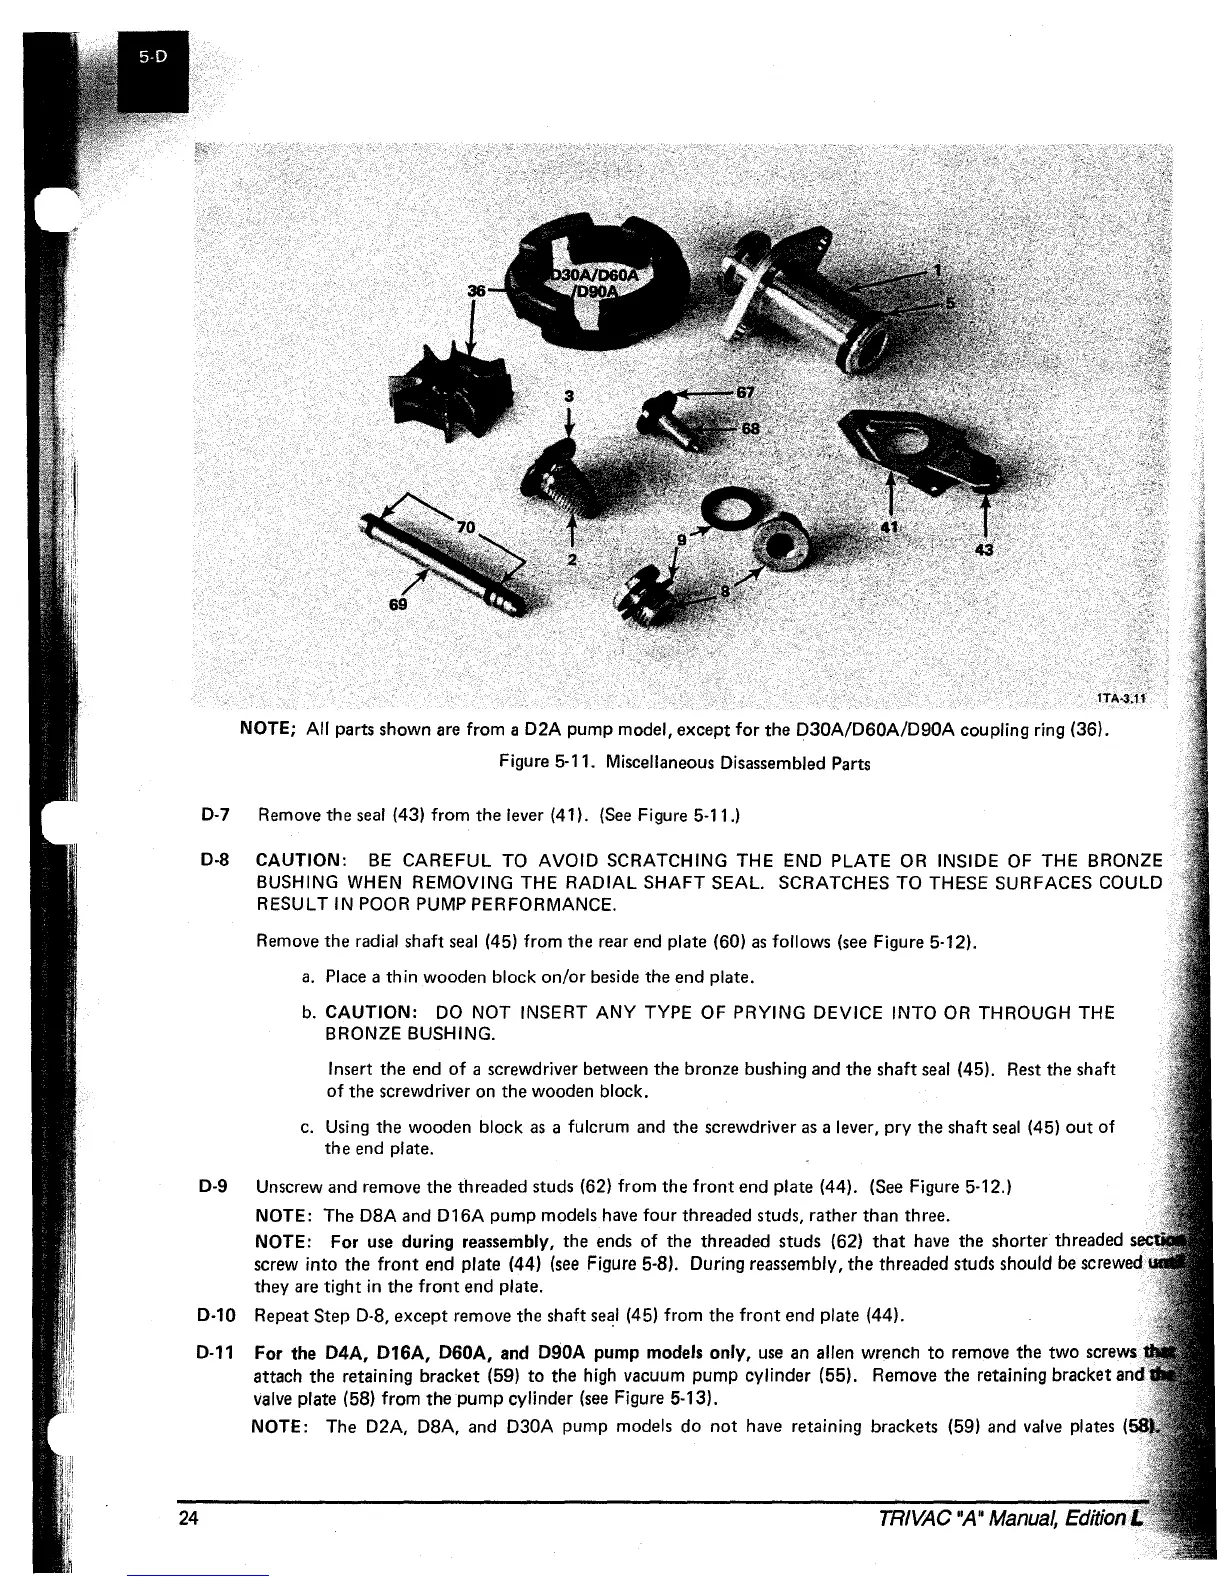
NOTE;
A"
parts shown are from a D2A
pump
model,
except
for
the
D30A/D60A/D90A
coupling ring (36).
Figure
5·11. Miscellaneous Disassembled Parts
0·7
Remove
the
seal (43) from
the
lever (41). (See Figure 5·11.)
CAUTION:
BE
CAREFUL TO AVOID SCRATCHING THE END PLATE OR INSIDE OF THE BRONZE
BUSHING
WHEN REMOVING THE RADIAL SHAFT SEAL. SCRATCHES
TO
THESE SURFACES COULD
RESULT
IN
POOR PUMP PERFORMANCE.
Remove
the
radial shaft seal (45) from
the
rear end plate (60) as follows (see Figure 5·12).
a.
Place a thin wooden block
on/or
beside
the
end
plate.
b. CAUTION:
DO
NOT INSERT ANY TYPE
OF
PRYING DEVICE INTO OR THROUGH THE
BRONZE BUSHING.
Insert
the
end
of
a screwdriver between
the
bronze bushing and
the
shaft
seal (45). Rest
the
shaft
of
the
screwdriver on
the
wooden block.
c. Using
the
wooden block
as
a fulcrum and
the
screwdriver as a lever,
pry
the
shaft seal (45)
out
of
the
end plate.
Unscrew and remove
the
threaded studs (62) from
the
front
end
plate (44). (See Figure 5·12.)
NOTE: The D8A and 0 16A
pump
models have four threaded studs, rather
than
three.
NOTE:
For
use during reassembly,
the
ends
of
the
threaded
studs
(62)
that
have
the
shorter
threaded
screw
into
the
front
end
plate (44) (see Figure 5·8). During reassembly,
the
threaded studs should be screwed
they
are
tight
in
the
front
end
plate.
Repeat
Step
0·8,
except
remove
the
shaft (45) from
the
front
end
plate (44).
For
the
D4A,
OlGA,
D60A, and D90A
pump
models
only,
use an allen wrench
to
remove
the
two
screws
attach
the
retaining bracket (59)
to
the
high vacuum
pump
cylinder (55). Remove
the
retaining bracket
valve plate (58) from
the
pump
cylinder (see Figure 5·13).
NOTE: The D2A, D8A, and D30A
pump
models
do
not
have retaining brackets (59) and valve plates
TRIVAC
"A"
Manual,
Edition
 Loading...