5-E-1
Special Requirements for extreme-Corrosive Service
Pumps
WARNING: STEPS 1 THROUGH 4 BELOW MUST BE FOLLOWED FOR EXTREME-CORROSIVE
SERVICE PUMPS.
1. NOTE: New vanes (49/53) and a new oil filter (35) are required for extreme-corrosive service pumps;
therefore, it is not necessary to do
Step E-8c.
REQUIRED ACTION: Refer
to
Steps
E-'
through E-8b(2)
to
clean and inspect all metal parts.
2. Degrease all tools that will be used for handling degreased extreme-corrosive service pump parts.
Ensure that the working surface is free of any hydrocarbon substance.
3.
Degrease and rinse all metal pump parts
in
a nonhydrocarbon solvent.
4. Wet all seals and all internal pump parts with the recommended
perfluoropolyether
pump fluid.
5-E-2 Instructions
for
Cleaning
and
Inspecting
All
Pump Models
Give
particular attention to cleaning the following
areas.
28
E-l.
Inspect all a-ring
grooves
for burrs
and
dirt.
Sand
and/or
clean
as
necessary.
E-2.
CAUTION:
FAILURE
TO REMOVE BURRS
AND
SCRATCHES FROM THE SHAFT COULD
RESULT IN DAMAGE TO THE
RADIAL
SHAFT SEALS (45).
Inspect the coupling key (38)
and
the shaft
for
burrs
or
scratches.
Sand
smooth,
if
necessary
(see
Figure 5-4).
E-3.
Ensure
that all
dirt
accumulation
is
cleaned
from all
passages,
including the following:
a.
The hole
on
the bottom
edge
of
the
front
end
plate (44) - this hole extends
all
the way
to
the bronze bushing.
b. The
small
hole in or just
above
the rear-end-plate (60)
and
front-end·plate (44) bronze
bushing
(see
Figures
5-6
and
5-8).
c.
The oil nozzle (56) hole in the
second
stage
pump cylinder (46) - remove the oil nozzle
screw
and
clean the
screw
and
the hole
(see
Figure 5·14); then screw the oil nozzle (56)
into its hole in the cylinder (46).
NOTE: The D30A, D60A, and D90A
pump
models have
two
oil nozzles that must be
cleaned.
d.
For
D30A, D60A, and D90A
pump
models only, clean
the
brass
air
nozzle screw (66)
located inside
of
the intake tube portion
of
the high vacuum
pump
cylinder
(55).
e. The tiny Silencing hole
in
the side of the gas ballast valve (17) stem just
below
the bolting flange - use fine wire to clear any dirt from the hole;
DO
NOT
ENLARGE THE HOLE.
E-4.
Using a brush, thoroughly
clean
the center bearing (52).
(See
Figure 5-9.)
E-5.
Clean
all
dirt
accumulation or buildup from the three
vane
slots in
each
rotor (48/54).
(See
Figure 5-9.)
E-6.
Visually inspect the air inlet tube (69)
to
ensure
that
it
is
clear
of
debris
(see
Figure 5-11).
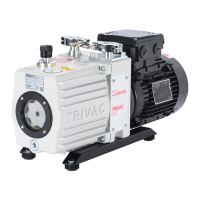
TRIVAC
"A
II
Manual, Edition L
 Loading...