0·15
CONTINUED
If necessary
for
cleaning, remove
and
disassemble
the
oil level glass assembly (15) as follows:
a. Use
one
of
the
following
three
methods
to
remove
the
oil level glass assembly
from
the
coupl
ing
housing (11).
Method
(1) - Unscrew
the
assembly using
an
adjustable
spanner
which
has
the
correct
pin loca-
tions
to
match
the
two
holes
in
the
assembly.
or
Method
(2) - Place
the
nose
ends
of
a large pair
of
snap
ring pliers
into
the
two
holes in
the
assem-
bly
(15);
insert a
screwdriver
or
small bar
between
the
nose
ends
of
the
snap
ring pliers; use
the
screwdriver
or
bar
to
force
the
pliers
and
the
assembly
to
turn
counterclockwise;
unscrew
the
assembly
from
the
coupling
hOUsing (see Figure 5-16).
or
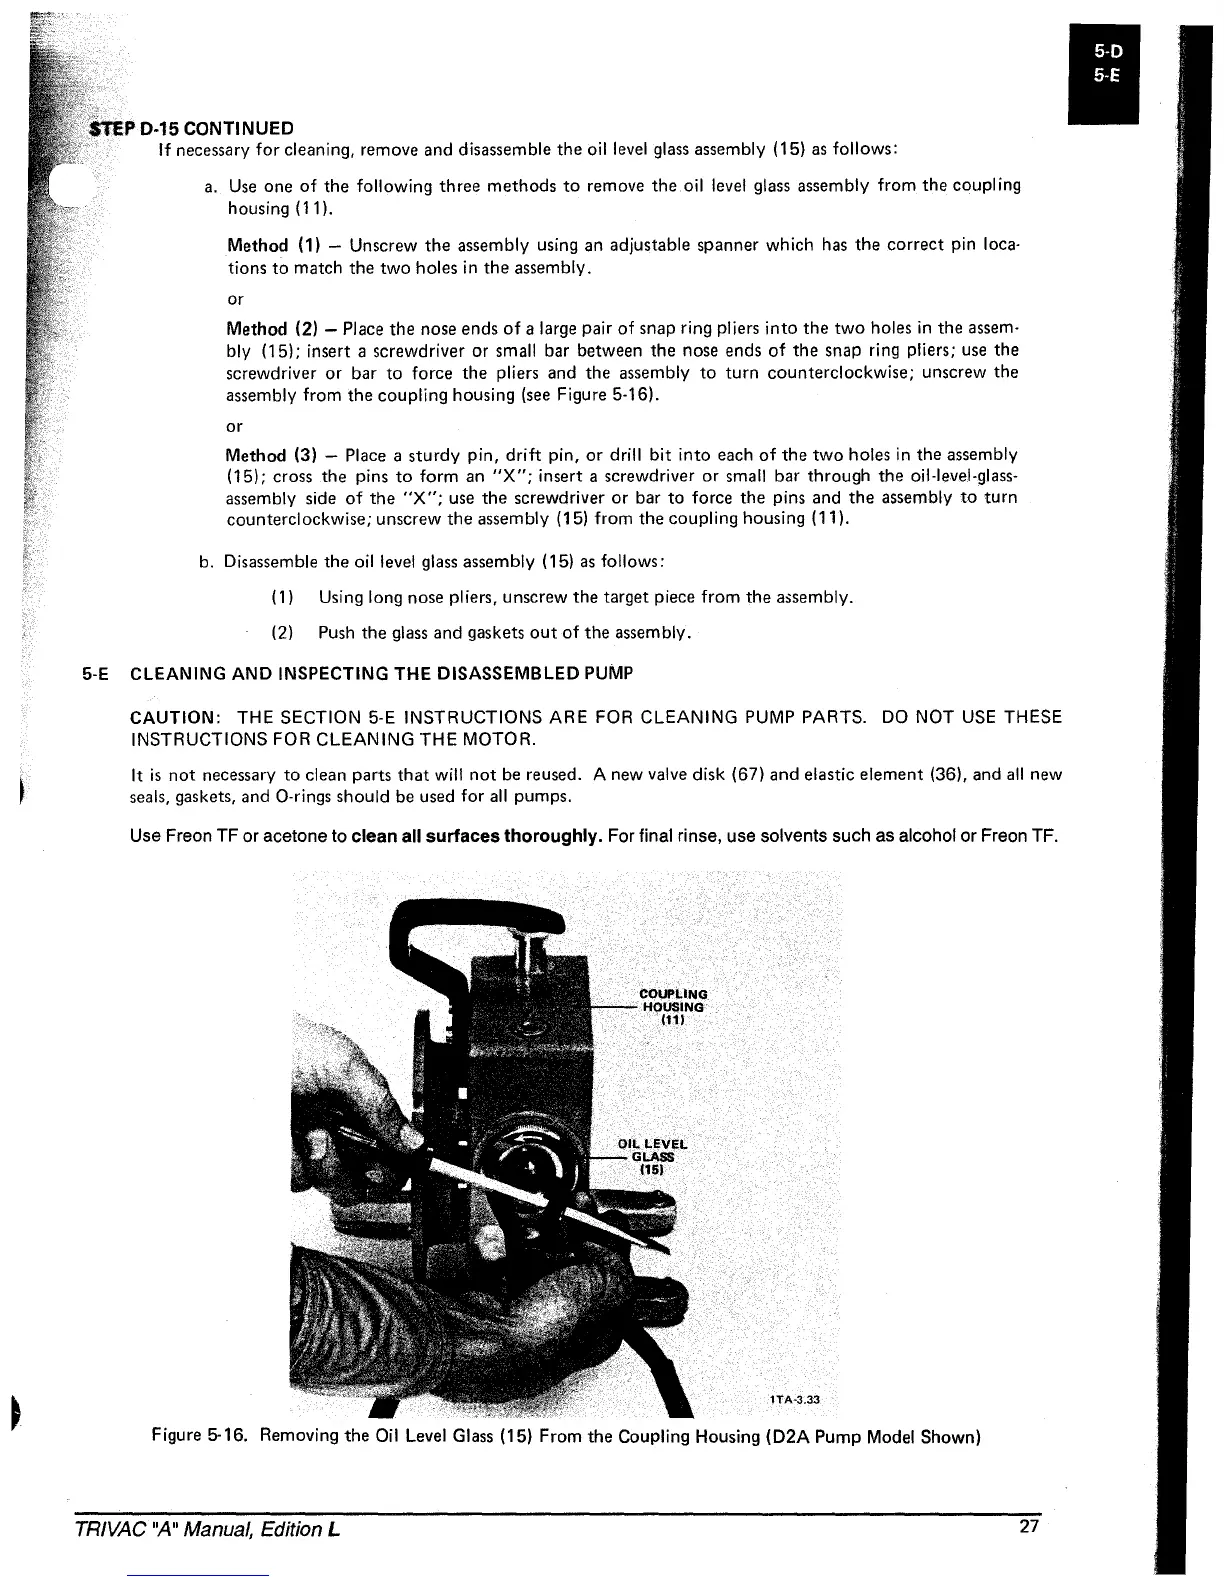
Method
(3) - Place a
sturdy
pin,
drift
pin,
or
drill
bit
into
each
of
the
two
holes in
the
assembly
(15);
cross
the
pins
to
form
an
"X";
insert
a screwdriver
or
small
bar
through
the
oil-Ievel-glass-
assembly side
of
the
"X";
use
the
screwdriver
or
bar
to
force
the
pins
and
the
assembly
to
turn
counterclockwise;
unscrew
the
assembly (15)
from
the
coupling
housing
(11).
b. Disassemble
the
oil level glass assembly (15) as follows:
(1) Using long
nose
pliers,
unscrew
the
target
piece
from
the
assembly.
(2) Push
the
glass
and
gaskets
out
of
the
assembly.
5-E
CLEANING
AND
INSPECTING
THE
DISASSEMBLED PUMP
CAUTION:
THE
SECTION
5-E
INSTRUCTIONS
ARE
FOR
CLEANING
PUMP
PARTS.
DO NOT USE THESE
INSTRUCTIONS
FOR
CLEANING
THE
MOTOR.
It
is
not
necessary
to
clean
parts
that
will
not
be reused. A new valve disk (67)
and
elastic
element
(36),
and
all
new
seals, gaskets,
and
O-rings
should
be
used
for
all
pumps.
Use
Freon
TF
or
acetone
to
clean all surfaces thoroughly. For final
rinse,
use
solvents
such
as
alcohol
or
Freon
TF.
lTA-3.33
Figure 5-16. Removing
the
Oil Level Glass (15)
From
the
Coupling Housing
(D2A
Pump
Model
Shown)
TRIVAC "A" Manual, Edition L
27
 Loading...