This document is an owner's manual for an LG IPS LED Monitor, specifically covering models 29UM68 and 34UM68. The manual provides comprehensive instructions for assembling, setting up, operating, and troubleshooting the monitor, ensuring users can maximize its features and maintain its performance.
Function Description
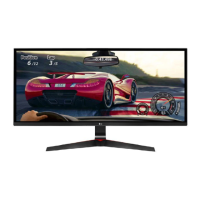
The LG IPS LED Monitor serves as a display unit for personal computers (PCs) and various AV devices. It utilizes In-Plane Switching (IPS) technology, which is known for providing wide viewing angles and accurate color reproduction, making it suitable for tasks requiring precise color, such as graphic design, photo editing, and video production, as well as for general computing and entertainment. The "LED Monitor" designation clarifies that it is an LCD monitor with LED backlighting, which typically offers better contrast, brightness, and energy efficiency compared to traditional CCFL backlighting.
The monitor supports multiple input sources, including HDMI and DisplayPort, allowing for versatile connectivity with different devices. It is designed to transmit both digital video and audio signals, providing a complete multimedia experience. For audio output, the monitor includes a headphone port, enabling users to connect external headphones for private listening.
A key feature of this monitor is its intuitive control system, primarily managed through a joystick button located at the bottom of the monitor. This single button simplifies navigation through the On-Screen Display (OSD) menu, allowing users to adjust various settings with ease. The power indicator, integrated with the joystick button, provides visual feedback on the monitor's power status.
Usage Features
The LG IPS LED Monitor offers a range of features designed to enhance the user experience, from ergonomic adjustments to advanced display settings.
Assembly and Setup:
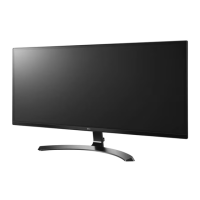
The manual details a straightforward assembly process for the stand, which includes a stand base, stand body, and cable holder. Users are instructed to place the screen face down on a soft cloth to prevent scratches during assembly. The stand allows for height adjustment (up to 120.0 mm for the 34UM68 model) and angle adjustment (20° forwards and -5° backwards), enabling users to find a comfortable viewing position. The cable holder helps organize cables, contributing to a tidy workspace. For wall mounting, the monitor supports VESA standard wall mount plates, with specific instructions and screw requirements provided for secure installation.
Connectivity:
The monitor provides multiple input connectors: two HDMI IN ports and one DisplayPort IN. This allows simultaneous connection of a PC and various AV devices like gaming consoles, Blu-ray players, or set-top boxes. The manual emphasizes the use of certified HDMI cables to prevent compatibility issues, screen display problems, or connection errors. For DisplayPort connections, it notes that video or audio output may vary depending on the PC's DP version. The headphone port allows for direct audio output from the monitor, with a recommendation to use straight earphones to avoid interference with other external devices.
On-Screen Display (OSD) Menu and Settings:
The joystick button is central to controlling the monitor's functions. A single press activates the main menu, while moving the joystick up/down or left/right navigates through options and adjusts settings. Holding the joystick button turns the monitor off. The OSD menu is divided into several categories:
- Quick Settings: This section provides quick access to frequently used adjustments such as Brightness, Contrast, Volume, Input selection, and Ratio. The Ratio setting allows users to choose between Wide, Original, Cinema 1, Cinema 2, and 1:1 aspect ratios, catering to different content types and preferences.
- PBP (Picture-by-Picture): This feature allows the monitor to display content from two different input sources simultaneously on one screen. Users can select inputs for the main and sub-screens, adjust sound output, swap screen positions, and modify the aspect ratio for each displayed picture.
- Picture: This comprehensive section offers various picture modes (Custom, Reader, Photo, Cinema, Color Weakness, FPS Game 1, FPS Game 2, RTS Game, Custom (Game)) optimized for different viewing scenarios. Users can fine-tune settings like Sharpness, Black Level, DFC (Dynamic Contrast), Response Time, FreeSync, Black Stabilizer, Gamma, and Color Temp (Warm, Medium, Cool, Red, Green, Blue). The Six Color option allows for precise adjustment of hue and saturation for red, green, blue, cyan, magenta, and yellow.
- Sound: This menu includes MaxxAudio® technology, which enhances sound quality with features like Bass Enhancement (MaxxBass), Treble Enhancement (MaxxTreble), Dialog Enhancement (MaxxDialog), and 3D sound effect (Maxx3D). Users can enable or disable MaxxAudio and customize its settings or use the Midnight Mode for rich sound at low volumes.
- General: This section covers general monitor settings such as Language, SMART ENERGY SAVING (High, Low, Off), Power LED (On/Off), Automatic Standby (Off, 4H, 6H, 8H), Buzzer (On/Off), and OSD Lock (On/Off).
- Reset: This option allows users to return all monitor settings to their default factory values.
Gaming Features:
The monitor includes specific features tailored for gaming, such as FPS Game 1, FPS Game 2, and RTS Game picture modes, which optimize display settings for different game genres. The Black Stabilizer feature enhances visibility in dark game scenes, allowing players to spot enemies more easily. FreeSync technology, when used with a compatible graphics card, synchronizes the monitor's refresh rate with the GPU's frame rate, eliminating screen tearing and stuttering for a smoother gaming experience.
Energy Saving:
The SMART ENERGY SAVING feature helps reduce power consumption by adjusting the monitor's luminance. The Automatic Standby function can be configured to turn off the monitor after a set period of inactivity, further contributing to energy efficiency.
Maintenance Features
The manual provides essential guidelines for maintaining the monitor's safety, performance, and longevity.
Handling and Moving:
Users are advised to handle the monitor carefully, especially when moving or lifting it. It is recommended to keep the original packaging for safe transportation. Before moving, all power cords and cables should be disconnected. The monitor should be held firmly by its top and bottom frame, avoiding direct contact with the panel itself to prevent damage. When adjusting the screen's angle or height, users are cautioned against touching the screen area or placing fingers between the screen and the base to prevent injury or damage.
Cleaning:
Although not explicitly detailed in a dedicated "cleaning" section, the manual implies careful handling to prevent scratches, such as using a soft cloth when placing the screen face down during assembly. This suggests that gentle cleaning methods should be used for the screen and exterior.
Troubleshooting:
A comprehensive troubleshooting section helps users diagnose and resolve common issues. It addresses problems such as:
- No display: Checks for power cord connection, power LED status, input selection, and computer power.
- "OUT OF RANGE" message: Indicates that the input signal's frequency is outside the monitor's supported range, guiding users to adjust PC graphics settings.
- "No Signal" message: Suggests checking the signal cable connection between the PC and monitor.
- OSD lock: Provides instructions to unlock the OSD menu if functions are unavailable.
- Image sticking: Recommends using a screensaver to prevent permanent image retention from prolonged display of still images.
- Unstable/shaky display or shadow trails: Advises checking the selected resolution and changing it to the recommended 1080P if using interlaced HDMI signals.
- Abnormal display color: Guides users to set color depth to 24-bit or higher, check signal cable connections, and notes that minor pixel defects are normal for LCD screens.
- "Unrecognized monitor" message: Instructs users to install the display driver from the provided CD or LG's website and verify that the video card supports Plug&Play.
- No sound from headphone port/speaker: Recommends increasing monitor volume and setting the monitor as the default audio output device on the PC.
Product Warranty and Components:
The manual stresses the importance of using genuine LG components to ensure safety and product performance, stating that damage from counterfeit components will not be covered by the warranty. It also advises that using generic, uncertified cables may lead to display issues or image noise. For optional accessories, users are directed to electronics stores or online retailers.
By following the instructions and recommendations in this manual, users can effectively set up, operate, and maintain their LG IPS LED Monitor, ensuring a reliable and high-quality display experience.