Installation
Hydro Kit
Installation Manual 19
ENGLISH
- For space heating / cooling, ‘Dip switch #2’ should be set correctly.
- For sensing air temperature at specific area, remote temperature sensor(PQRSTA0) or wired
remote controller could be choose, depending on the ‘Dip switch #3’ setting.
*please refer the “System Set-Up, Dip Switch Setting”
- Wi-Fi module(PWFMDD200/105 cm) connected to ‘CN-WF’ on Hydro kit PCB. To increase the
length between Wi-Fi modem and Hydro Kit, please purchase USB Extension Cable(PWYREW000,
10 m)
- In case of floor cooling, please make sure to set cooling cut off temperature for preventing
condensation on the floor
- For 2 way valve control, please refer the “Accessories Installation, 2 Way valve”
- Balancing valve with flow meter is recommended to ensure 100 % of the nominal flow.
If the water flow rate is too low or High, PHEX could be frozen and burst or capacity could be
reduced.
1)
Cooling operation is only available for Medium temperature Hydro Kit.
Mode Condition 2-way valve
Cooling
FCU – ‘Not use’ Open
FCU – ‘Use’ Close
Heating None No control
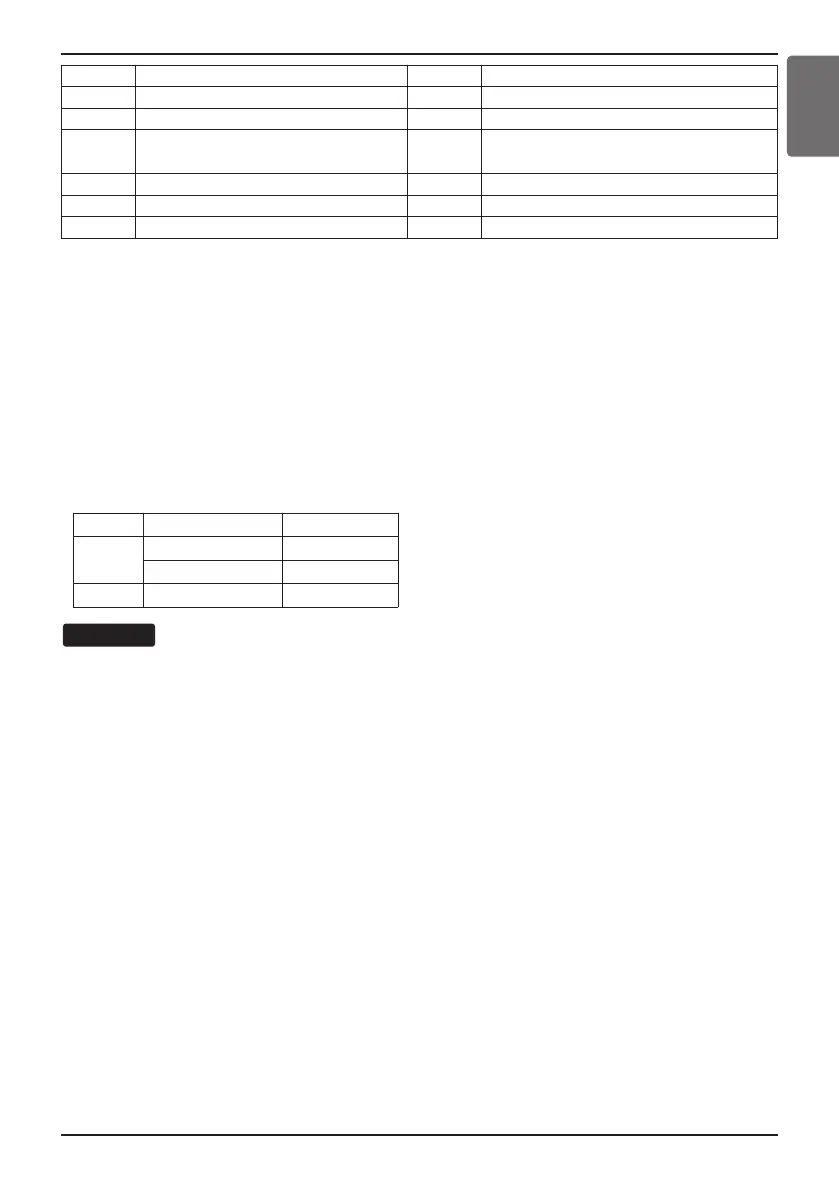
1 Shut-Off valve 8 Balancing valve with flow meter
2 Expansion tank 9 Automatic air separator
3 Service port(Drain valve) 10 Pressure safety relief valve
4
Magnetic filter (Mandatory with
Corrosive material of pipe)
11 Pressure meter
5 Water Pump 12 Check valve
6 Strainer 13 Buffer Tank
7 Flow switch (included in product) 14 Water Tank temperature Sensor (12 m)





 To Next Page