20
ENGLISH
Without Cool/Heat Selector Installation and Connection
In case, try to set mode without Cool/Heat Selector and try to use
other switch except from LG Outdoor Cool/Heat Selector in field.
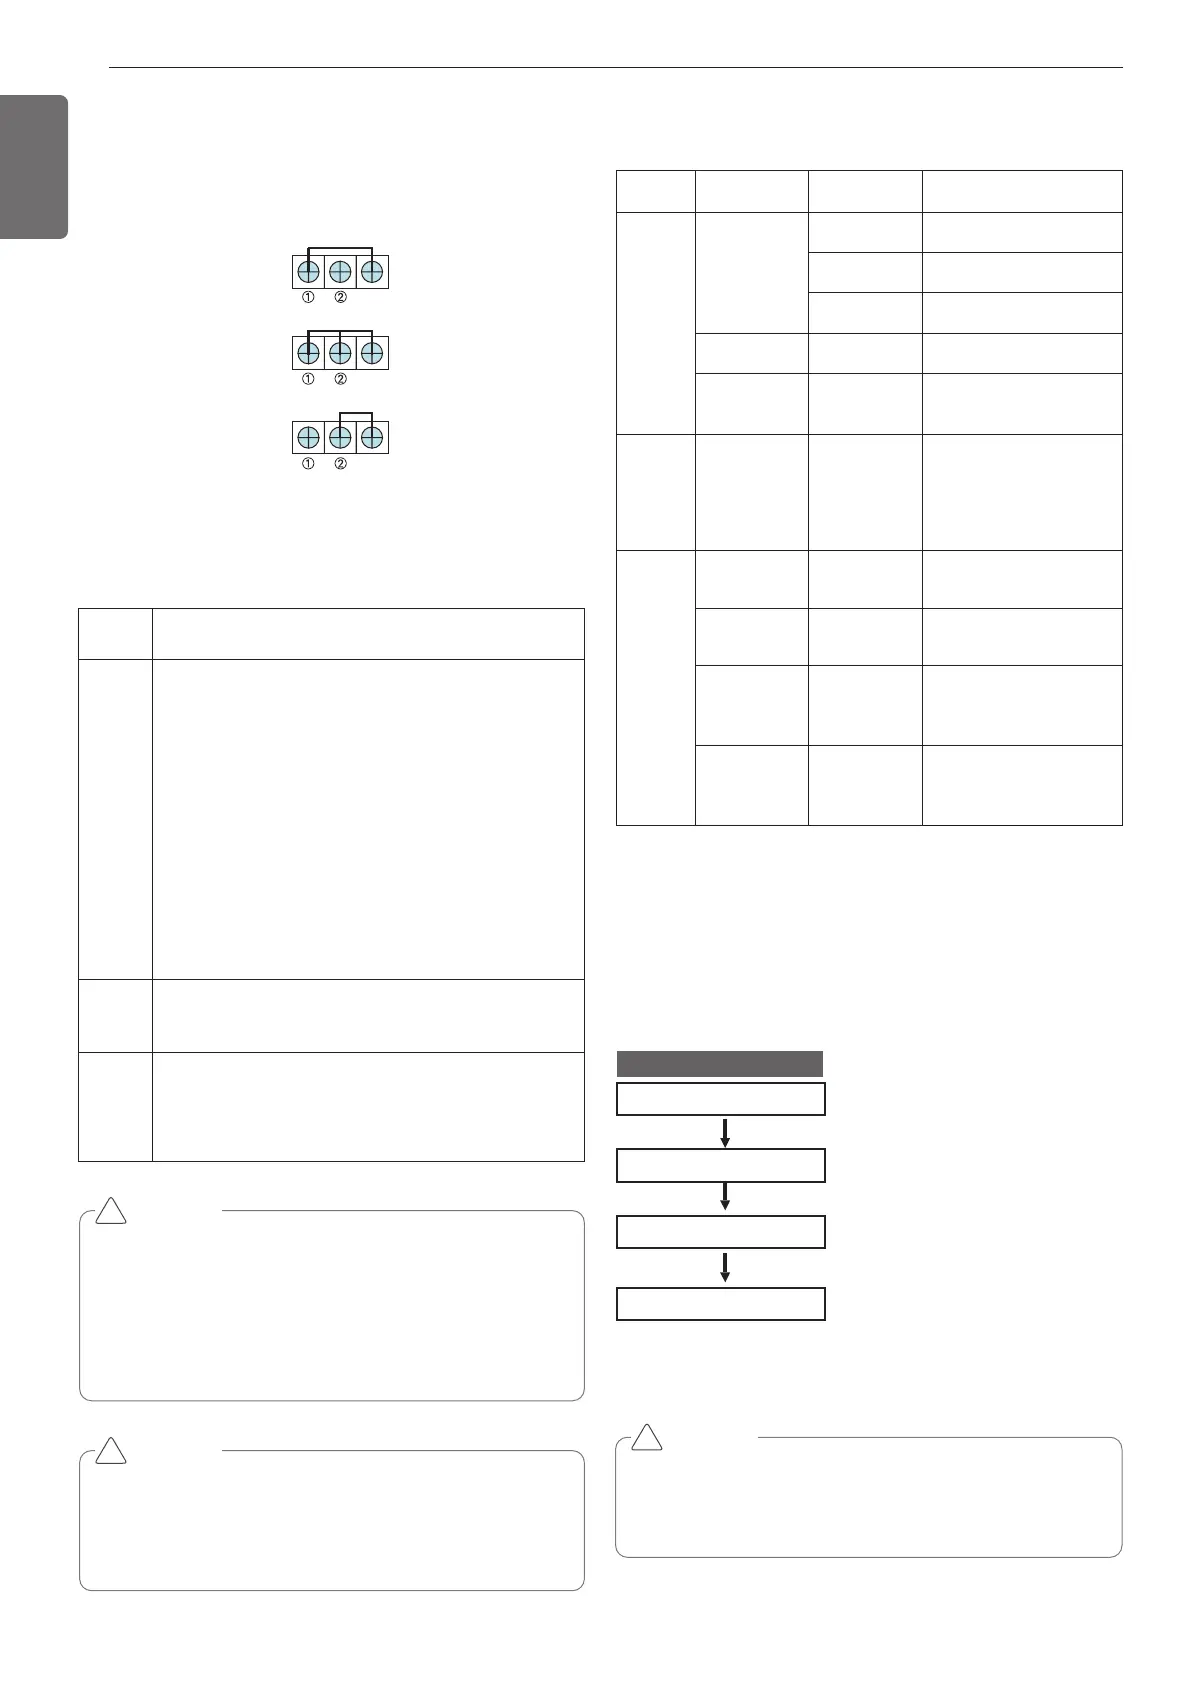
Connect signal terminal block as below figure and description.
- How to set mode without Cool/Heat Selector
• Cooling Mode Setting
① ‘ GND Connection
② ‘ Off (Open)
• Heating Mode Setting
① ‘ GND Connection
② ‘ GND Connection
• Fan Mode Setting
① ‘ Off (Open)
② ‘ GND Connection
When system fault occurs, the error code is displayed at indoor unit
display or remote control display, the trouble shooting guide is in the
service manual
CAUTION
When cutting main power of the Multi V
• Always apply main power of the outdoor unit during use of product
(cooling season/heating season).
• Always apply power 6 hours in advance to heat the crank case
heater where performing test run after installation of product. It
may result in burning out of the compressor if not preheating the
crank case with the electrical heater for more than 6 hours. (In case
of the outdoor temperatue below 10 °C (50 °F))
!
CAUTION
• Request installer to set the function during installation.
• In case the function is not used, set the dip S/W OFF and reset the
power.
• If ODU RPM changes, cooling capacity may go down.
!
CAUTION
Preheat of compressor
• Start preheat operation for 3 hours after supplying main power.
• In case that the outdoor temperature is low, be sure to supply
power 6 hours before operation so that the heater is heated(in-
sufficient heating may cause damage of the compressor.)
!
Night Low Noise
ARUN series
In cooling mode, this function makes the ODU fan operate at low RPM
to reduce the fan noise of ODU at night which has low cooling load.
1
Check to see whether there is any refrigerant leakage, and
slack of power or communication cable.
2
Confirm that 500 V megger shows 2 MΩ or more between
power supply terminal block and ground. Do not operate in
the case of 2 MΩ or less.
NOTE: Never carry out megaohm check over terminal con-
trol board. Otherwise the control board would be
broken.
Immediately after mounting the unit or after leaving
it turned off for an extended length of time, the re-
sistance of the insulation between the power sup-
ply terminal board and the ground may decrease to
approx. 2 MΩ as a result of refrigerant accumulating
in the internal compressor.
If the insulation resistance is less than 2 MΩ, turn-
ing on the main power supply and energizing the
crankcase heater for more than 6 hours will cause
the refrigerant to evaporate, increasing the insula-
tion resistance.
3
Check if high/low pressure common pipe, liquid pipe and
gas pipe valves are fully opened.
NOTE: Be sure to tighten caps.
4
Check if there are any problems in automatic addressing or
not:
Check and confirm that there are no error messages in the
display of indoor units or remote controls and LED in out-
door units.
Compo-
nent
Phenomenon Cause
Check method and Trouble
shooting
Compres-
sor
Not operating
Motor insula-
tion broken
Check resistance between
terminals and chassis
Strainer
clogged
Change strainer
Oil leakage
Check oil amount after
opening oil port
Stop during
running
Motor insula-
tion failure
Check resistance between
terminals and chassis
Abnormal
noise
during running
R-S-T miscon-
nection
Check compressor R-S-T
connection
Outdoor
fan
High pressure
error at cooling
Motor failure,
bad ventilation
around outdoor
heat exchanger
Check the outdoor fan oper-
ation after being turned the
outdoor units off for some
time.
Remove obstacles around
the outdoor units
Outdoor
EEV
Heating failure,
frequent de-
frosting
Bad connector
contact
Check connector
No operating
sound at apply-
ing power
Coil failure
Check resistance between
terminals
Heating failure,
frozen outdoor
heat exchanger
part
EEV clogged Service necessary
Low pressure
error or dis-
charge temper-
ature error
EEV clogged Service necessary
Setting the Fan Max. RPM
Max. RPM setting method
 Loading...