31
Installation Manual
Due to our policy of continuous product innovation, some specifications may change without notification.
©LG Electronics U.S.A., Inc., Englewood Cliffs, NJ. All rights reserved. “LG” is a registered trademark of LG Corp.
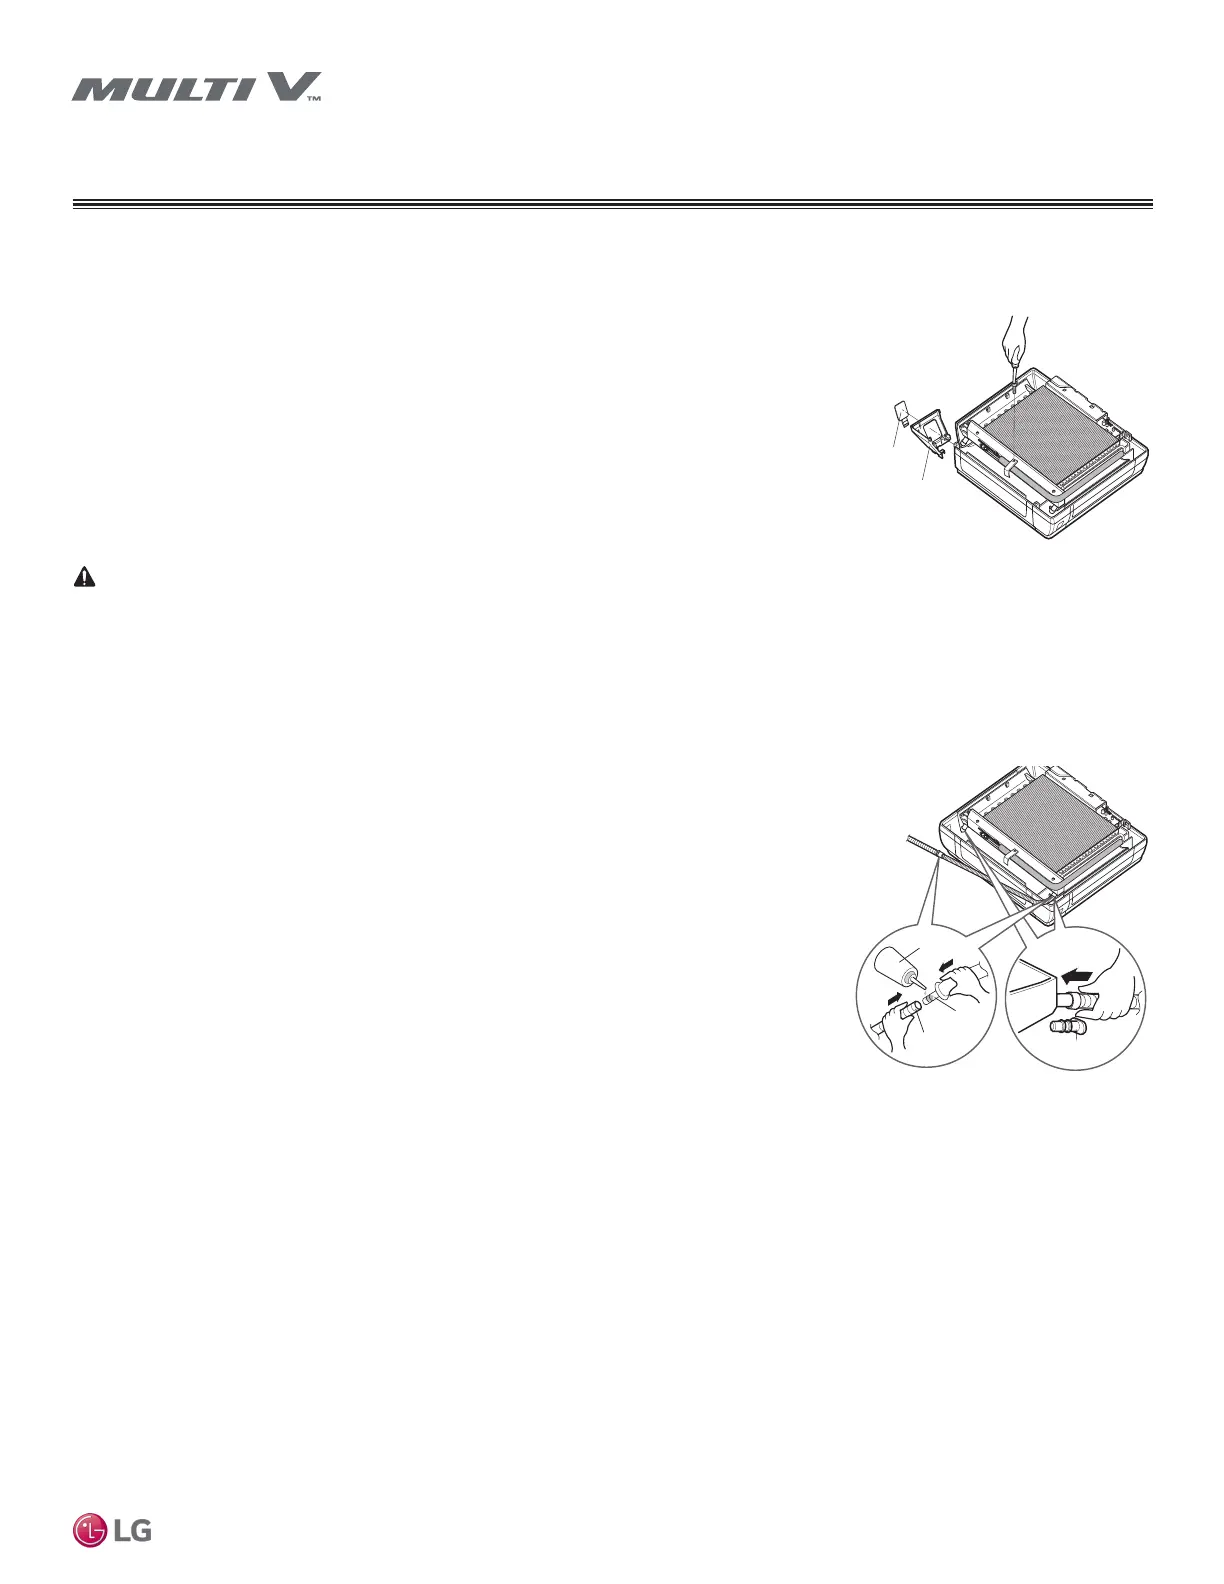
Removing Side Bottom Covers and Piping Knockout from the Gallery Indoor Unit
Before mounting the indoor unit, either the right or left bottom side covers and the piping
hole knockout need to be removed to pass the drain hose and piping through. This proce-
dure must be done after removing the indoor unit front metal panel.
1. Using a Phillips head screwdriver, remove the center bottom screw from the L-bracket
tube holder.
2. Detach one of the side covers (either right or left depending on how the piping and drain
hose need to be routed).
3. Knockout the piping hole from the detached side cover.
Figure 15: Removing Covers and Knockout Hole.
After knocking out the hole from the side cover, be sure to smooth or cut any burrs around the hole. Burrs can lead to physical cuts and scrapes.
Note:
• If the application calls for creating a piping hole directly through the rear wall, the knockout the piping hole from the side cover might not be
necessary.
• It is recommended that the picture and front metal panels not be re-attached to the indoor
unit until the final test has been run which will ensure that all electrical and piping connec-
tions are working properly.
Preparing the Drain Hose Connection
1. To prepare indoor unit for the drain hose, remove the rubber plug at the desired direction
(left or right at bottom of the unit). Ensure that the drain hose is routed to the closest pipe
hole under the unit.
2. Insert the drain hose into the opening / handle of the drain pan, and then attach the drain
hose and connecting hose using recommended adhesive. This step can be done once the
indoor unit is mounted to the wall if necessary.
Only the
desired direction
Rubber Cap
Connection
Adhesive
Drain
Hose
Insert in the
Chosen Side
Figure 16: Connecting the Drain Hose.
Preparing for Installation — Gallery Indoor Units, continued.
GENERAL INSTALLATION GUIDELINES
Gallery Indoor Units
SF Frame
 Loading...