47
Installation Manual
Due to our policy of continuous product innovation, some specifications may change without notification.
©LG Electronics U.S.A., Inc., Englewood Cliffs, NJ. All rights reserved. “LG” is a registered trademark of LG Corp.
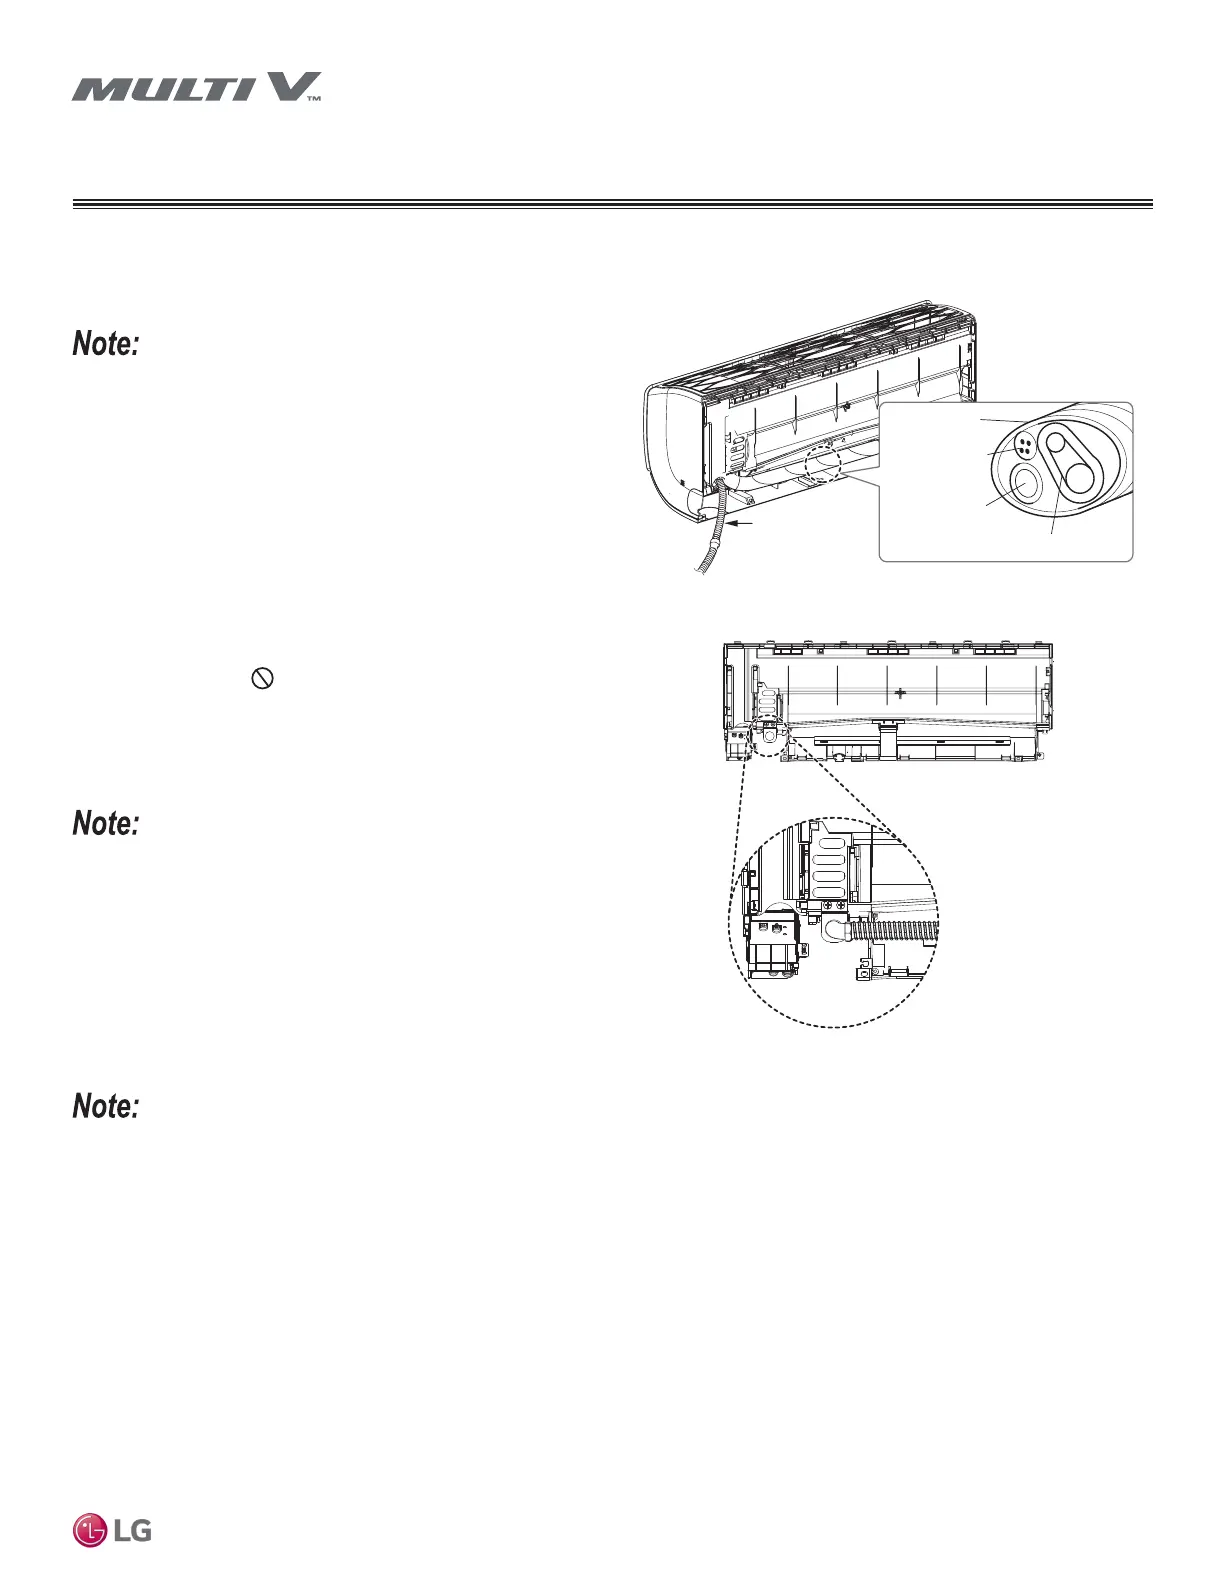
Piping Installation When Piping is on
the Left Side
• See the Electrical System Installation section for information on
how to connect the communication / connection (power) cable from
the outdoor unit.
• For left-side piping, it is recommended that the communication /
power connections are complete before starting the piping connec-
tions.
1. Insert drain hose on left (feature may differ depending on model
of indoor unit).
2. Align the center of the refrigerant piping and corresponding con-
nection as shown on the next page.
3. Place a couple of drops of refrigerant oil on outside of the flare
before assembling. Do not add any contaminants. Tighten
the flare nut initially by hand.
4. Finish tightening the flare nut with a torque wrench until the
wrench clicks. Follow torque guidelines in the table on the next
page.
When tightening the are nut with a torque wrench, ensure the direction
for tightening follows the arrow on the wrench.
5. Bundle the refrigerant piping, drain hose, and communication /
connection (power) cable together. Ensure that the drain hose is
located at the bottom of the bundle.
• If using a conduit for the power wiring / communications cable,
see the next page.
Positioning the drain hose at the top of the bundle can cause conden-
sate to overow from the drain pan in the inside of the indoor unit.
Left Side Piping
Drain Hose
Piping
Connection
Cable
Tape
Drain Hose
Figure 54: Piping Installation When Piping is on the Left Side.
Wall Mounted Indoor Units
SJ/SK Frame
PIPING INSTALL
 Loading...