ADJUST THE FEET
1. Inspect the treadmill to see if it is level and sturdy. Each of
the four feet and the two wheels should touch the floor.
NOTE: Make sure that the two wheels are both placed in
the same position. See ADJUSTING THE INCLINE on
page 19 for instructions on how to change wheel height.
2. If needed, adjust the height of any feet that are not
touching the floor by twisting them counterclockwise.
2
CONNECT TO POWER
1. Plug the female end of the power cord into the power jack
on the front of the treadmill next to the Power switch.
2. Plug the male end of the power cord into a grounded,
dedicated outlet.
3
SET UP THE REMOTE
1. Remove the small plastic tab
from the battery compartment by
pulling on it.
2. The first time you use the remote
or after replacing the battery,
the remote must be paired with
the OmniFit Trimotion. After the
power has been switched on,
press and hold the Start button
on the remote for seven seconds.
You will hear a series of beeps
indicating the pairing is complete.
NOTE: If you do not hear the beeps, turn off the power and repeat the
step above.
3. Hold the remote or strap it to your wrist like a watch, making sure to
fasten it tightly.
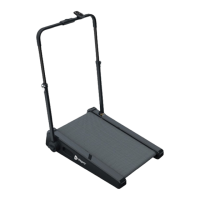
SET UP THE OMNIFIT TRIMOTION AS A WALKING PAD
The OmniFit Trimotion is almost ready to use as a walking pad. Just follow
these last few steps.
WARNING: When used as a walking pad with no safety key, you must
not exceed a speed of 3.5 miles per hour.
10 OmniFit Trimotion User Manual Lifepro Endurance Training Collection 11
 Loading...