Netlink Installation and Operation Manual
10 11
Installation and Operation
Section 2 – Initial Configuration
Before connecting the NetLink to a network for the first time, the board must be configured using a laptop.
i Unless otherwise specified, all screens shown are of the NL4 GUI. NL2 and NLX screens are similar, with changes as noted in the text.
i If using DHCP, a Network Scan Tool used for finding LSP devices is available at http://www.lifesafetypower.com/support/software-
firmware-downloads.
2.1 Preparing to configure the Netlink board
In order to perform the initial configuration of the Netlink, you will need the following:
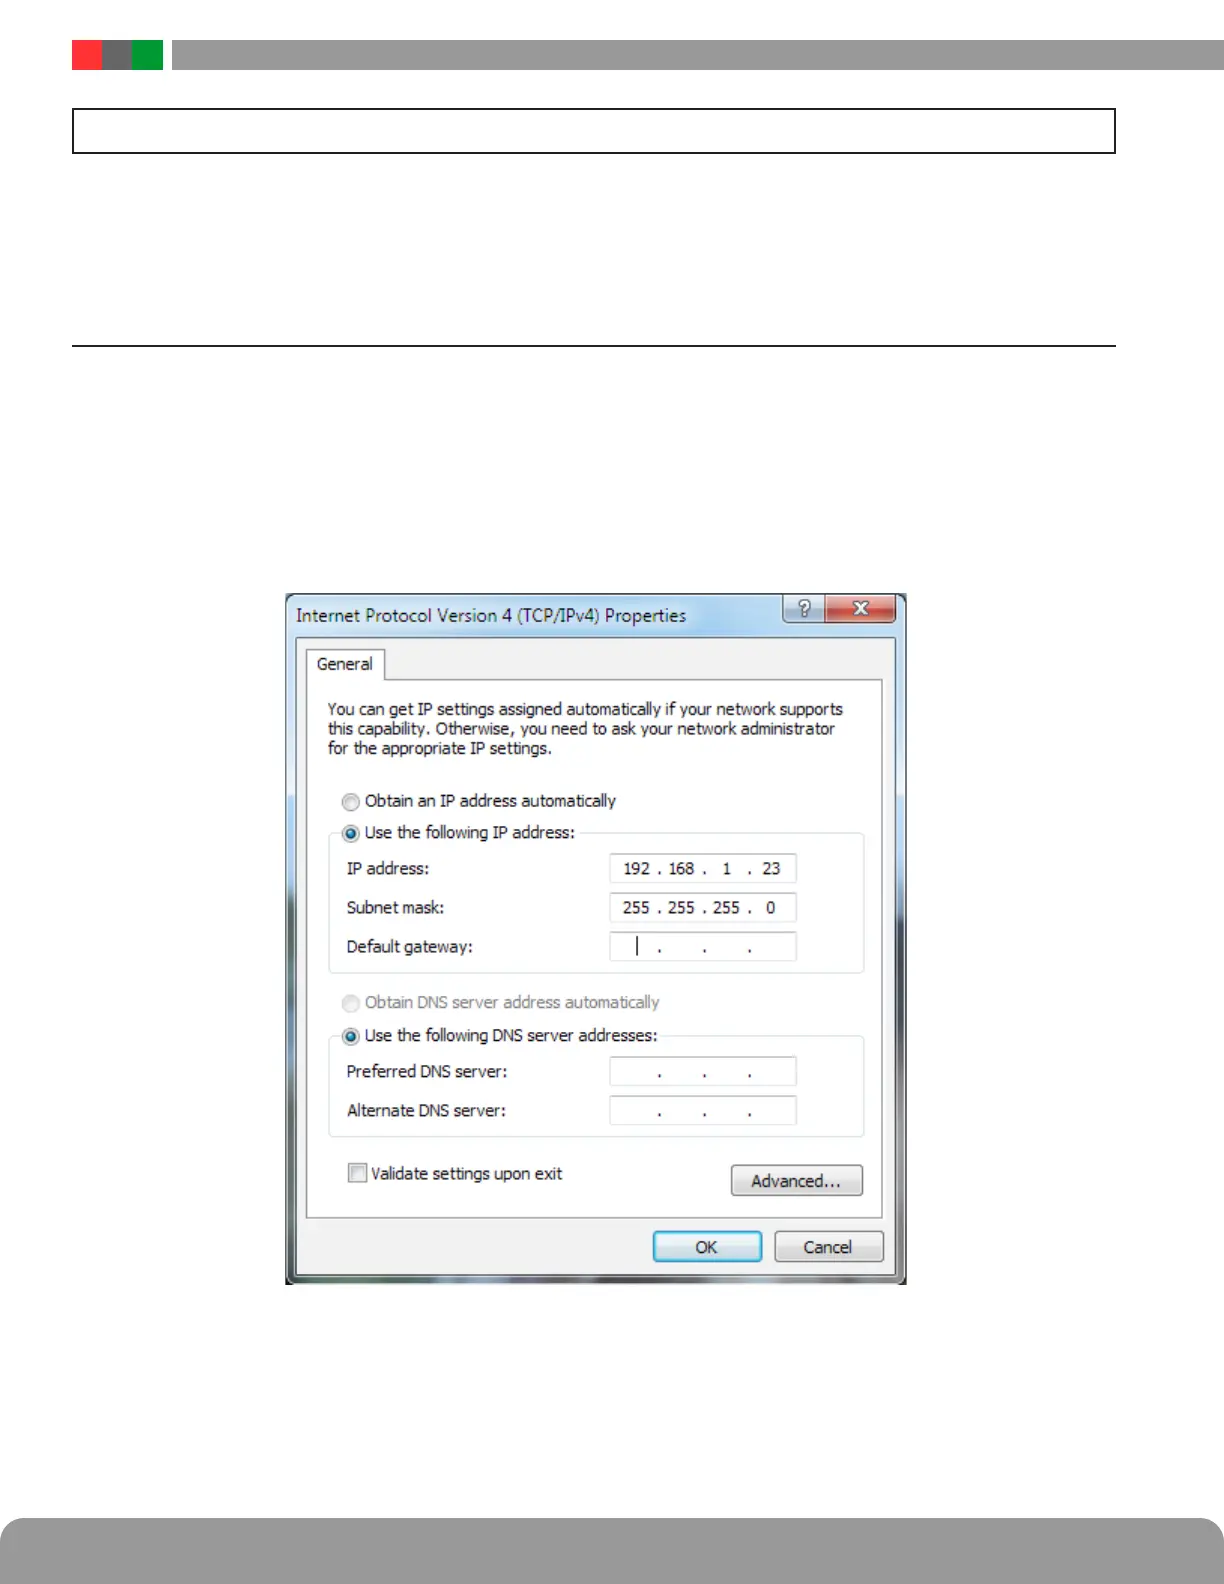
• A computer (PC or Mac) set to a static IP address in the subnet 192.168.1.xxx, where xxx is a subnet address (0 to 255)
not being used by any other device on the network. Do not use 192.168.1.9 or the final IP address you will be using for the
Netlink. Disable any active WiFi connections. See Figure 2.1.
• A web browser installed on the computer.
• A standard (not crossover) ethernet cable long enough to reach between the computer and the Netlink.
• The Netlink to be configured must be wired into the system and powered. After powering the Netlink, wait for it to initialize -
when ready, the yellow SYS LED will be lit steady.
Figure 2.1 - Example of a PC Ethernet Port Settings Window
After the Netlink is powered within the system and initialized, connect the Ethernet cable between the Ethernet ports of the computer
and the Netlink.
 Loading...