46
SECTION 5 (CONTINUED) / SECTION 5 (SUITE) / SECCIÓN 5 (CONTINUACIÓN)
TOOLS AND HARDWARE REQUIRED / OUTILS ET QUINCAILLERIE REQUIS / INSTRUMENTAL Y HERRAJE REQUERIDOS
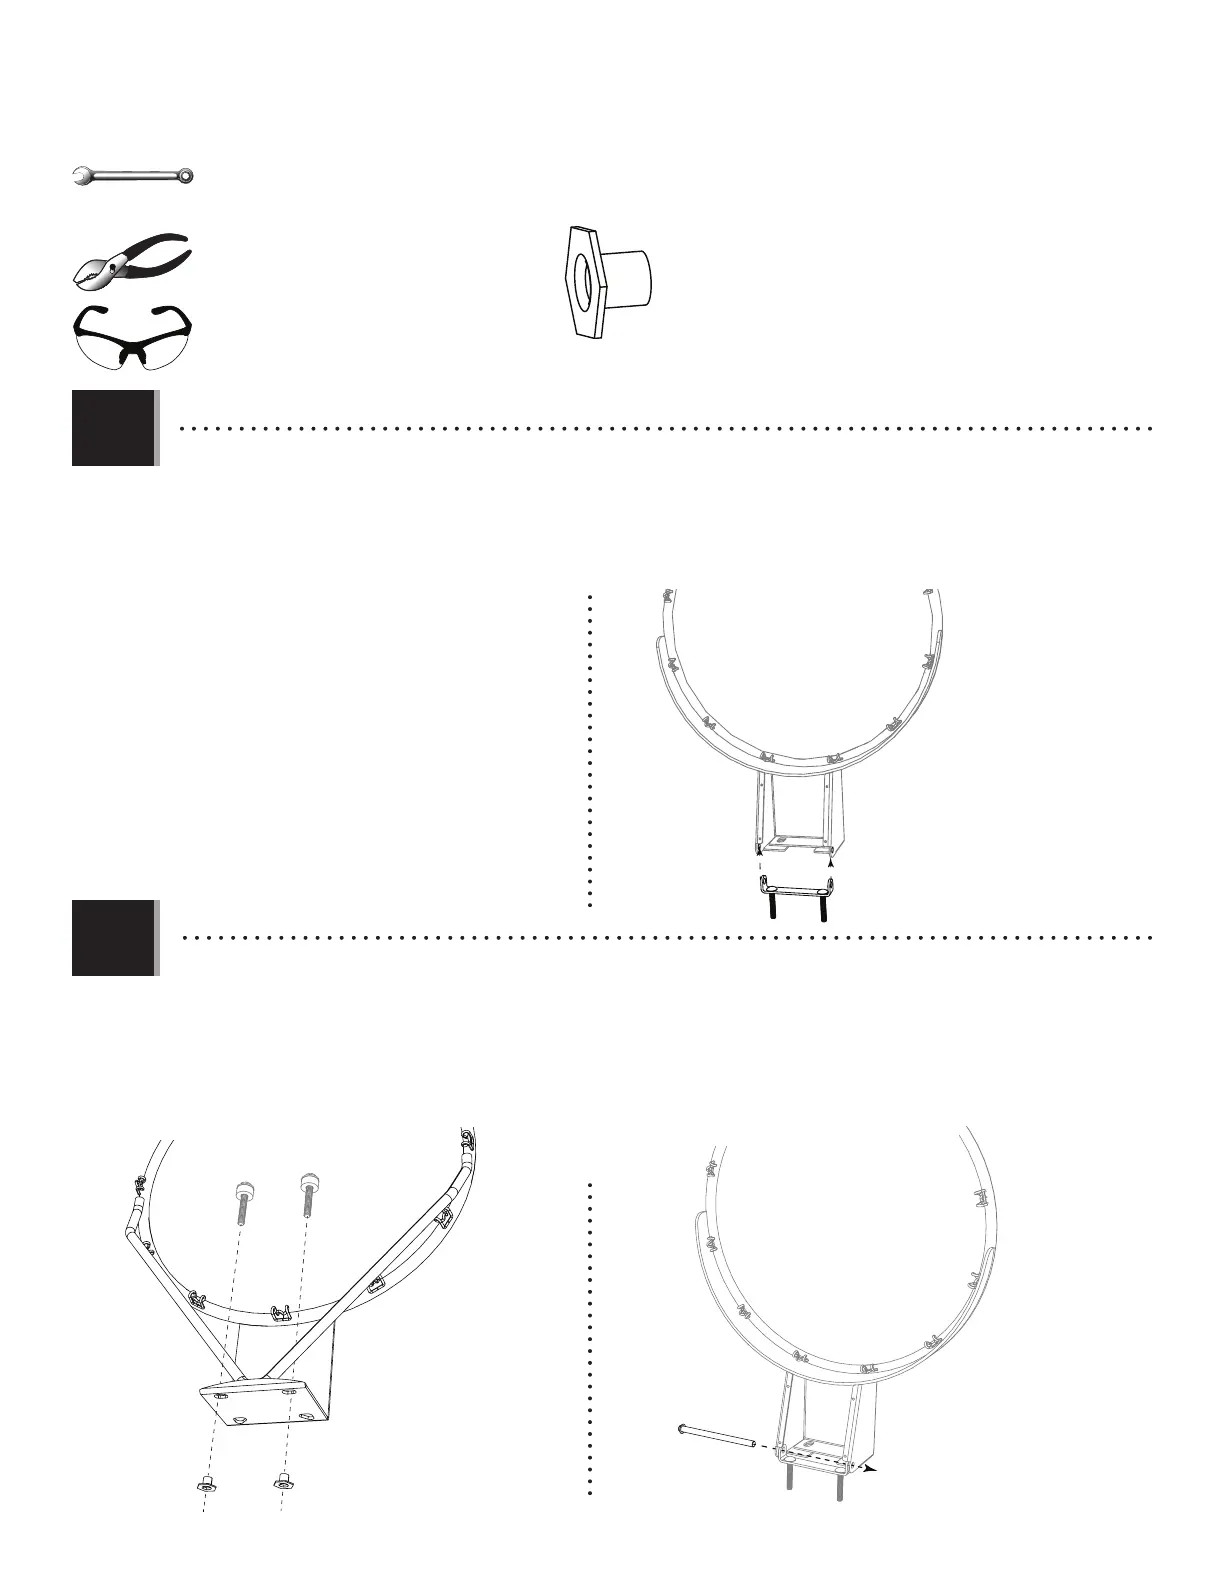
• Slam-It®: Insert the bolt assemblies through the holes in the rim and secure with two (2) T-nuts (AAJ).
Slam-It® Pro: Slide the axle assembly through the housing and the pivot assembly as indicated.
• Slam-It®: Insérer les assemblages de boulons à travers les trous dans l’anneau et les fi xer en utilisant deux (2) écrous en « T » (AAJ).
Slam-It® Pro: Faire glisser l’assemblage de l’essieu à travers le carter et l’assemblage du pivot comme indiqué.
• Slam-It®: Insertar los conjuntos de pernos por los agujeros en el aro y fi jarlos usando dos (2) tuercas en «T» (AAJ).
• Slam-It® Pro: Deslizar el conjunto del eje por la carcasa y el conjunto del pivote como se indica.
• Slide the pivot assembly into the housing of the Slam-It
®
Pro rim (ALX) and align the holes as indicated.
• Faire glisser l’assemblage du support de pivot dans le carter de l’anneau Slam-It
®
Pro (ALX) et aligner les trous comme indiqué.
• Deslizar el conjunto del soporte de pivote en el bastidor del aro Slam-It
®
Pro (ALX) a través del y alinear los agujeros como se indica.
ALX
AAJ (x2)
AAJ
AAJ
• Slam-It
®
Pro Rim
• Slam-It
®
Rim
• Slam-It
®
Pro Rim
• Slam-It
®
Rim
5.3
5.4
NO IMAGE HERE
AUCUNE IMAGE ICI
NINGUNA IMAGEN AQUÍ
1/2 in/po (≈13 mm)
(x1)