-13-
LIFEWARMER
™
CONNECTING THE CONTROLLER
Connecting the Controller to the TIS or TTS-B tubing
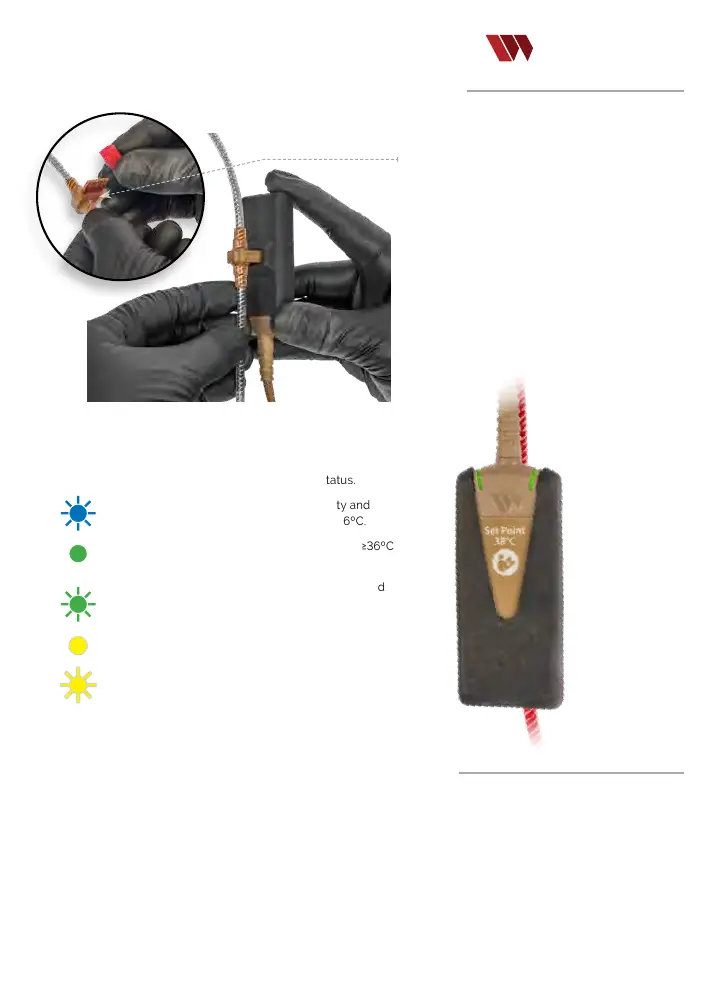
STEP1:
Remove the red protective cap from
the middle connector of the tubing set to expose
t
he circuit cartridge. Discard the red protective cap.
STEP2: Firmly press the circuit cartridge on
the tubing into the connector slot on the black
Controller Jacket as shown in the photo..
STEP3:
Refer to Controller LED illumination for System status.
A
ashing Blue LED that increases in intensity and
speed indicates the uid is warming but is <36ºC.
A solid green LED indicates the uid is between ≥36ºC
and < 44ºC.
One green LED ash every second (while connected
to tubing) indicates stand by mode, no ow or uid
ow is too slow to warm.
A solid yellow LED indicates a low battery condition.
A yellow strobe LED indicates a dry line, poor
connection, disconnection or tubing mechanical
failure.
Disconnecting Components /Discontinuing Use
•
When infusion is complete, disconnect the Controller from the tubing.
•
Disconnect the Controller from the Battery.
•
Dispose of contaminated biohazard materials according to CDC and institutional Guidelines.
•
Surface clean/disinfect Controller, Battery, and Charger.
•
Connect Battery to Charger and allow to charge for 90 minutes for a fully depleted battery.
Circuit cartridge
Step 1
Step 2