13
2022-07-19
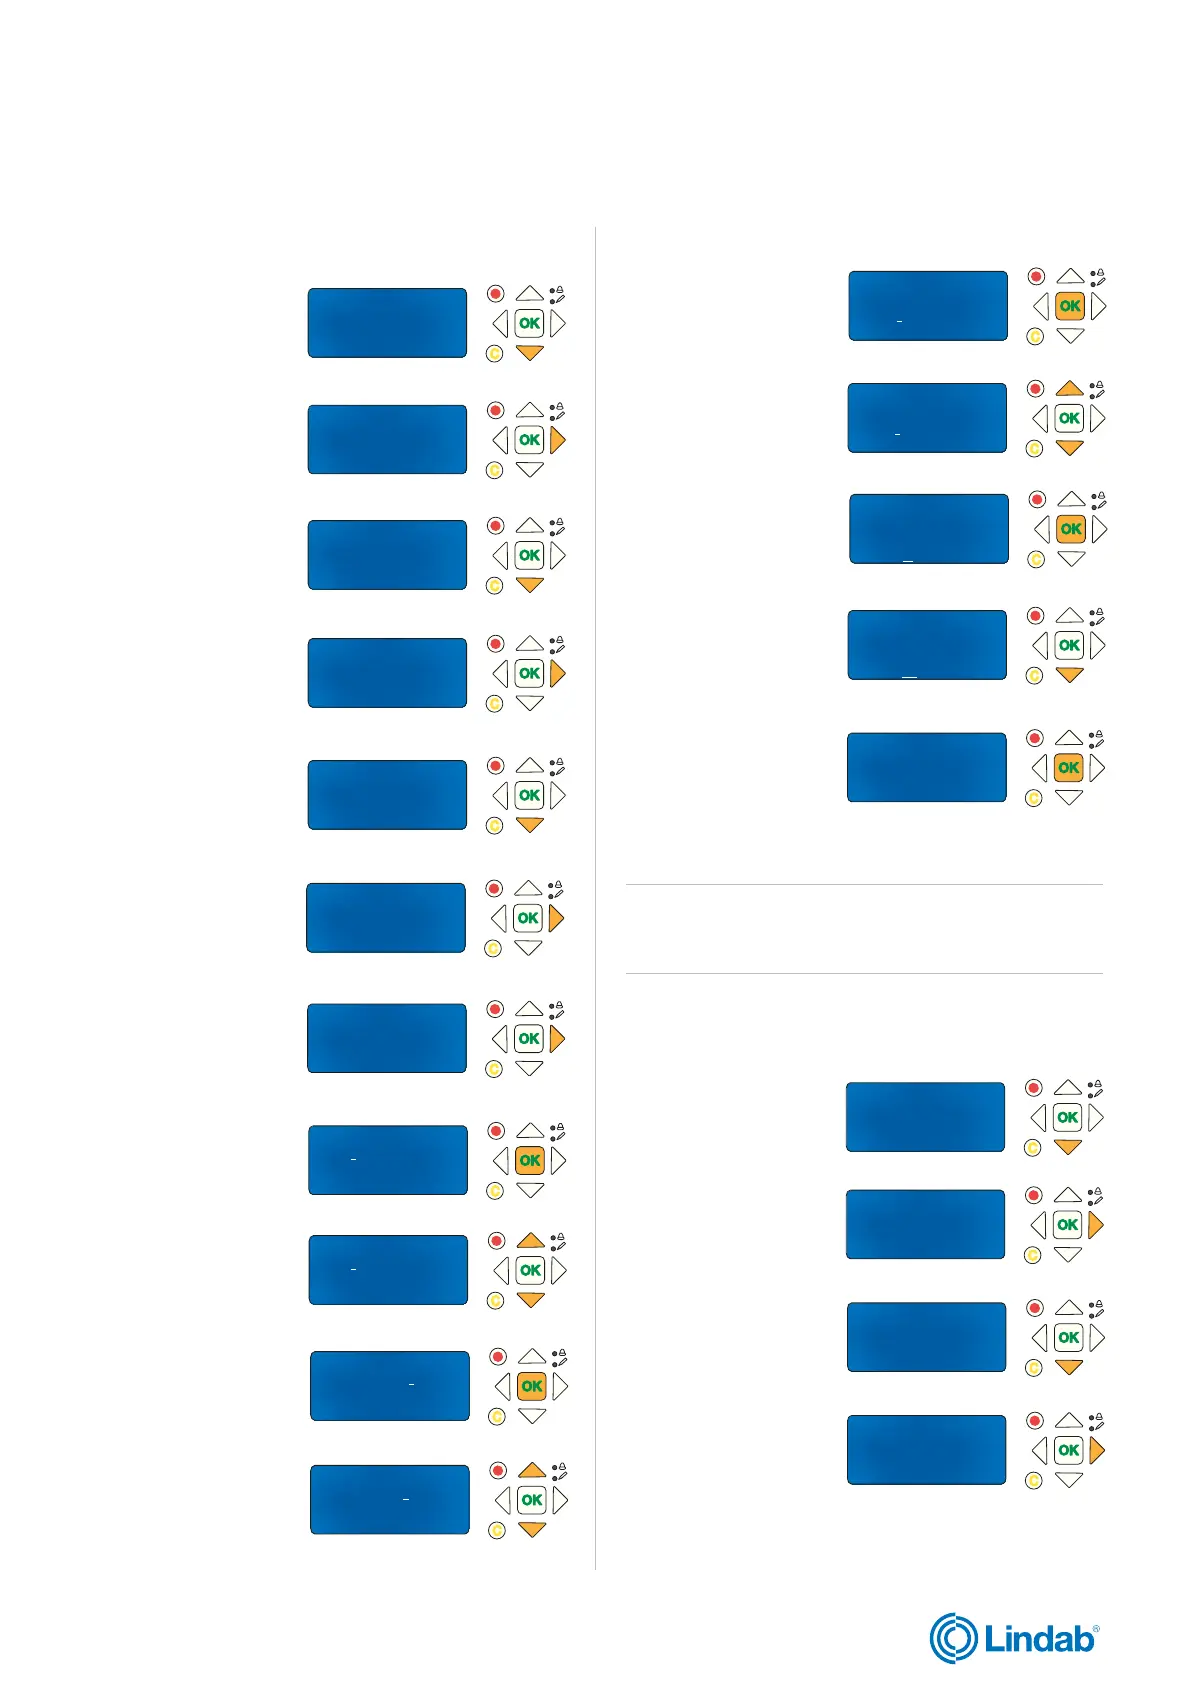
1. Press ”down” to find
”System Setup”
2. Press ”forward” to
access ”System setup”
3. Press ”down” to find
”Miscellaneous”
De-/Activate Damper
Detecotr/Temp AI1
Pressure sensor
-> Miscellaneous
->Adressing Slaves
SEF
Communication
De-/Activate Damper
Status Overview
-> System Setup
Settings
Manual/Auto
-> Input/Output NC/NO
Damper Time
Fire Thermostat
Temperature alarm
Fire Inspector
Section evacuation
Section containment
->Section tools
->Set same section
Set increasing sect
Set same section
Start: 7 Stop: 7
Section 4
Set now: No
Set same section
Start: 7 Stop: 7
Section 4
Set now: No
Set same section
Start: 4 Stop: 7
Section 4
Set now: No
Set same section
Start: 4 Stop: 7
Section 4
Set now: No
Set same section
Start: 4 Stop: 7
Section 4
Set now: No
Set same section
Start: 4 Stop: 7
Section 4
Set now: No
-> De-/Activate Damper
Detecotr/Temp AI1
Pressure sensor
Miscellaneous
Select Slave/damper
6
Deactivate/
activate Damper-->
Set same section
Start: 4 Stop: 7
Section 1
Set now: No
Set same section
Start: 4 Stop: 7
Section 1
Set now: No
Set same section
Start: 4 Stop: 7
Section 1
Set now: Yes
->Adressing Slaves
SEF
Communication
De-/Activate Damper
Set same section
Start: 4 Stop: 7
Section 1
Set now: Yes
Status Overview
-> System Setup
Settings
Manual/Auto
lindab | commissioning guide
We reserve the right to make changes without prior notice
FireSystemPro
2.8 Section setup in PRO-M
4. Press ”forward” to
access ”Miscellaneous”
5. Press ”down” to find
”Section tools”
6. Press ”forward” to
access ”Section tools”
7. Press ”forward” again
to access ”Set same
section”
8. Press ”OK” to start
editing modbus adress
for ”Start”
9. Use ”up” and ”down”
arrows to change
”Start” number of mod-
bus adress
10. Press ”OK” to con-
firm ”Start” number
11. Use ”up” and
”down” arrows to
change ”Stop” number
of modbus address
12. Press ”OK” to con-
firm ”Stop” number
3. Press ”down” to find
“De-/Activate Damper”
4. Press ”forward” to
access ”De-/Activate
Damper”
13. Use ”up” and
”down” arrows to
change number of
”Sections”
14. Press ”OK” to
confirm ”Section”
15. Press ”down” to
changes status of ”Set
now” to Yes
2. Press ”forward”
to access ”System
Setup”
16. Press ”OK” to con-
firm ”Set now” status
2.9 Change damper setup via PRO-M
1. Press ”down” to find
”System Setup”
Setup for section 1 are now done
Note! Repeat the steps above to set more sections for
other PRO-S damper units (modbus addresses) in the
system.
Continue with next step on following page