Page 12 of 33 FA69388–2 English
Jun 2013
33
How To Use the Parallel I/O Option
Linx 5900 & 7900
2.4.2 Configure the inputs
Set the links LK2 to LK5 to the default position (A), so that the printer provides the 0 V and
24 V connections. Refer to ‘Input connections’ on page 29 for information about the input
wiring.
To configure the inputs, perform the following steps.
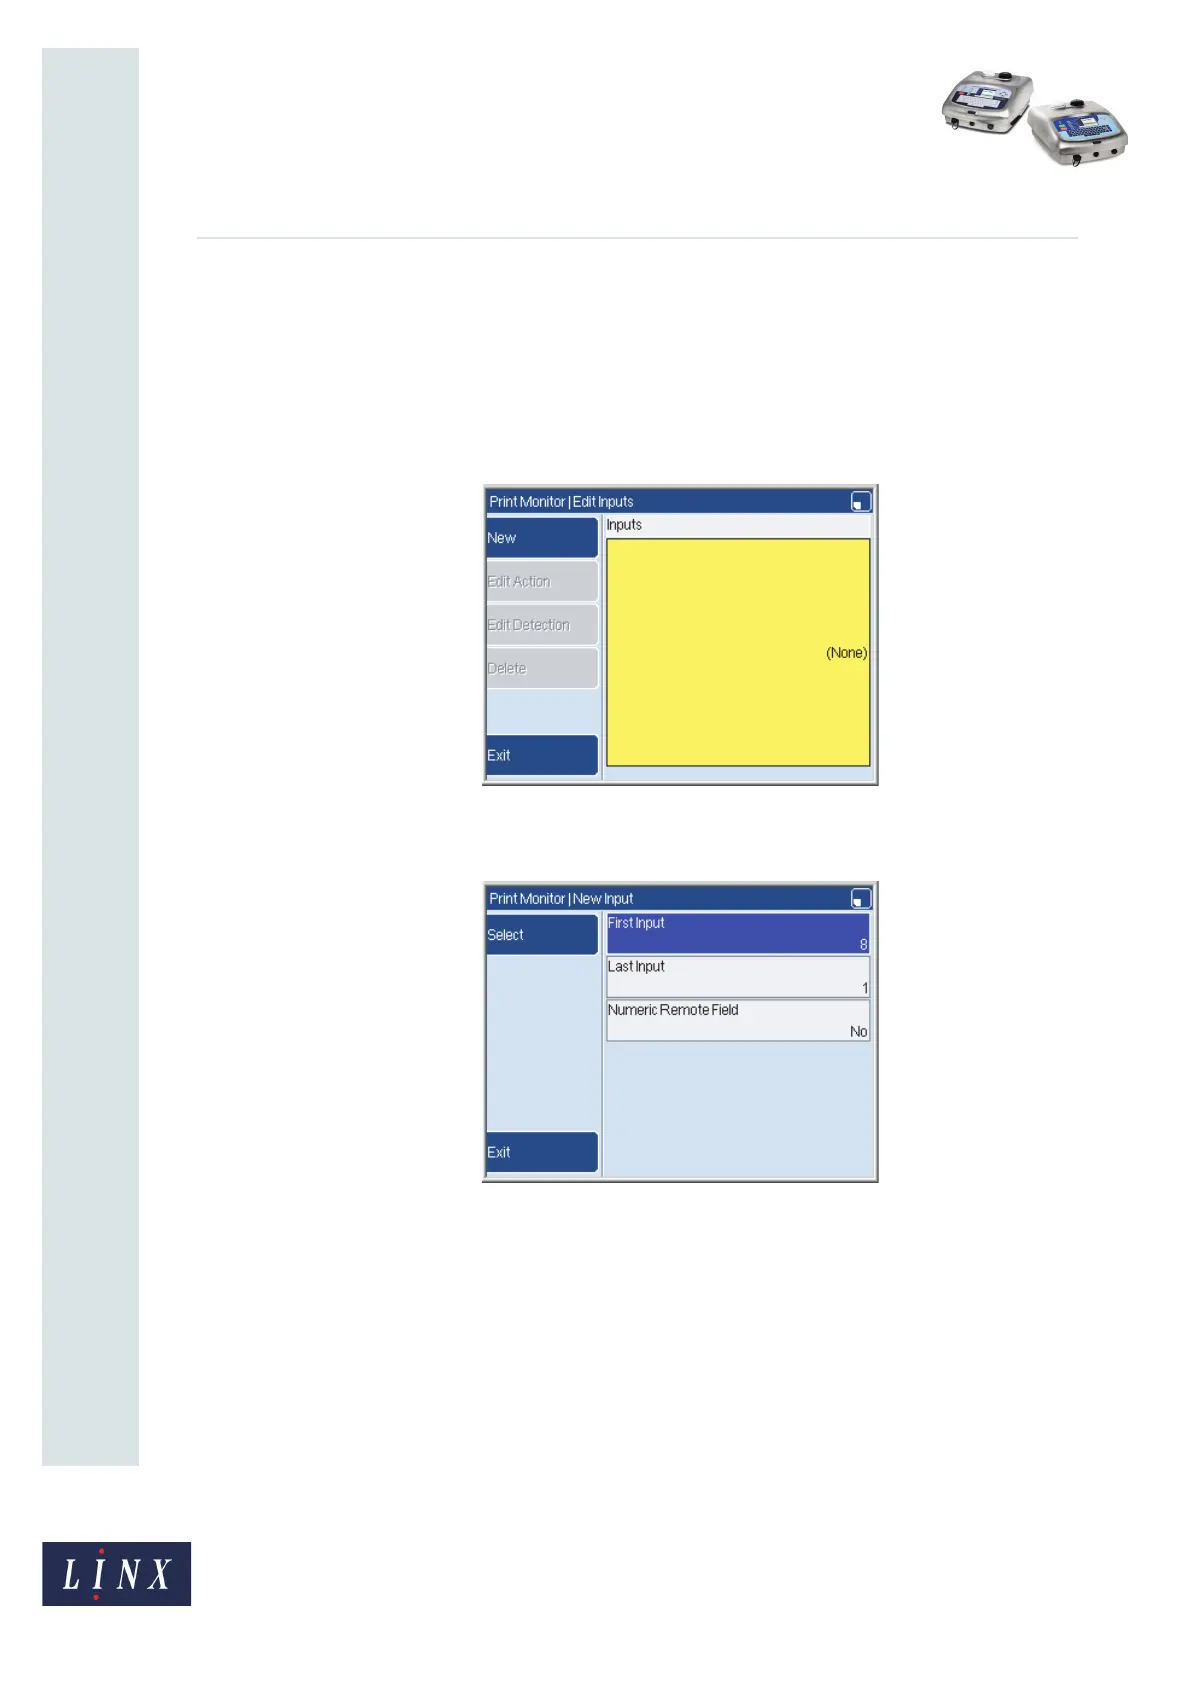
1 At the Parallel I/O page, select the Inputs option to display the Edit Inputs page.
Figure 15. Edit Inputs page
2 Press the New key to display the New Input page.
Figure 16. New Input page
This page shows the default values (8 and 1) for the first input and last input of the
new range of inputs. In this example, you change these values to 6 and 4, so that the
three inputs 6, 5, and 4 are assigned to the new range.
(The Numeric Remote Field option is described on page 19.)
69434
69435