11
lci1.com 574 - 537- 890 0 Rev: 11.16.18
Solera
®
Classic Awning
Installation and Owner’s Manual
(For Aftermarket Applications)
CCD-0001254
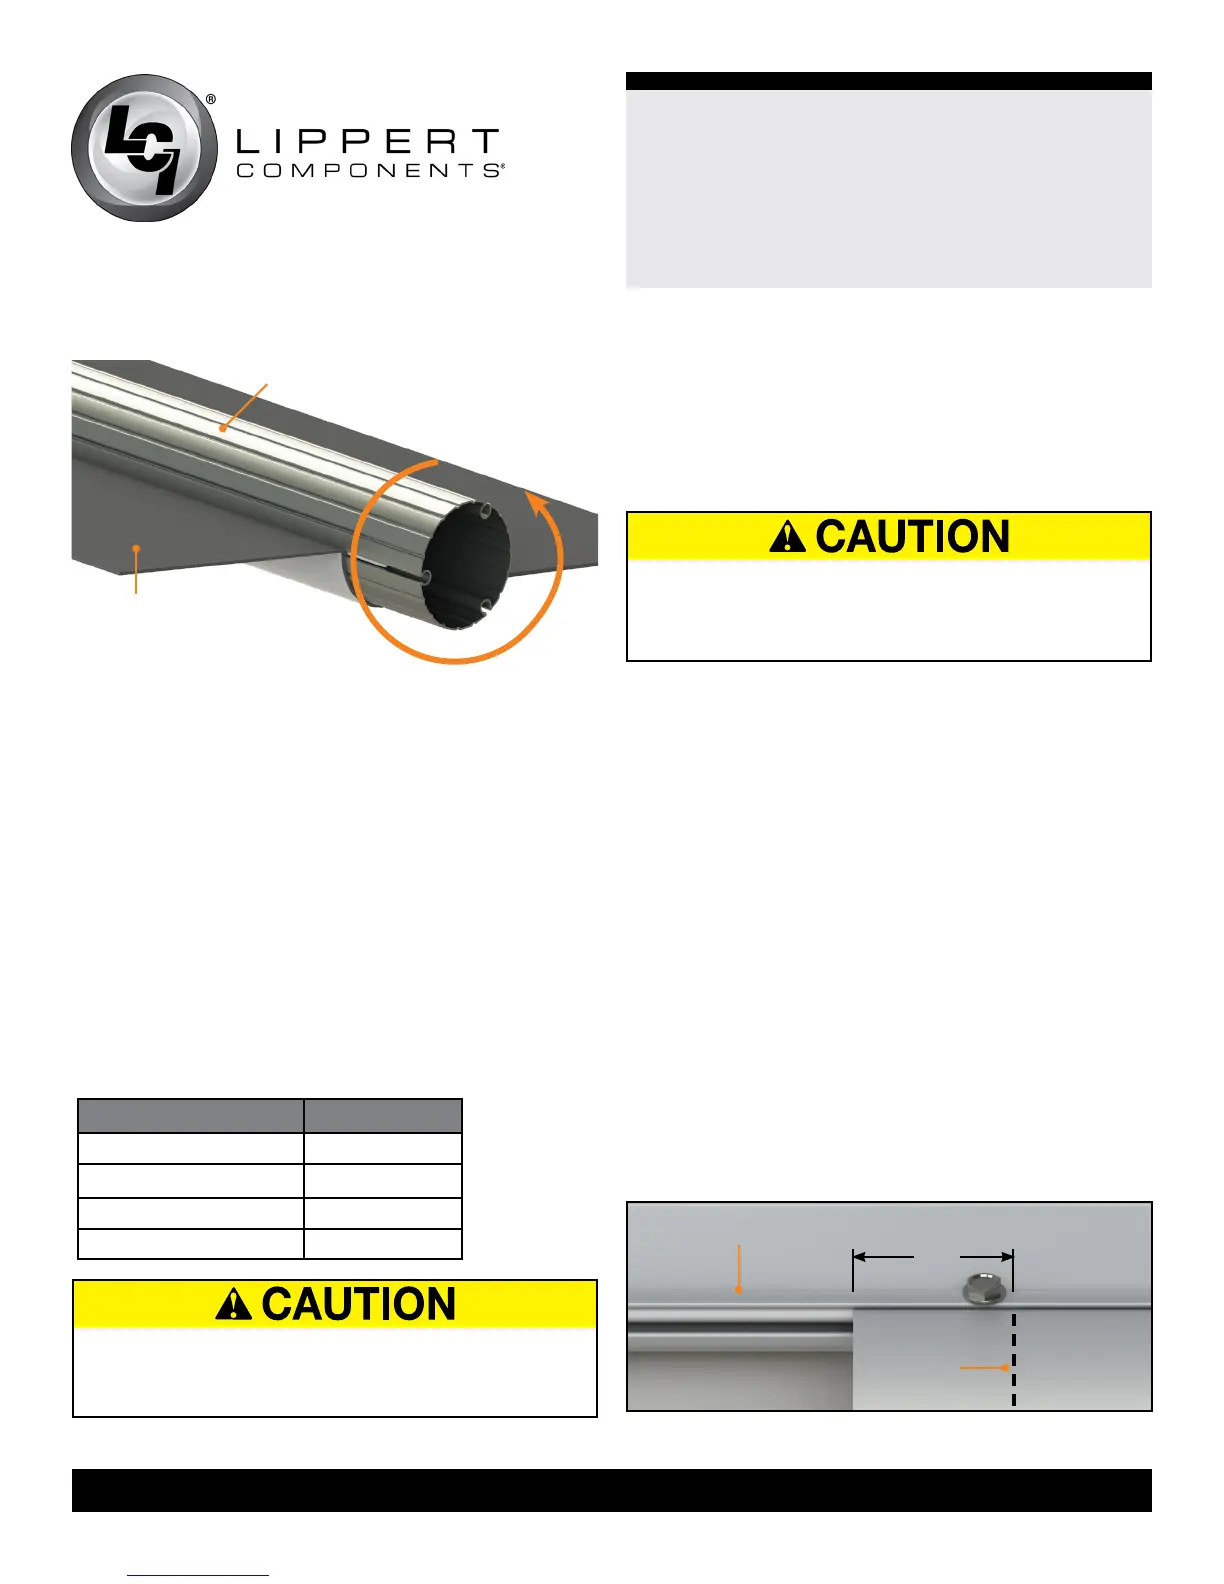
5. Roll the fabric onto the roll tube (Fig.16). Make sure the
fabric stays snug and at to the roll tube with the printed side
facing outward.
6. Using the three screws previously removed from the end
caps, attach the drive head and idler head assemblies to the
roll tube, making sure the orientation is the same.
NOTE: Make sure to align the drive head assembly with the
previously made marks for the cam lock location.
7. Secure the idler head and roll tube to the work bench.
8. Rotate the drive head assembly counterclockwise the
number of turns stated on the turn chart. Insert a cotter pin into
the end cap into the shaft on the drive head assembly.
Classic Awnings Fabric Replacement Turn Chart
Fig.16
Roll
Fabric
Roll Tube
9. Working with one or two other persons, install the roll tube
assembly, which includes the drive/idler head assemblies, to
the awning rail by sliding the assembly along the awning rail.
Make sure the awning will unroll with the printed side of the
fabric up.
10. Unroll the fabric from the roll tube to allow the drive and
idler head assemblies to be installed into the outer support
arms.
11. Install the previously removed drive head assembly and
idler head assembly retaining bolts into the outer support arms
to secure the components.
12. Reinstall the previously removed support arm upper
mounting bracket to the unit wall.
13. Make sure the cam lock is in the roll out position and
remove cotter pins from the awning heads.
14. Retract and extend the awning several times (see
Operation section) to ensure that the fabric is square on the
roll tube.
15. Secure the fabric in the awning rail 1” inside the edge
of the fabric on both ends using a #6 x ½” hex. head screw.
Install the screw down through the awning rail and into the
fabric and polycord (Fig.17).
16. If equipped and previously removed, reinstall the drip cap.
Roll Tube Width Turns
6’ to 10’ 12
11’ to 14’ 13
15’ to 18’ 14
19’ and up 16
FAILURE TO MAINTAIN CONTROL OF THE ROLL TUBE,
FABRIC AND DRIVE/IDLER HEADS MAY RESULT IN
PERSONAL INJURY OR PROPERTY DAMAGE.
FAILURE TO SUPPORT THE ROLL TUBE, FABRIC
AND DRIVE/IDLER HEAD ASSEMBLIES DURING
INSTALLATION MAY RESULT IN PERSONAL INJURY
OR PROPERTY DAMAGE.
Awning Rail
1”
Fabric
Stitching
Fig.17