9
lci1.com 574 - 537- 890 0 Rev: 11.16.18
Solera
®
Classic Awning
Installation and Owner’s Manual
(For Aftermarket Applications)
CCD-0001254
Optional Carport Position
1. After the arm is fully extended, remove the outer arm
from the side of the unit by releasing the lever on the lower
mounting bracket (Fig.8).
2. Walk the awning out until the outer arm is straight up and
down. Set the lower mounting bracket on the ground.
3. Make sure to use the provided stakes to secure the outer
arm to the ground.
Retracting the Awning
NOTE: Do NOT retract the awning while in carport mode.
1. If in carport mode, do as follows:
A. Remove the stakes from the foot of the outer arm.
B. Walk the outer arm back to the unit, then secure it to
the lower mounting bracket on the unit’s sidewall.
C. Repeat steps A and B on the other end of the awning.
2. Take the awning pull strap and return it to the center of the
awning roll tube.
3. Lower the roll tube by holding the outer arm and
releasing the support arm assembly handle on the side.
Let the outer arm upper channel (Fig.6, Channel #1) slide
down the outer arm lower channel (Fig.6, Channel #2)
until it rests on the acorn nut. Repeat procedure on the
other end.
4. Loosen the black locking knob.
A. Unlock the mount/rafter arm by releasing the spring
clip from the top of the head assembly.
B. Allow the mount/rafter arm to slide all the way down
toward the bottom of the outer arm.
C. Repeat the procedure for both ends.
5. Take a rm hold of the awning strap and release the
tension on the springs by ipping the cam lock up to the
roll in position.
6. Walk the awning in toward the unit.
A. Hook the pull rod into the pull strap before the strap
gets too high.
B. Using the pull rod, walk the awning to the fully-closed
position.
7. Lock the arms for travel mode by compressing the
outer arm and mount/rafter arm together until the red tab
disappears, then tighten the black locking knob.
Fabric Replacement
Fabric Removal
1. If equipped, remove the drip cap from the end of the awning
rail from which the fabric will be removed.
2. Remove the two #6 x ½” hex head screws located on the
awning rail. Set screws aside (Fig.10).
3. Extend the awning out completely by sliding the mount/
rafter arms all the way to the top of the outer arm and make
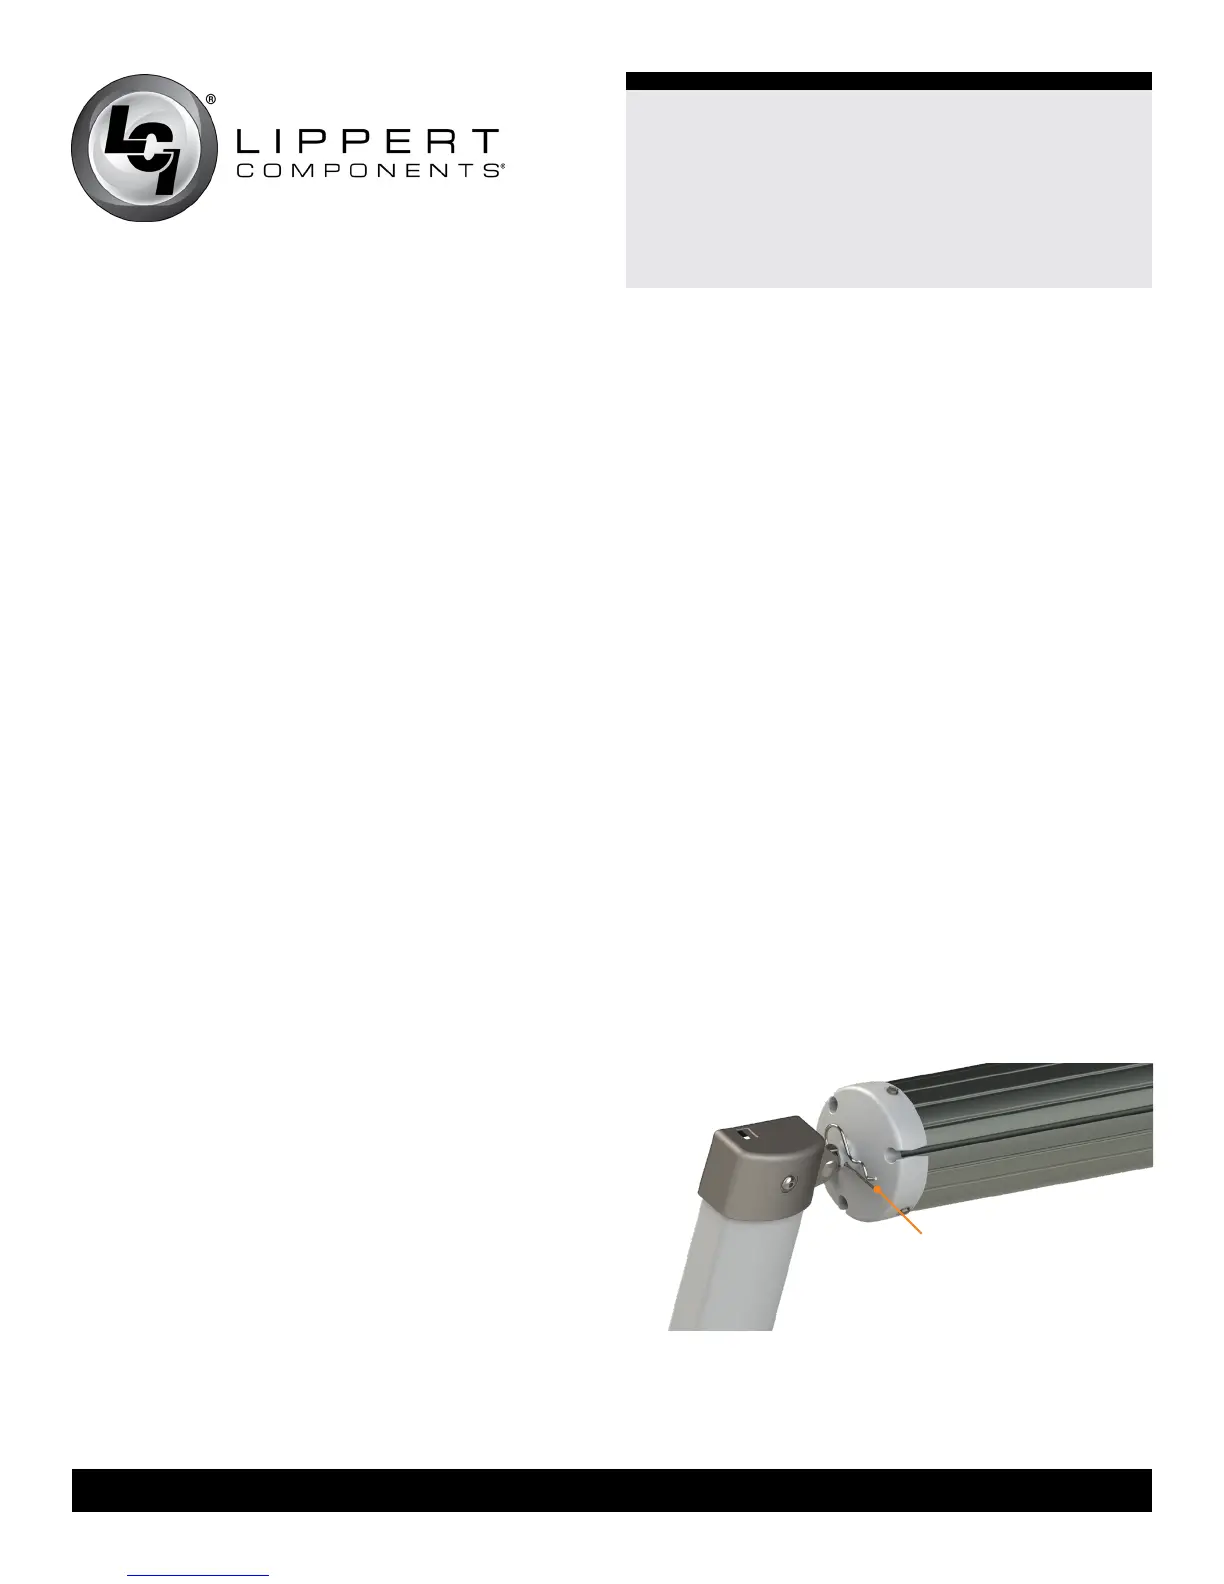
sure they lock into place and insert cotter pins (Fig.13).
4. Pull on the mount/rafter arm to insure the fabric is taut
and tighten the black locking knob to lock it into place. As a
precaution, tape the cam lock in the roll out position.
5. On the end of the awning rail the fabric will be removed
from, remove the upper mounting bracket from the unit wall.
Allow the mount/rafter arm to pivot out of the way.
Fig.13
Cotter Pin
Idler Side Shown