9
lci1.com 574 - 537- 8900 Rev: 03.16.18
Solera
®
Power Awning
Installation and Owner’s Manual
(For Aftermarket Application)
CCD-0001261
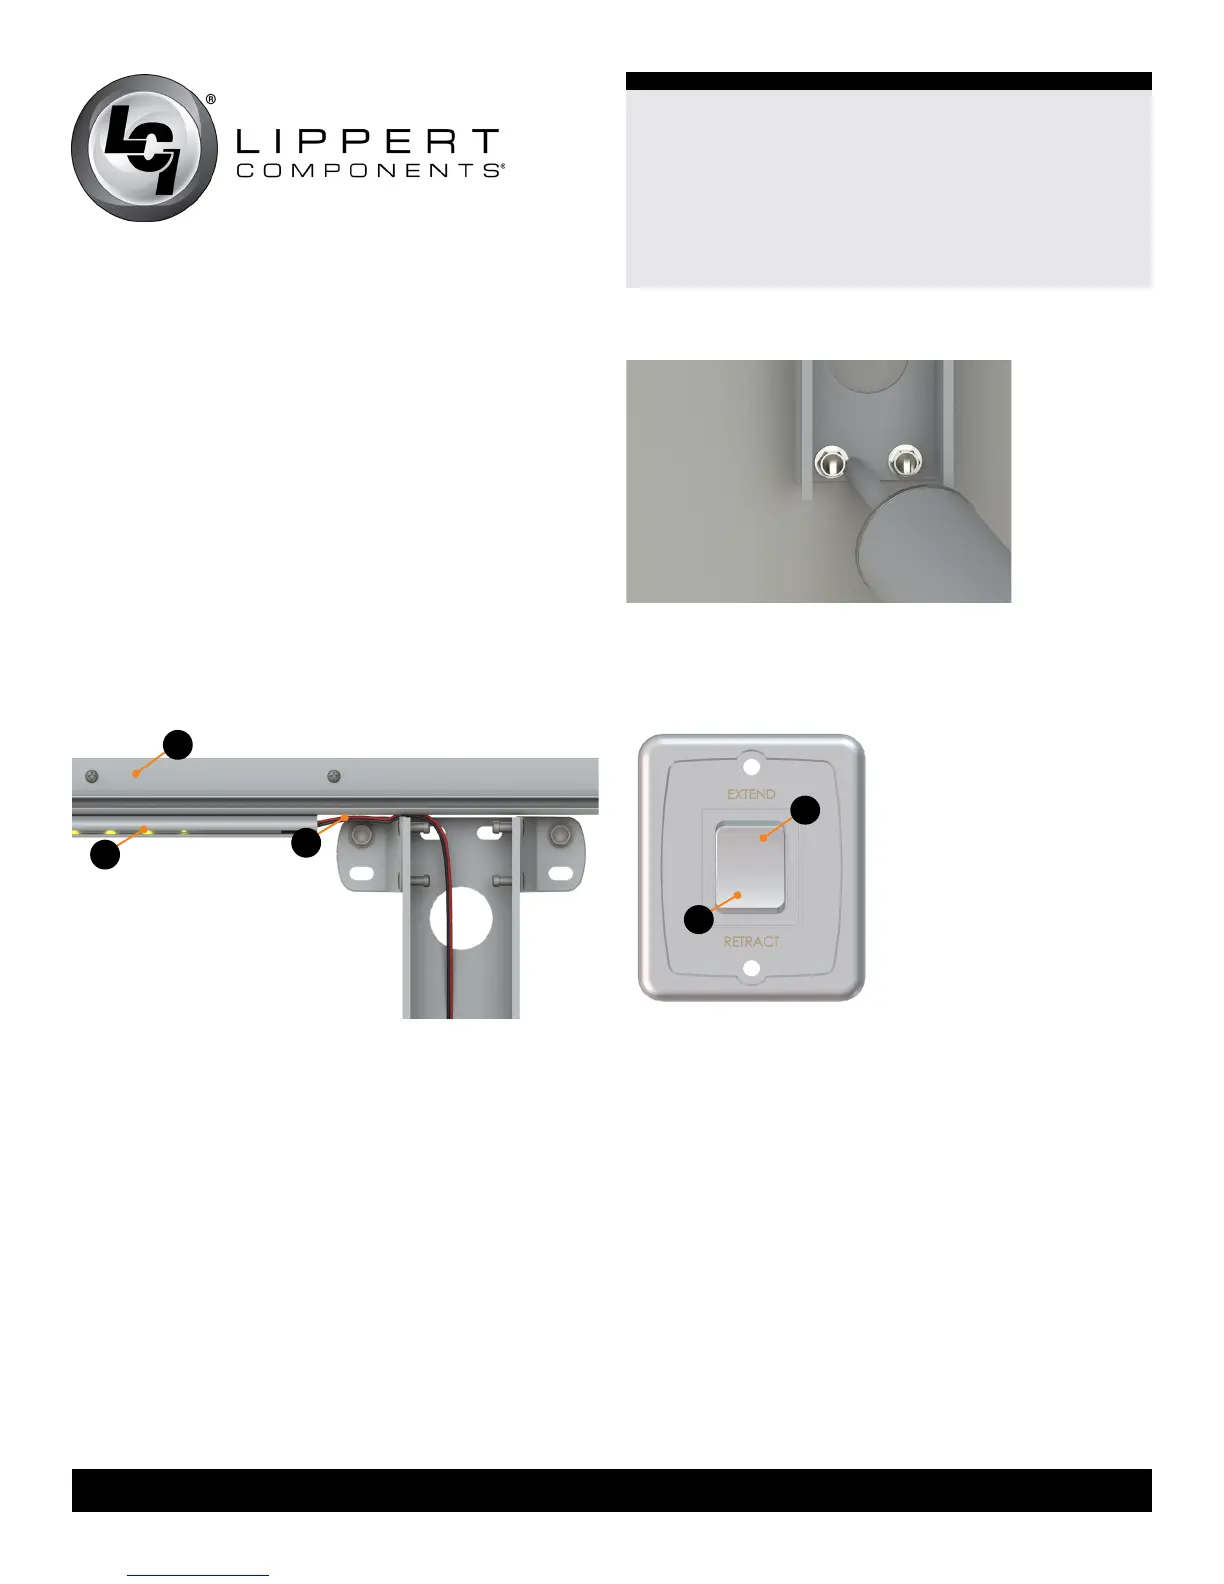
LED Light Rail Installation
NOTE: Solera Power Awning must be installed prior to
LED Light Rail installation.
1. Seal the back of the LED light rail with silicone sealant or
Butyl tape.
2. Mount the LED light rail (Fig.13B) directly below the
awning rail (Fig.13A) and secure to the side of the unit.
3. Remove the wire covers in the drive side mount arm.
4. Route the light wire over the top of the upper brackets
on the drive side mount arm and run the light wire down
through the mount arm (Fig.13C).
Fig.13
A
B
C
5. Cut the power and ground wires to the desired length
and connect to the unit wiring. Make sure to connect the
red wire on the light side to the power wire on the unit side
and connect the black wire from the light side to the ground
wire from the unit side.
NOTE: The LED light rail must be wired through a 3A
maximum fused circuit.
Seal Wall Penetrations
1. Seal all fastener locations and wire penetrations to
protect against water intrusion (Fig.14).
Fig.14
2. Reinstall all wire covers into the support arm assemblies.
Operation
Fig.15
A
B
NOTE: Some units may not use the LCI switch (Fig.15).
Extending the Awning
1. Verify the RV battery is fully charged and connected to
the electrical system.
2. Locate the locking latch on the side of the support arm,
if equipped, and unlock the latch.
NOTE: This latch is optional and may or may not be
installed on one or both support arms.
3. Press and hold EXTEND (Fig.15A) until the awning is
extended completely.