4
lci1.com 574-537-8900 Rev: 03.21.19
Solera
®
Universal Hardware
Manual Awning to
Solera 18V Power Awning
(For Aftermarket Applications)
CCD-0001267
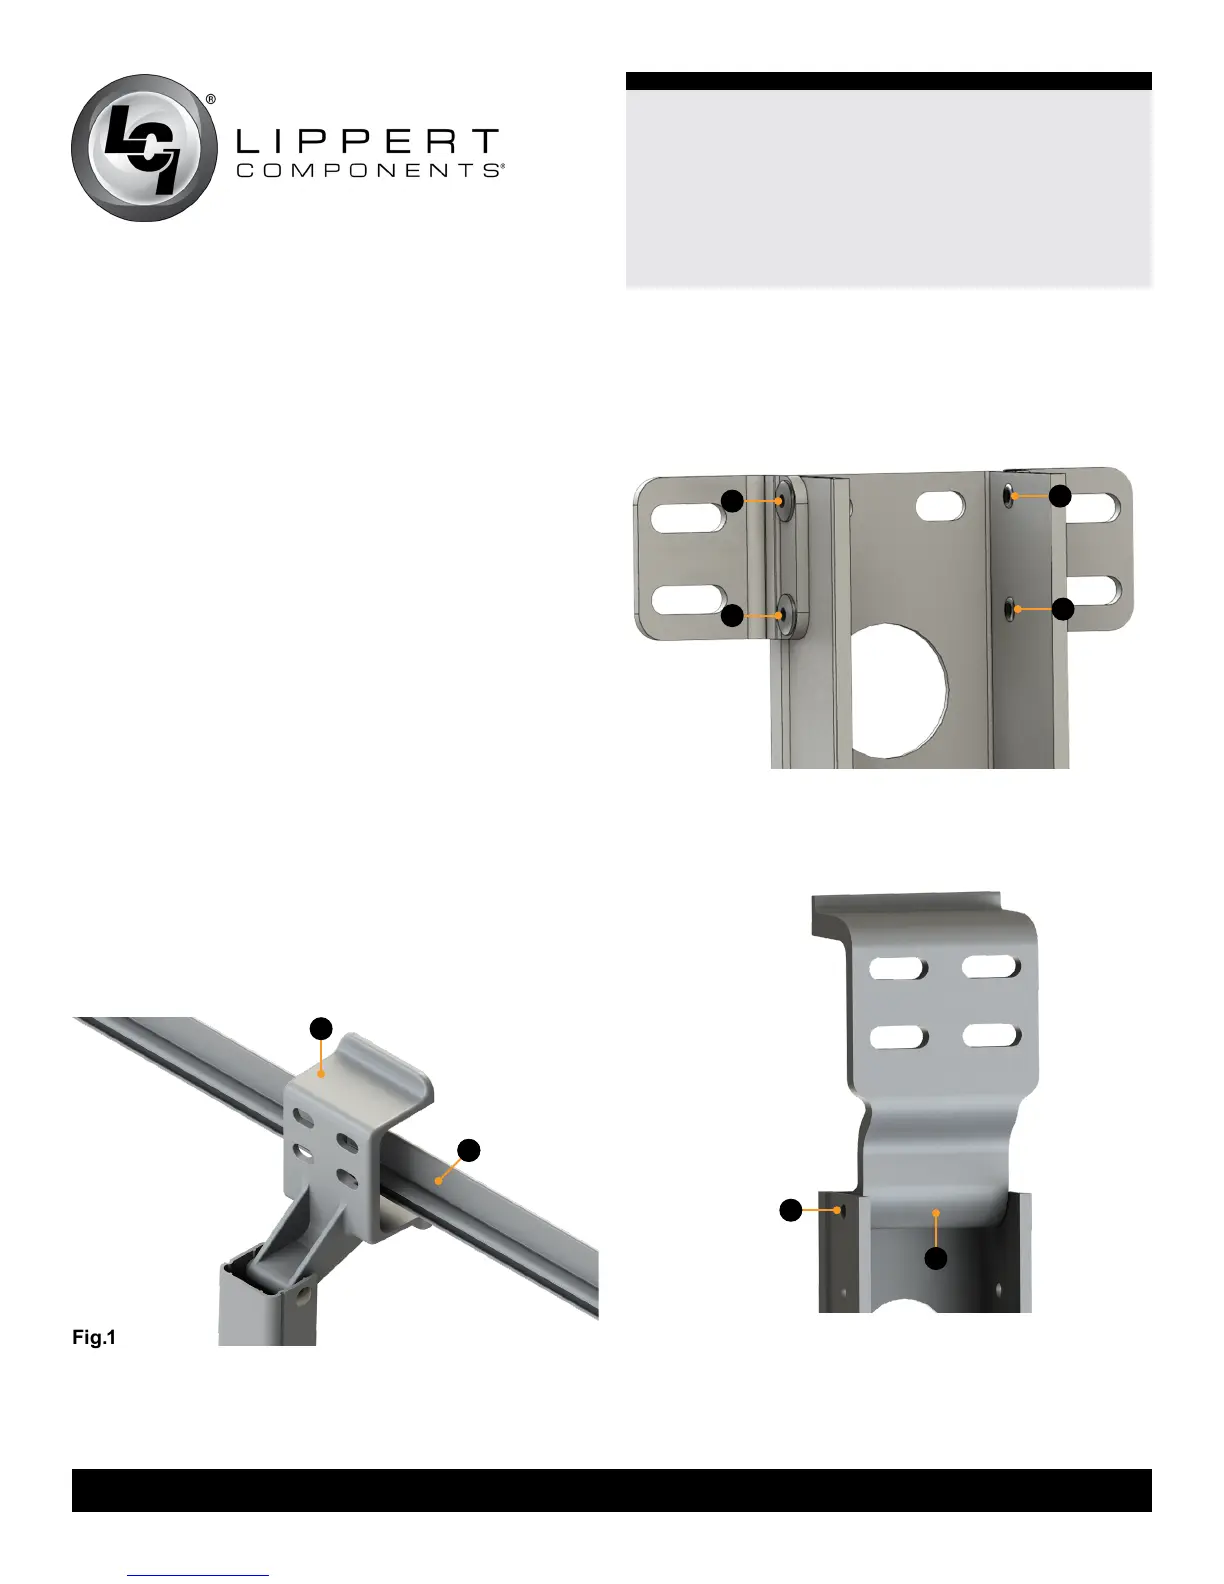
Fig.1
Resources Required
• 1-2 people, depending on task
• Cordless or electric drill or screw gun
• Appropriate drive and drill bits
• Socket wrench
• ⁄” Socket
• Rivet gun
• Locking pliers
• Ladder
• Silicone sealant
• Non-permanent method of marking
Optional Upper Mounting
Bracket Installation
This procedure is O N LY needed if replacing support arm
assemblies that had upper mounting brackets. This will
avoid making additional holes in the unit. If upper brackets
are NOT needed, proceed to the Conversion section.
If replacing support arm assemblies that had upper
mounting brackets (Fig.1A) that straddled the awning rail
(Fig.1B), exchange the angle bracket already attached
to the new support arm assembly with the new provided
upper mounting bracket, bolt and nylon locking nut.
1. On the new power awning support arm assembly, drill
out the four rivets holding the original upper mounting
bracket supports to the support arm assembly (Fig.2A).
Set the two upper mounting brackets aside.
2. Align the new upper mounting bracket bolt guide
(Fig.3A) at the top set of holes of the support arm
assembly (Fig.3B).
Fig.2
Fig.3
B
A
A
A
A
A
B
A