6
lci1.com 574-537-8900 Rev: 03.21.19
Solera
®
Universal Hardware
Manual Awning to
Solera 18V Power Awning
(For Aftermarket Applications)
CCD-0001267
4. Separate the drive head from the support arm and
secure the support arm to the unit in the travel position.
5. Remove the fasteners from the upper mounting bracket
(Fig.6A) of the support arm assembly.
6. Detach the support arm assembly from the lower
mounting bracket. Discard the mounting bracket.
7. Remove the fasteners from the lower mounting bracket
(Fig.7A) of the support arm assembly.
THE SPRING IS UNDER EXTREME TENSION. IMPROPER
HANDLING COULD CAUSE DEATH, SERIOUS INJURY
OR PROPERTY DAMAGE.
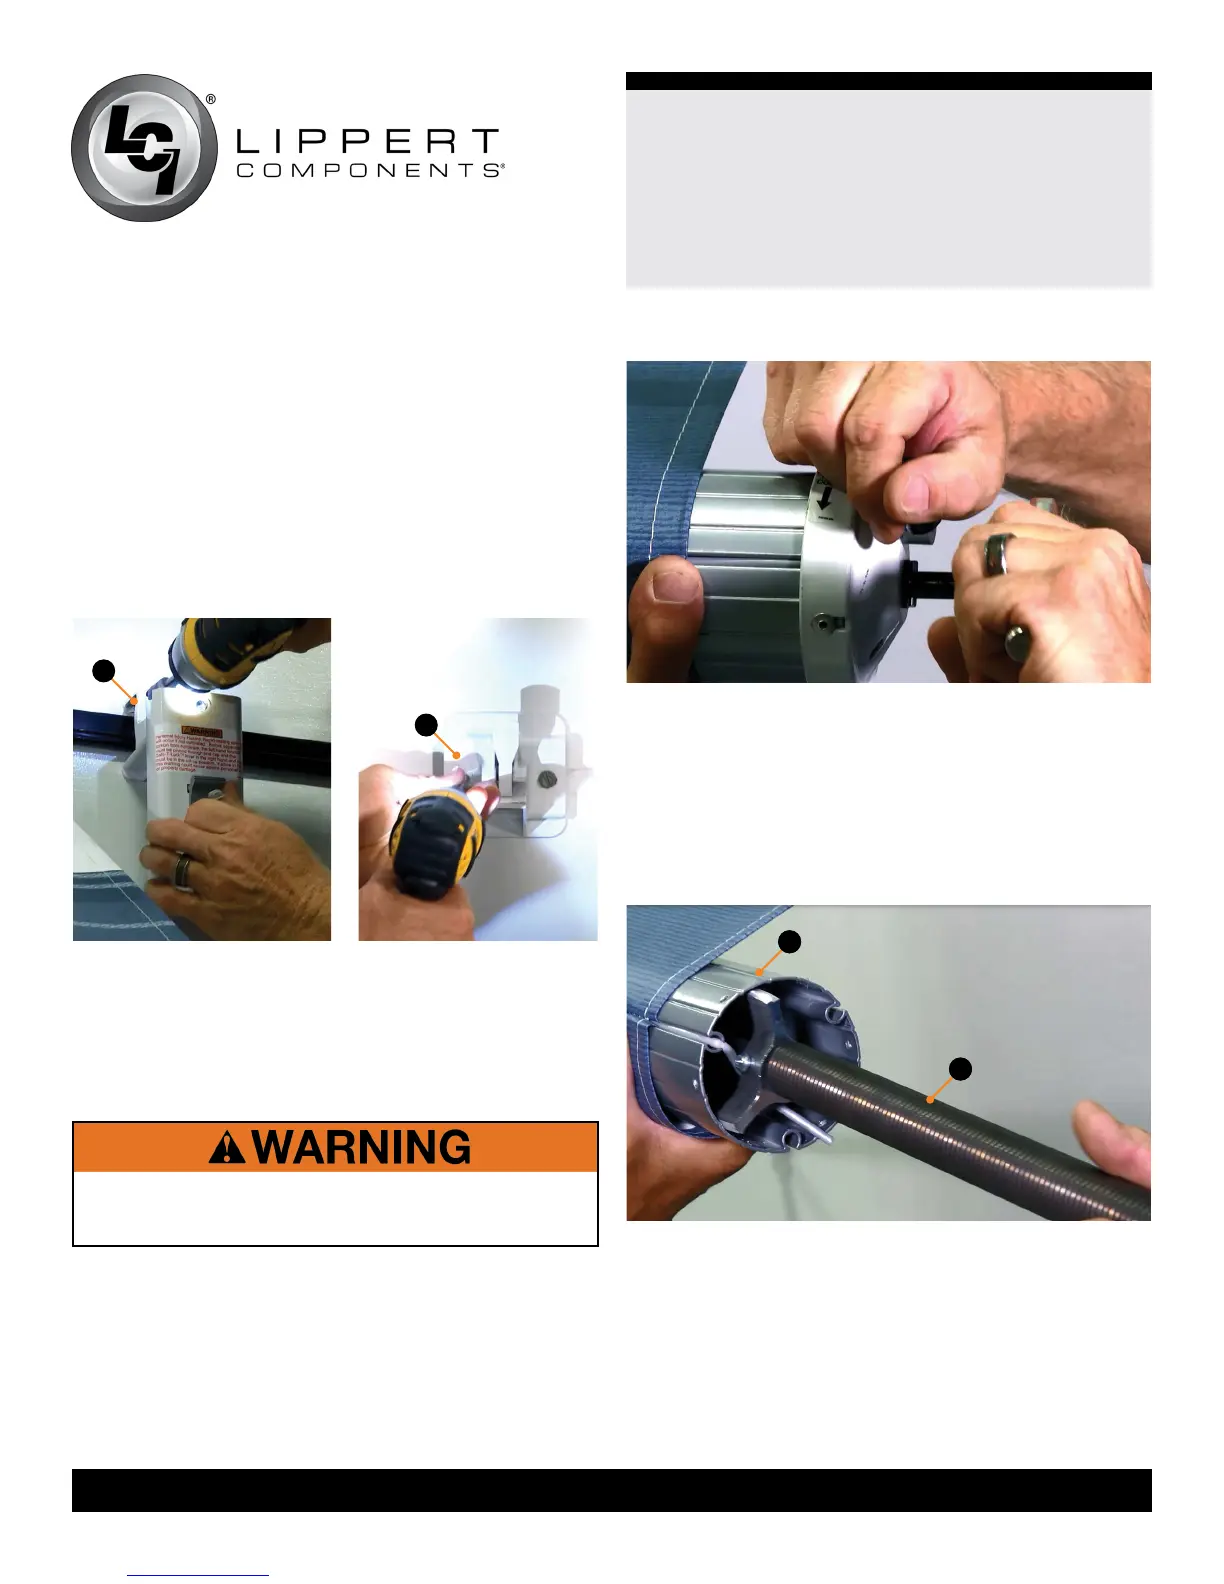
8. Firmly take hold of the drive head with a pair of locking
pliers (Fig.8). Remove the cotter pin from the end cap and
move the cam lock to the roll up position.
NOTE: Padding the locking pliers will prevent the
scratching of components.
A
B
9. Slowly release all of the tension by rotating the drive
head with the locking pliers.
10. Using an appropriately-sized drill bit, drill out the rivets
securing the end cap to the roll tube.
11. Remove the end cap and spring assembly (Fig.9B)
from the roll tube (Fig.9A).
Fig.8
A
Fig.9
A
Fig.6
Fig.7