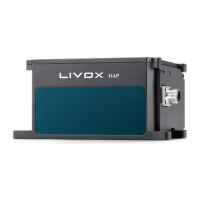
LIVOX HAP
User Manual
10
©
2022 Livox Tech All Rights Reserved.
Mounting Notice
Read and understand the following warnings before mounting the HAP (TX):
1. Before use, remove the screen protector from the optical window.
2. Signicant dust and stains on the optical window will aect the performance of the LiDAR
sensor. Follow the instructions in the Maintenance section to clean the optical window using
compressed air, isopropyl alcohol, or a lens cloth. Mount the HAP (TX) after cleaning it.
3. When mounting the HAP (TX), the eld of view must not be blocked by an object, including
glass. Refer to Figure 3.1.1.
4. When mounting the HAP (TX), allow a space of at least 10 mm around the device to prevent
poor airow aecting heat dissipation, and make sure the waterproof breathable valve is not
blocked.
5. The HAP (TX) cannot bear any extra payload. Otherwise, the reliability of the product cannot
be guaranteed.
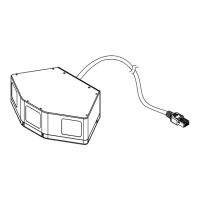
Dimensions
The bottom surface of the HAP (TX) has four M3 mounting holes with a depth of 5 mm, and four
M6 mounting through-holes (φ6.5). Refer to the below illustrations for HAP (TX) dimensions and
locations for the mounting holes, and mount the HAP (TX) in an appropriate place.
0°
15°-15°
-30°
-45°
-60°
60°
200
175
150
125
100
75
50
45°
30°
0°
5°
-5°
-10°
200
175
150
125
100
50
75
10°
15°
-15°
Note that the HAP (TX) eective detection range varies based on where the object is within the
FOV. The closer to the edge of the FOV, the shorter the eective detection range is. The closer to
the center of the FOV, the farther the eective detection range. Refer to the diagrams below: Pay
attention to the eective detection range when in use.
HorizontalVertical
10% Reectivity
Unit
:
m
Figure 3.1.2 Eective Detection Range inside FOV of the HAP (TX)
As shown above, when an object with a reflectivity of 10% is placed near the border of the
vertical FOV, the object can be detected as far as 125 m.