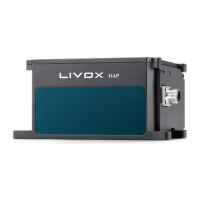
LIVOX HAP
User Manual
©
2022 Livox Tech All Rights Reserved.
13
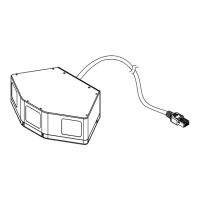
HAP (TX) Function Cable
Livox Aviation Connector 1-to-3 Splitter Cable
Figure 4.2.1 Connecting the HAP (TX)
Red
(
postive)
Black
(
negative)
Computer
Ubuntu-18.04 system
The IP address of the computer can be configured by using the ifconfig command at the
terminal. The conguration code is as below:
~$ sudo ifcong enp4s0 192.168.1.50 (replace “enp4s0” with the network port name of the
computer)
2. Connect the HAP (TX) as shown below.
a. Connect the M12 aviation connector (female) on Livox Aviation Connector 1-to-3 Splitter
Cable with the M12 aviation connector (male) on HAP (TX). The lock nut of the M12 aviation
connector (female) should be tightened with a wrench to ensure a secure connection with
the end face of the M12 aviation connector (male) lock nut. Make sure there is no gap
between them.
b. Connect the RJ-45 network connector on the Livox Aviation Connector 1-to-3 Splitter
Cable to the computer.
c. Connect the power cable on the Livox Aviation Connector 1-to-3 Splitter Cable to the
external power source. Pay attention to the input voltage range and polarity.
The function cable does not need to be used as it has no electrical current when using
with the HAP (TX).
When multiple HAP (TX) LiDAR sensors are connected to one computer in static IP
address mode, make sure all sensors connected have different static IP addresses.
Refer to Livox HAP User Manual for more information on how to set the IP address for
each LiDAR sensor.
If more than six HAP (TX) LiDAR sensors are required, use a gigabit router or a switch.
The broadcast number for each LiDAR sensor can be viewed in the Device Manager
of Livox Viewer 2 or the Livox SDK. For the HAP (TX), the broadcast number will be its
serial number ending in an additional “1”.
Launch Livox Viewer 2 after the HAP (TX) is connected. Click the device with the static
IP address that should be altered. Click to open the settings page and set the static IP
address of the HAP (TX).