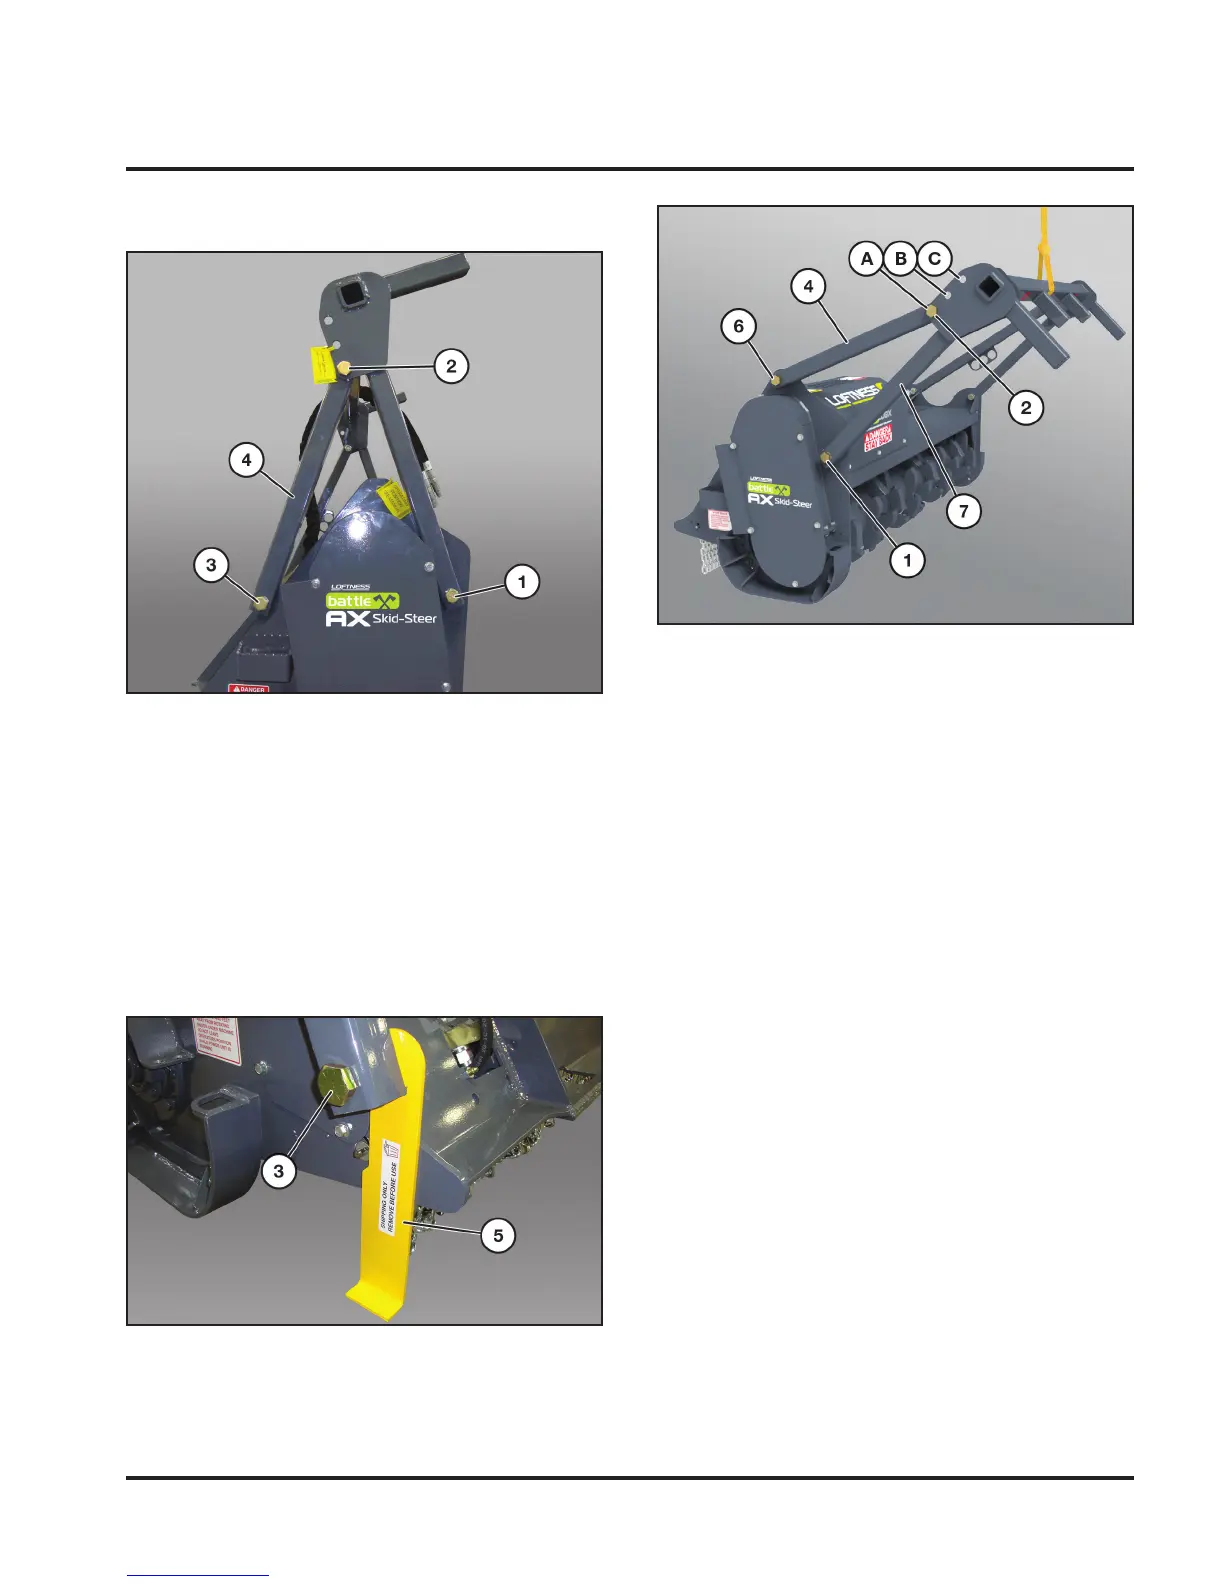
13Battle Ax Skid Loader OM
Move rear arms into position so hole in lower end of
rear arm (4) aligns with the top hole (6) of the side plates
(indicated by the shipping tag). Remove the shipping tag.
NOTE: The pusher bar is factory-set so the upper hole in
the rear arm (4) aligns with hole “A”. If a different
pusher bar angle is desired, remove nut and bolt
(2) from their current position while holding on to
the rear arm (4). Once the hardware is removed,
let the rear arm rest on pusher bar side assembly
(7).
Repeat procedure on other side.
Raise or lower the pusher bar and align the rear
arm (4) with the desired hole (A ,B, or C) on the
pusher bar side assembly.
Reinstall all hardware and tighten (1, 2, and 6) securely.
This must be done on both sides.
Set-up Instructions
Pusher Bar Assembly
NOTE: Assembling the pusher bar requires two people
or the use of an approved lifting device to
support the push bar as it is being adjusted.
Ensure pusher bar is being safely supported.
Loosen nuts (1 and 2).
Remove nut, bolt, and washer (3) securing the rear arm
(4) to the rear of the frame.
Repeat on other side.
NOTE: When removing the hardware (3) on the left
side, remove the shipping support stand (5) and
discard.