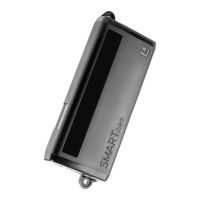
SMARTNEO - OPERATING MANUAL // PAGE 15
5.3 PROCESS
WARNING Moderate risk of serious injury through electric shocks
While using the SMARTneo-2G, liquid intrusion may lead to serious injury through
electric shocks.
• Ensure components are placed away from areas where spillages may occur
• Take care not to spill liquids onto or around the Control Box
NOTICE
LOGICDATA does not restrict customers to specic mounting positons for the SMARTneo-
2G. However, mounting the Control Box incorrectly may cause the Light Barrier colli-
sion detection system to malfunction. To ensure correct installation, all Table Tops must
be tested thoroughly (dierent materials, thicknesses, etc.). Additionally:
• Ensure there is no gap between the SMARTneo-2G and the Table Top at the mount-
ing points. The Control Box must be tightly secured with no movement possible.
• Ensure the mounting surface is smooth, at, and undamaged.
• Ensure the entire housing of the SMARTneo-2G is placed underneath the Table Top.
• Ensure the Control Box is installed and used within the ambient conditions speci-
ed in the product datasheet.
• If the Light Barrier function is not working properly, contact LOGICDATA.
NOTICE LOGICDATA recommends using the drilling template on page 13 to mark the positions
of the Mounting Screws. If you choose not to do so, pay close attention to the dimen-
sions of the SMARTneo-2G.
1. Position the SMARTneo-2G under the table top and mark the position of the drilling holes. If
necessary, use the Drilling Template on page 13 to help you.
2. Drill the holes into the table top.
3. Use the screwdriver and 2 Mounting Screws to attach the SMARTneo-2G to the Table Top at the
drilled holes.
NOTICE
The required tightening torque depends on the material of the Table Top. Do not exceed
2 Nm.
5.4 COMPLETING ASSEMBLY
After the SMARTneo-2G is attached to the Table Top, you must connect the Control Box to the system.
Instructions for this can be found in the next chapter.
 Loading...