1. Use the included mounting template
to mark holes for the screws.
2.
mounting screws. Insert the included
drywall anchors if you are installing the
camera in drywall.
3. Connect cables as shown in “Connecting
the camera” pg.10-11.
4. Feed the cable through the mounting
surface or cable notch and mount the
camera stand to the surface using the
included screws.
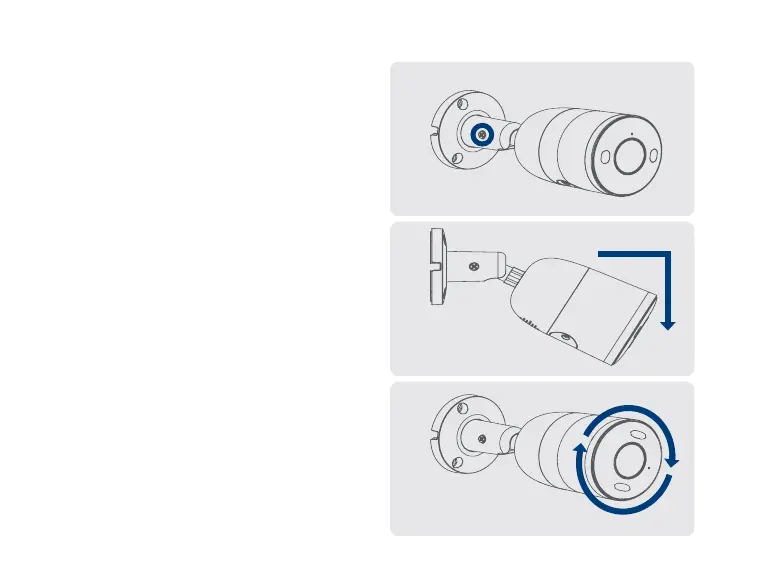
5. Use a Philips screwdriver to loosen the
adjustment screw and adjust the camera
position as needed (see Figure 2).
6. Tighten the adjustment screw to secure
the position.
7.
lens when your installation is complete.
Installing the camera
11
Adjustment screw
Tilt the camera on
the stand up to 90°
Twist the camera
around the stand 360°
Figure 2
10