Do you have a question about the Luxman L-505uX and is the answer not in the manual?
Proper placement guidelines to prevent malfunction and ensure efficient heat dissipation.
Turn off all devices before connecting. Ensure firm connections to prevent noise and damage.
Detects overcurrent, high temp, DC drift to protect amplifier/speakers; standby indicator blinks when active.
For any needed repairs or adjustments, consult your authorized dealer.
Controls power on/off; indicator shows operation status and blinks during muting or remote volume adjustment.
Adjusts the sound volume level, with no sound at minimum setting.
Adjusts sound volume balance between left and right channels.
Controls high-frequency range characteristics; center position provides flat response.
Controls low-frequency range characteristics; center position provides flat response.
Selects between speaker systems A, B, or both; requires 8 ohm minimum impedance for parallel use.
Connects speaker systems for L and R channels, requiring correct polarity connection.
Connect the supplied power cable to the unit's AC inlet and a wall outlet.
Use pin-plug cables to connect CD players, tuners, etc., to LINE-1 through LINE-4 inputs.
Connect left channel to LEFT SPEAKER, right channel to RIGHT SPEAKER, ensuring correct polarity.
Connect analog player output to PHONO terminal; ground wire may connect to GND terminal.
Connect recorder line output to MONITOR input; use REC OUT to send signals to recorder input.
Connect PRE OUT to power amp input or MAIN IN to external pre-amp output when using separately.
Turn on unit, select source, adjust volume, and operate tone/balance controls as needed.
Select source, set recording switch ON, play source, and set recorder to record.
Toggles the unit's power on and off remotely.
Selects audio input sources from the remote control.
Separates pre-amplifier and main-amplifier sections remotely.
Activates mute function, silencing sound output; press again to resume.
Bypasses tone and balance controls for purer sound; indicator lights when active.
Adjusts sound volume up or down using dedicated buttons on the remote.
| Power Output | 100W + 100W (8Ω) |
|---|---|
| Frequency Response | 20Hz-100kHz (+0, -3.0dB) |
| Signal to Noise Ratio | Phono (MM): 91dB, Phono (MC): 75dB, Line: 105dB |
| Weight | 22.5 kg |
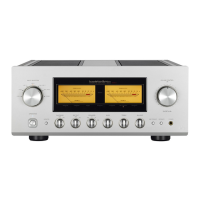
| Type | Integrated Amplifier |
| Input Sensitivity | 180mV (LINE) |
| Total Harmonic Distortion | 0.007% (1kHz) |
| Dimensions | 440 x 178 x 454 mm |
| Power Consumption | 270W |