Step 1
Install blade (Figure 2-11).
Figure 2-11
Step 2
Push the blade to the bottom of the blade holder. (Figure 2-12).
Figure 2-12
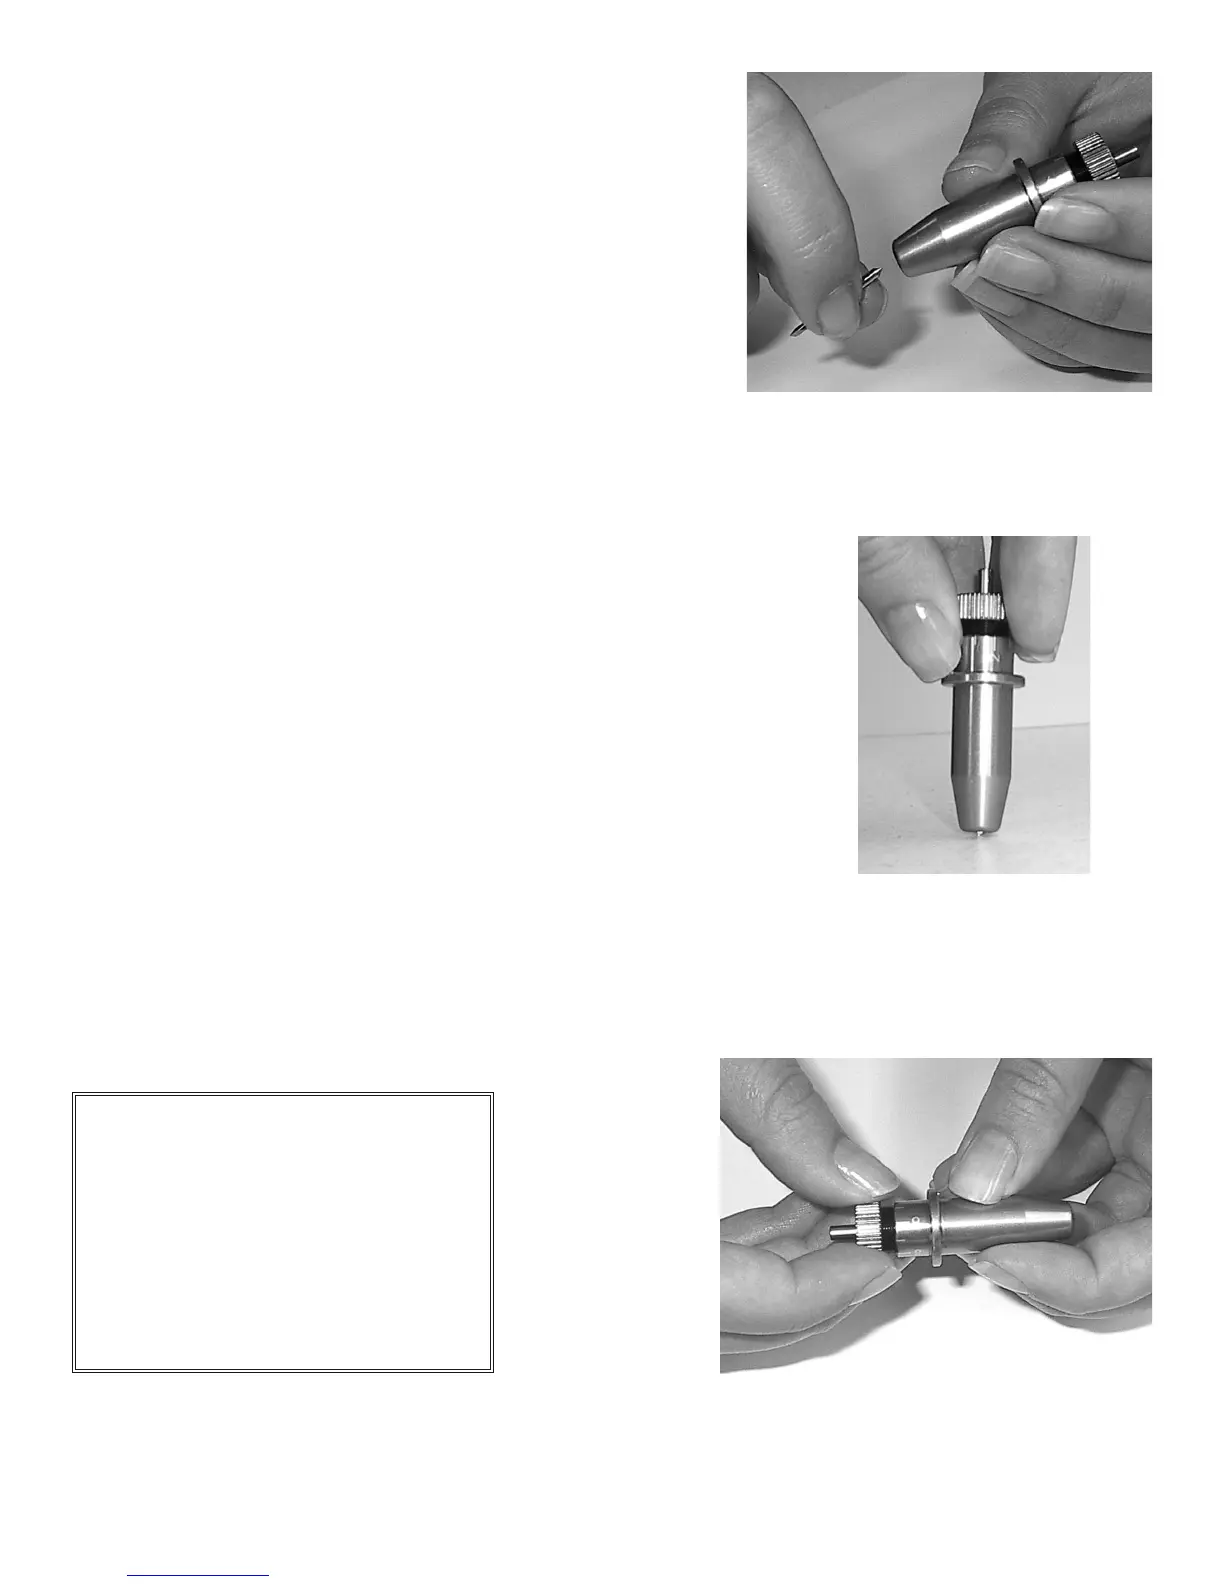
Step 3
Adjust the blade tip to suitable length by screwing “Blade tip adjustment screw” clockwise or count-clockwise.
(Figure 2-13).
Tips:
“The proper length” means the blade’s
length is adjusted 0.1mm more than
fi lm’s thickness. That is, if the thickness
of fi lm is 0.5mm, then blade’s length
is properly adjusted 0.6mm and it can
completely cut through the fi lm layer
yet avoid penetrating the backing.
Figure 2-13
2. Installation 2-7