35
Unit installation and configuration/Installation
Unit installation and configuration
The LCD display and the control button are sufcient for the basic settings of the unit.
Follow the steps indicated below to install the unit and congure the various parameters
accessible from the user interface on the LCD display.
Installation
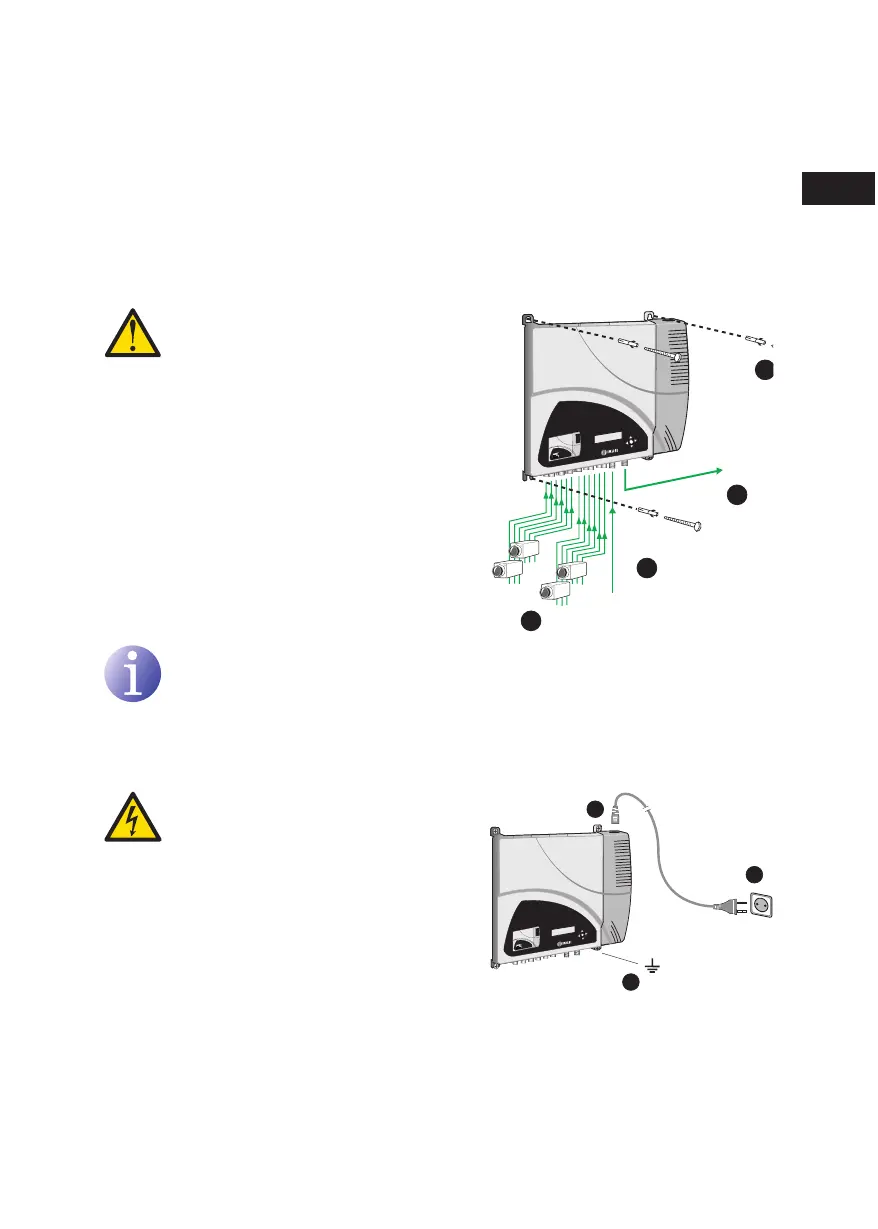
RISK OF DAMAGE TO THE UNIT
Mechanical handling of the unit while
it is switched on may lead to it being
damaged. Do not plug the unit into the
mains before or during installation.
1) Fit and tighten the bolts and plugs securing
the unit to the wall.
2) Connect AV inputs in the respective RCA
connectors.
3) You can also connect the coaxial cable from
the RF loopthrough input (connector F).
4) Connect the coaxial cable from the output to
the unit (connector F).
NOTE
Illustration above only applies to the MAC 401 model.
For MAC 201 model only AV1 and AV2 inputs are available.
Power supply connection
DANGER OF DEATH OR INJURY
Incorrect unit power connection may
cause an electric shock. Follow the
steps below for the electrical installation
of the unit.
1) Connect the earth cable.
2) Connect the power plug to the unit mains
connector.
3) Connect the power plug to the mains socket.
2
1
TV (loopthrough)
TV+AV1+AV2+AV3+AV4
network
4
3
video 1
audio L1
audio R1
video 2
audio L2
audio R2
video 3
audio L3
audio R3
video 4
audio L4
audio R4
en