5. It is critical to ensure that the hardware is L9.
Verify as follows:
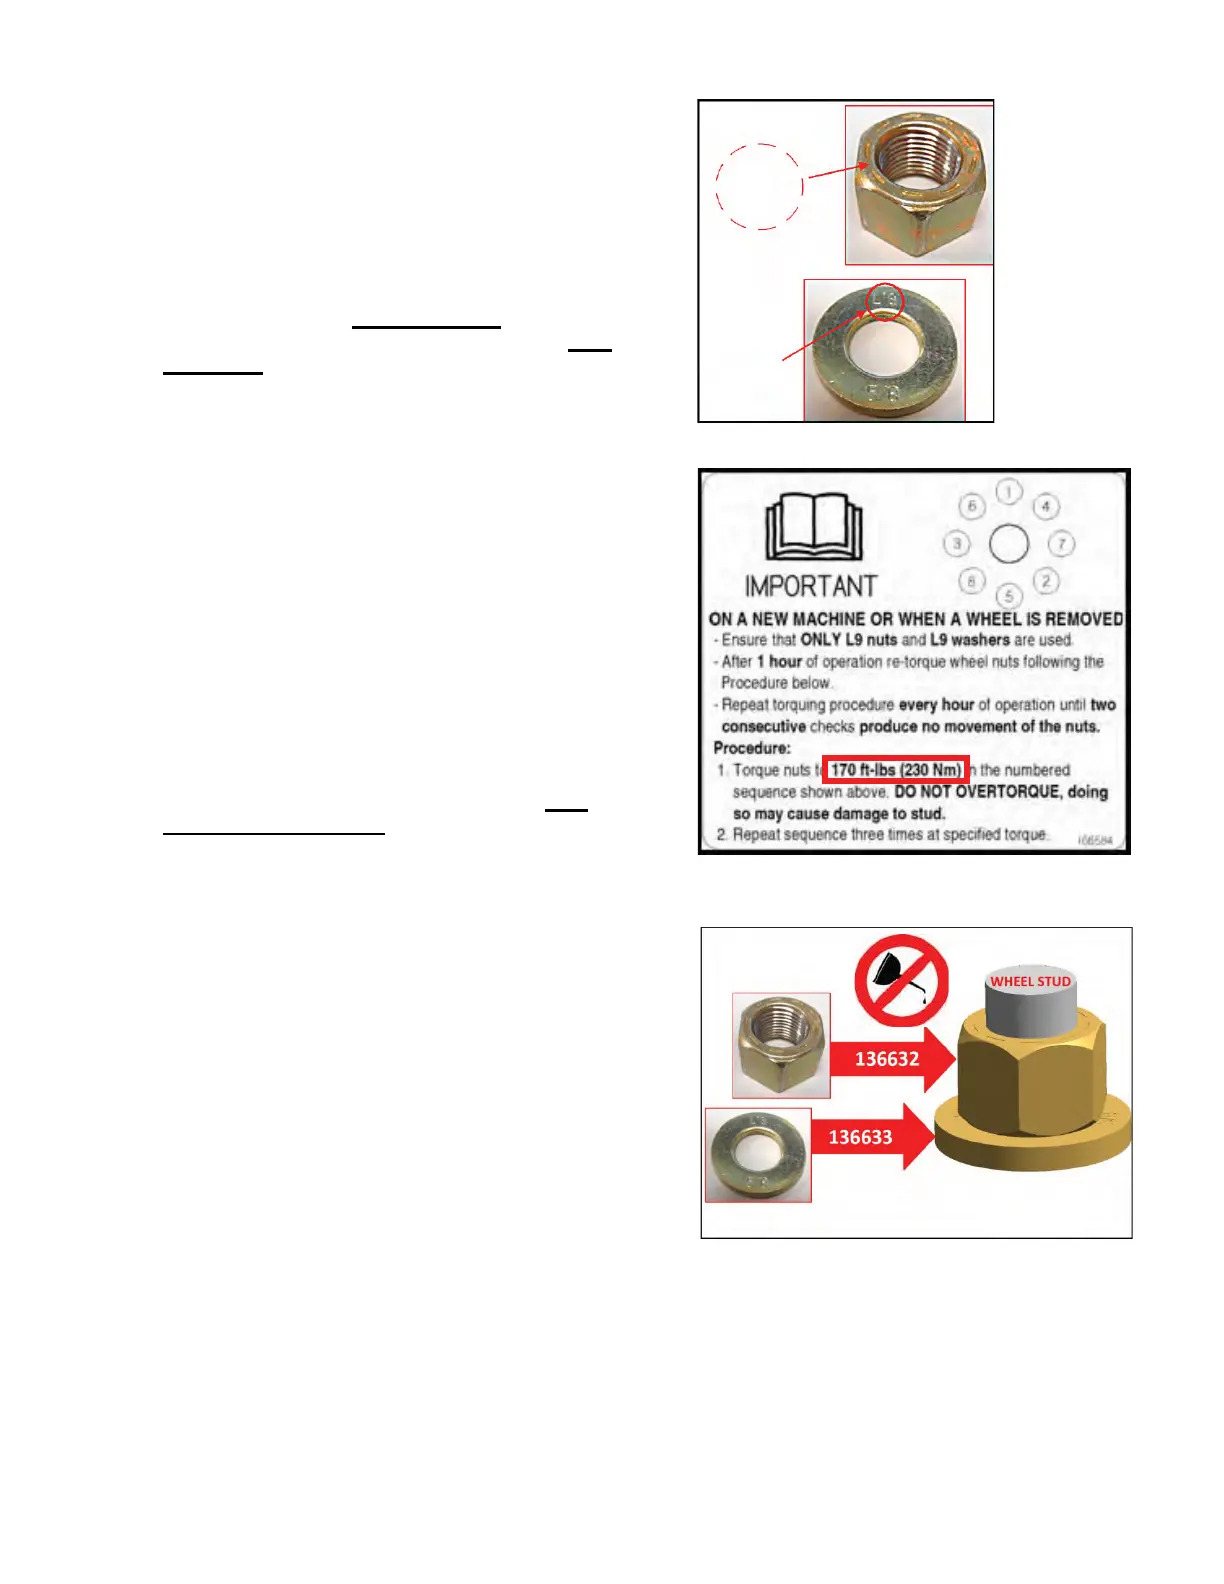
- Verify nut is L9 by ensuring it has 9 marks on one
side (See Figure 6)
- Verify washer is L9 by ensuring it has “L9” stamped
on one side (see Figure 6)
6. Mark each wheel stud at the 12 o’clock position.
Remove the old nuts ONE AT A TIME
and replace
with new washer and nut as per Step 7 and 8 ONE
AT A TIME in the numbered sequence shown on the
new drive wheel decal (Figure 7).
Check to see if the mark on the stud moves when the
nut is being removed. If the mark and stud are
moving, replace the wheel bolt.
7. Inspect the threads on each stud for damage. Spin on
nut only, by hand to check entire thread length to the
wheel rim. Remove nut, If thread damage is evident,
replace the wheel bolt.
For Auburn Gear drive wheels, use MD #49880
Wheel Bolt 5/8”NF x 60LG.
8. Inspect wheel bolt hole on the rim (that hole is
concentric around bolt) to see if there is any
elongation or wallowing out or other obvious damage.
If there is no damage replace old nut with the new
hardened washer and L9 nut. Thread the nut on using
hand tools only until they meet the washer. Nut
should be installed dry. Do not lubricate threads
with oil or products such as Never Seez®.
Tighten to 170 ft-lbs (230 Nm).
9. After inspecting wheel bolt holes, if multiple holes are
damaged this is an indication wheel bolt clamping
force was compromised. Replace the wheel rim and
all 8 wheel bolts. When (if) replacing wheel bolts, add
a couple of drops of a retaining compound such as
Loctite® 609
TM
to the knurled shoulder only, of the
new wheel bolt. Insert bolt till knurled shoulder
engages power wheel bolt hole engaging previous
knurling marks. Tap bolt in to seat head flush with
hub.
10. Along with new L9 hardware, it is important t
o adhere
to the new torque procedure as shown on the new
decal in Figure 7.
After all nuts are replaced, re-torque the new nuts to
170 ft-lbs (230 Nm) in the numbered sequence
shown on the decal.
DO NOT OVERTORQUE. Doing so may cause
damage to the stud.
Figure 6 – Nut And Washer Identification
Figure 7 – New Drive Wheel Decal With New
Torque Specification
Figure 8 – New L9 Nut And Washer
Form 169847 Revision A Pa
e 3 of 4