Initial Calibration Sequence
In the MAG-ic Probe software, Click on the Port Selection and Re-calibration Menu and select Serial
Port
Ÿ Select or type the correct COM Port # and click OK. The Green light on the top-right of the monitor
should light and the calibration messages will appear in the middle of the screen.
Ÿ If you should exceed the measurement range of the selected magnet, the device will display an “Out of
Range” message.
Ÿ Your MAG-ic Probe is now calibrated and ready for measurement.
Once you have established the correct COM port number and have typed that into the Serial
Connection Settings box, you are now ready to do some measuring using the MAG-ic Probe
Software. Note that the COM port information should not change and once you have it entered
you can simply follow the steps below.
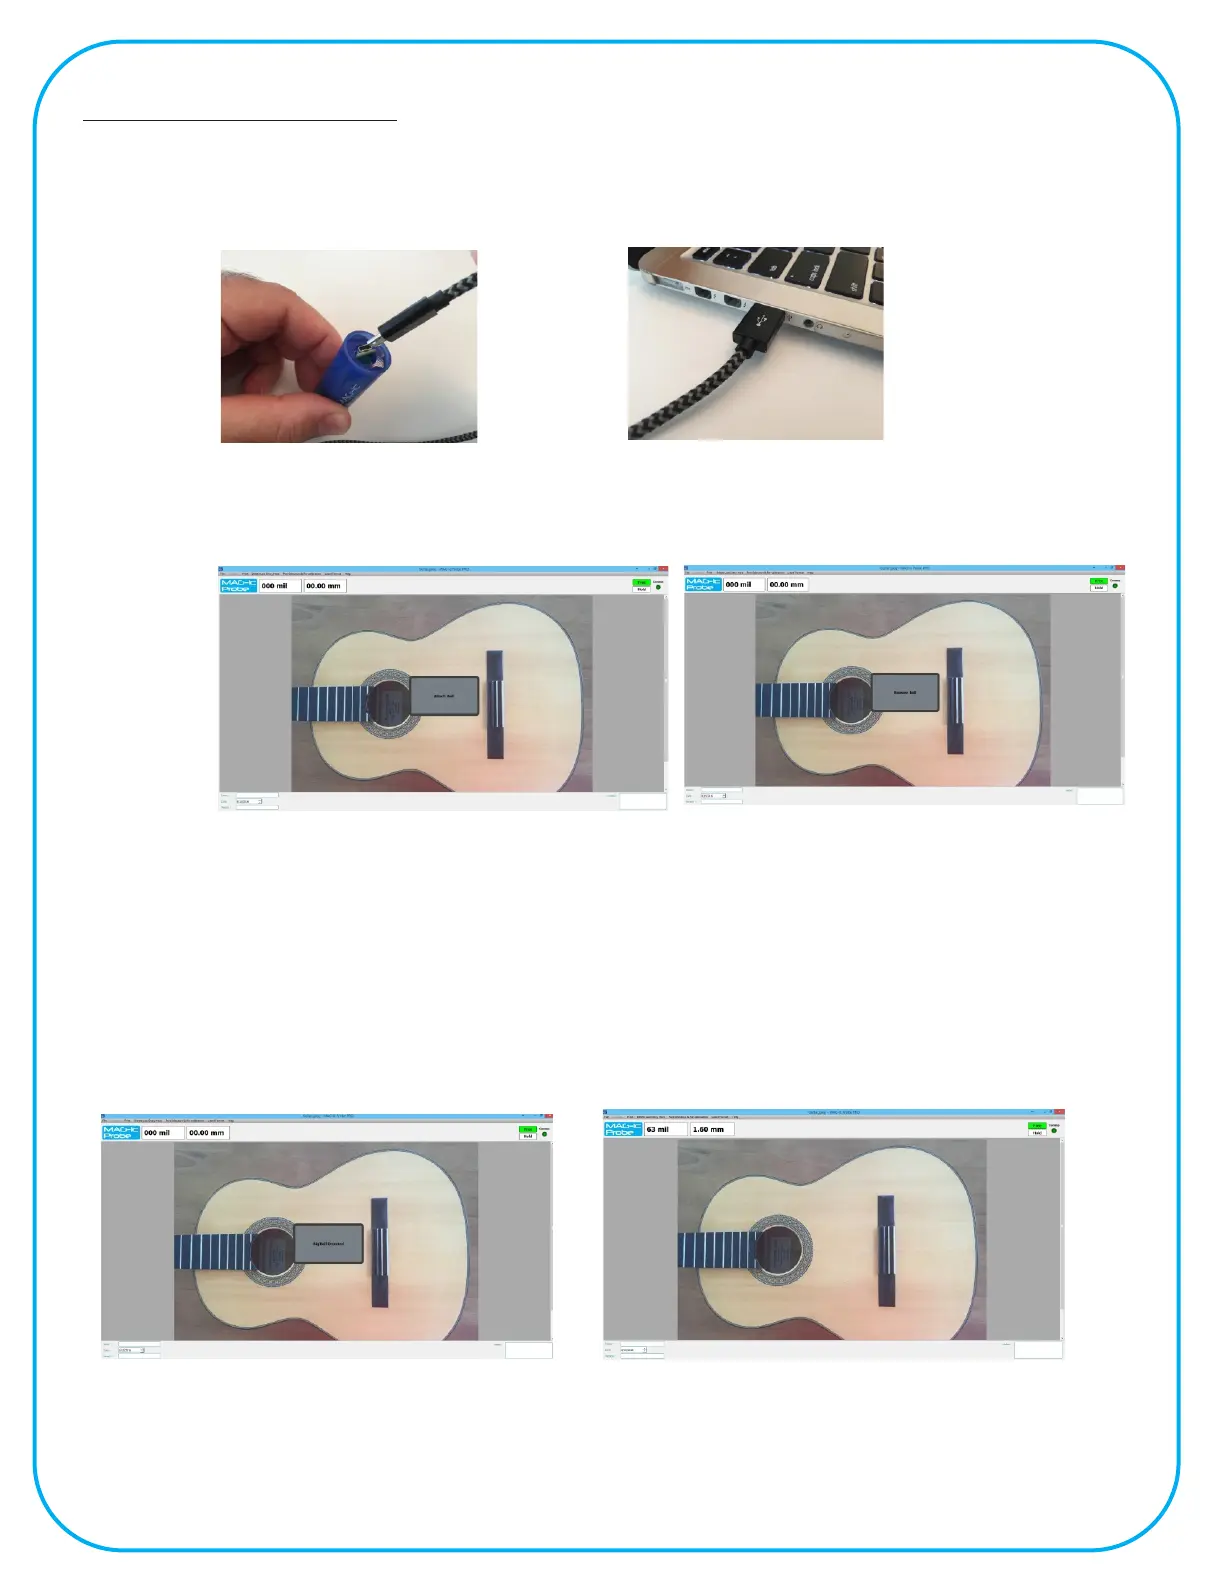
• Start without the Target magnet attached - If you missed the previous messages, the sequence should
be paused at “ATTACH BALL”
• Once you attach the target magnet to the probe, then 8 second countdown will commence and then
you will be asked to “REMOVE BALL”. Please move the magnet at least 2 ft away from the probe.
• This will initiate another 8 second countdown which should then successfully calibrate the MAG-ic
Probe.
• The display message will identify which target magnet has been detected and then the sequence is
complete. Place the magnet on the probe and the measurement in the top-left of the display should
show 0.00 or the current measurement.
8
For instructions on the MAG-ic Probe Software, please follow the tutorial videos
on the SOFTWARE page at www.magicprobe.net
 Loading...