Magstim Rapid²
Operating Manual
© The Magstim Company Limited 46 MOP03-EN-03
5.3 Voltage Selection and Fuse Rating
The Magstim Rapid
2
may be operated from supplies in the range of 115V ± 10% ~ 60Hz, 230V ± 10%
~ 50Hz and 240V ± 10% ~ 60Hz. The voltage selector on the rear panel of the Main Frame and if
relevant, the Magstim Plus
1
along with the associated fuses must correspond to the supply voltage as
indicated in the table below. The PSU, however, is not voltage selectable and is manufactured as
either a 230V (240V) ± 10% unit, or a 115V ± 10% unit. The two are not interchangeable.
Magstim
Plus
1
Fuse
Rating
T denotes timed or antisurge fuses. Fast acting fuses are not recommended.
H denotes high breaking capacity (ceramic fuse).
Note: Only replace fuses with those of the correct rating, and only operate the instrument with the
voltage selector set at the appropriate voltage. Failure to do so may cause serious damage to the
device(s).
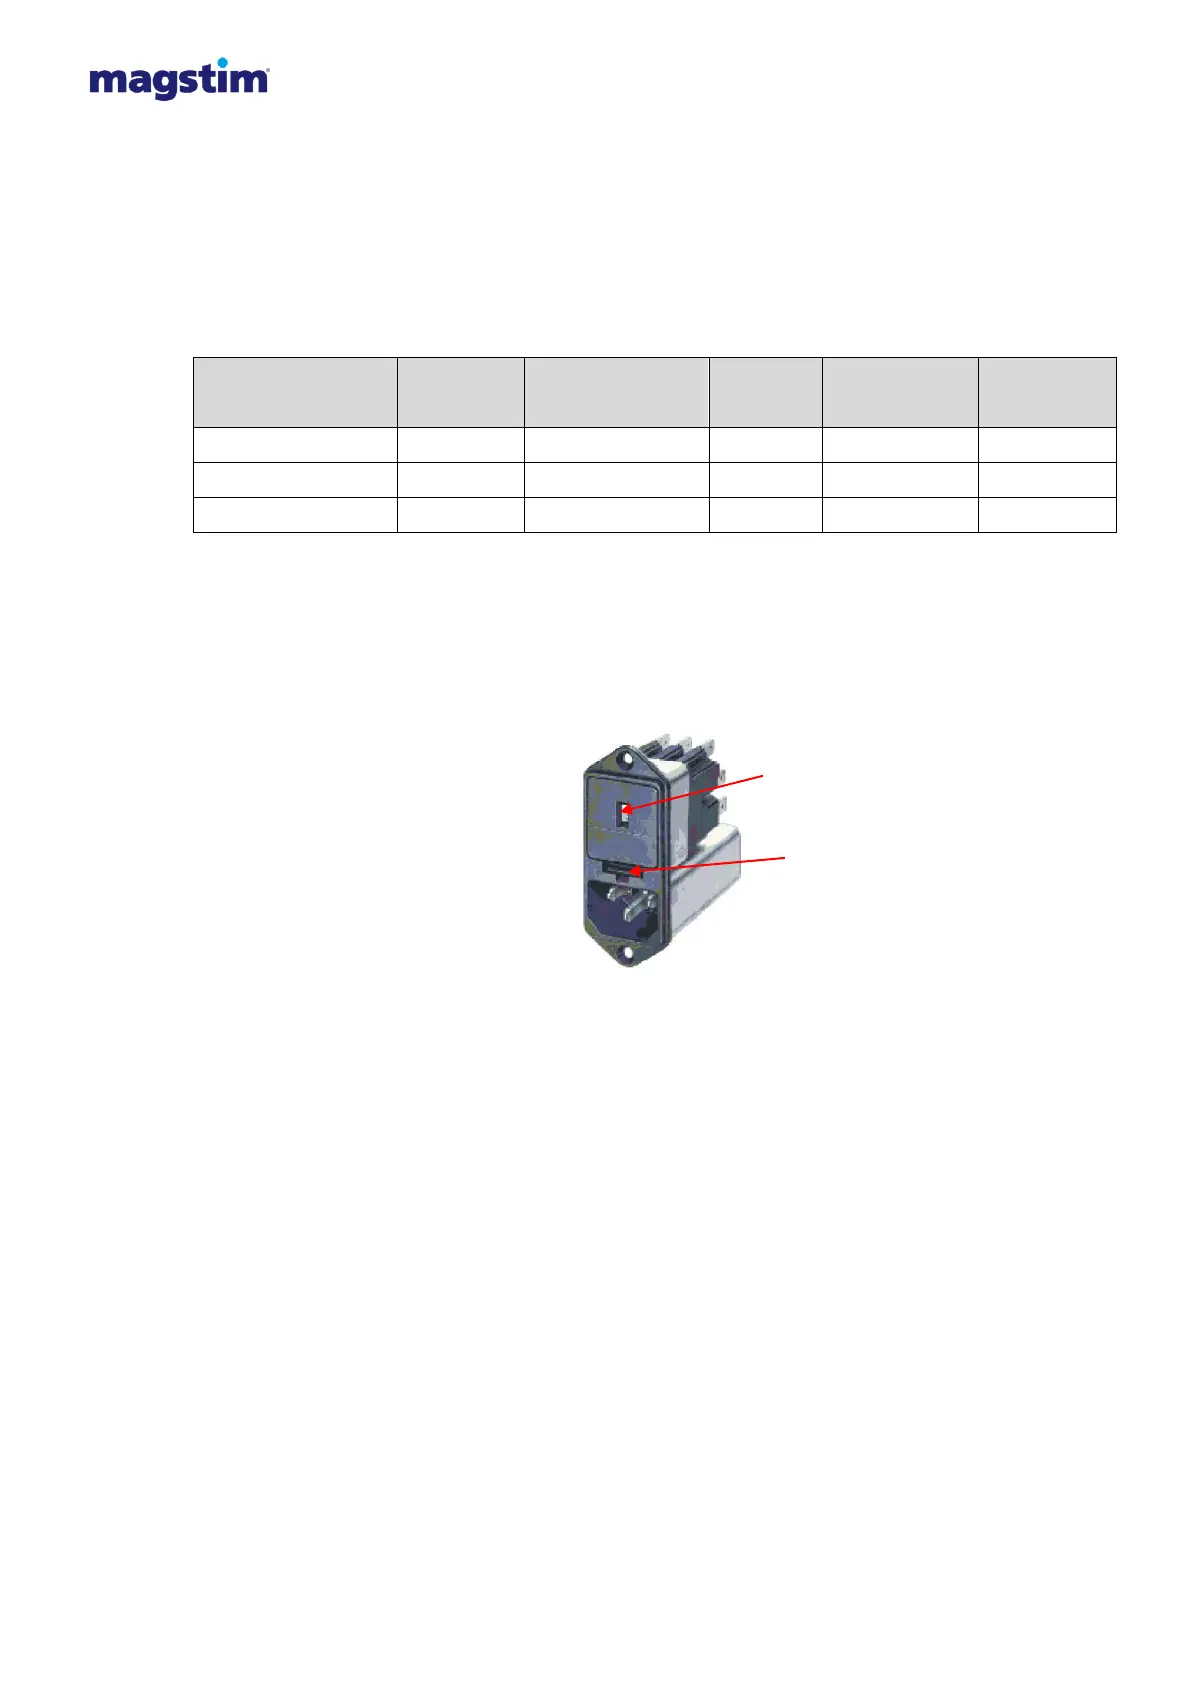
Figure 5.2: Power Entry Module
5.3.1 Fuse Replacement:
1. The Magstim Rapid² must be disconnected from the mains by disconnecting the power cord from
the PSU.
2. Insert the tip of a small blade screwdriver or similar tool into the slot (2) (refer to diagram 5.2) and
gently lever up the retaining lip of the fuse holder. The fuse holder will then slide out.
3. Replace the damaged fuse(s) with one of the correct rating (See above to ensure the correct fuse
is replaced) and locate and push home the tray ensuring the retaining lip clicks into place.
5.3.2 Changing the Voltage Selector Setting:
1. The Magstim Rapid² must be disconnected from the mains by disconnecting the power cord from
the PSU.
2. Remove the fuse tray as instructed above,
3. Using a pair of narrow nosed pliers, grip the voltage selector unit on one of the metal connection
plates and remove it from the Power Entry Module.
 Loading...