21
MAINTENANCE
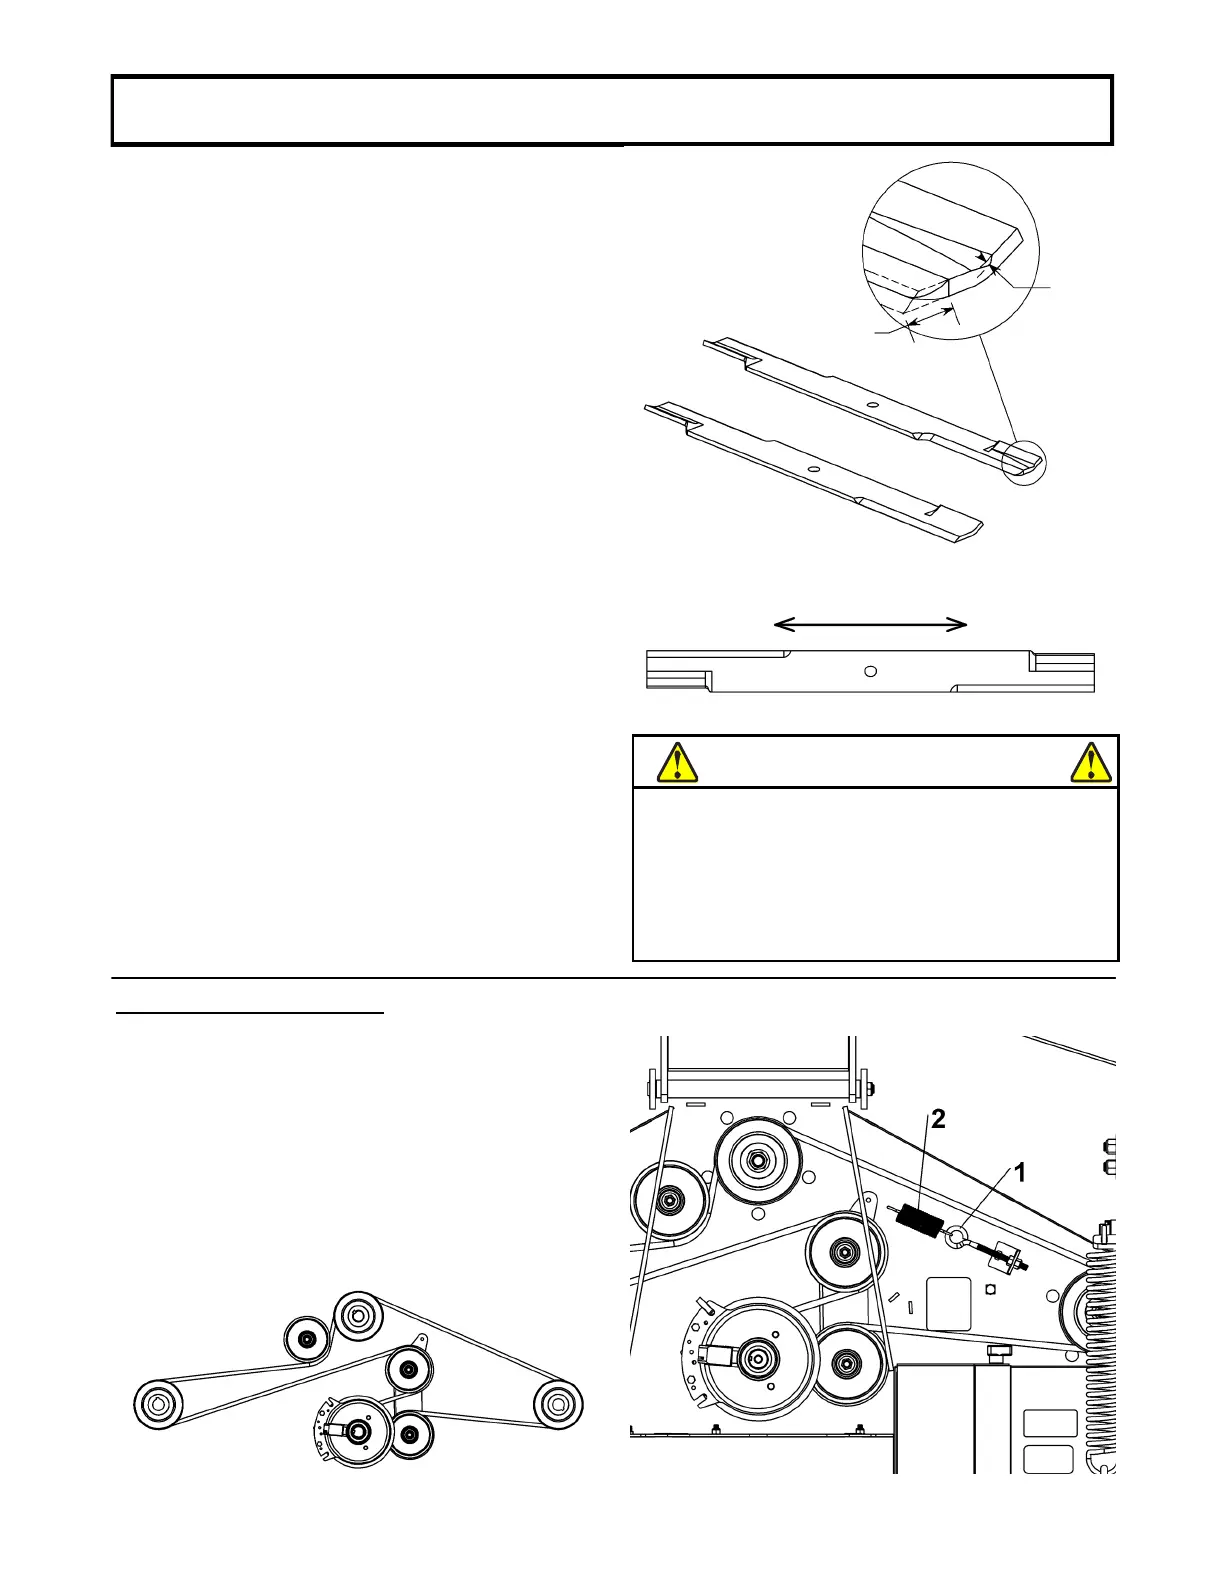
3. Check blade balance by positioning the blade
horizontally on a nail or on shaft in the central
hole. If either end of the blade points downward,
grind(remove)somematerialoffthatenduntilthe
blade balances. The blade is properly balanced
when neither ends drop. Blade balance is
generally maintained by removing an equal
amount of material from each end of the blade
whensharpening.
IMPORTANT:The blade must not be sharpened
beyond 3/8’’ (B dimension) and the blade’s most
worn out point must not be thinner than 5/32’’ (A
dimension).
IMPORTANT: Always install blade with the cutting
edgefacingthedirectionofrotationandthewingtips
pointingup.
4.Installthebladewiththewingtipspointingtowards
the bottom of the deck. Reinstall the blade
reversing the installation steps. Makesureto use
the appropriate torque for the bolt (see torque
specification table). Put thread locking sealant on
the nylon flange lock nuts, 5/8’ once installed.
Furthermore,useabrandnewnyloninsertflange
nuteachtime.
Newblade
Wornoutblade
A
B
Nailorshaft
HORIZONTAL
FigureA FigureB
V-BELTINSTALLATION
Illustration (figure A) is alsoonthe labels located on
thetopofthemowerdeck.
Removerighthandandlefthandbeltcovers.
(Figure B) Disengage belt tension by loosening
eyebolt(item1)andremovingthespring(item2).
InstallthebeltasshowninfigureA.
Reinstallthebelttensionerandapplyappropriate
tension.
Reinstall all beltcovers andsecure in placewith
hardware.
DANGER
Wheninstallingtheblademakesuretotightenatthe
specified torque. Always use thread locking sealant
andchangethelocknuteverytimeanutisloosened.
Always install all the parts in the same order as
shown.Notfollowingtheseinstructioncancausethe
blade to fall from the spindle causing damage,
injuriesordeath.