MAKERBOT SKETCH MANUAL
PAGE 25
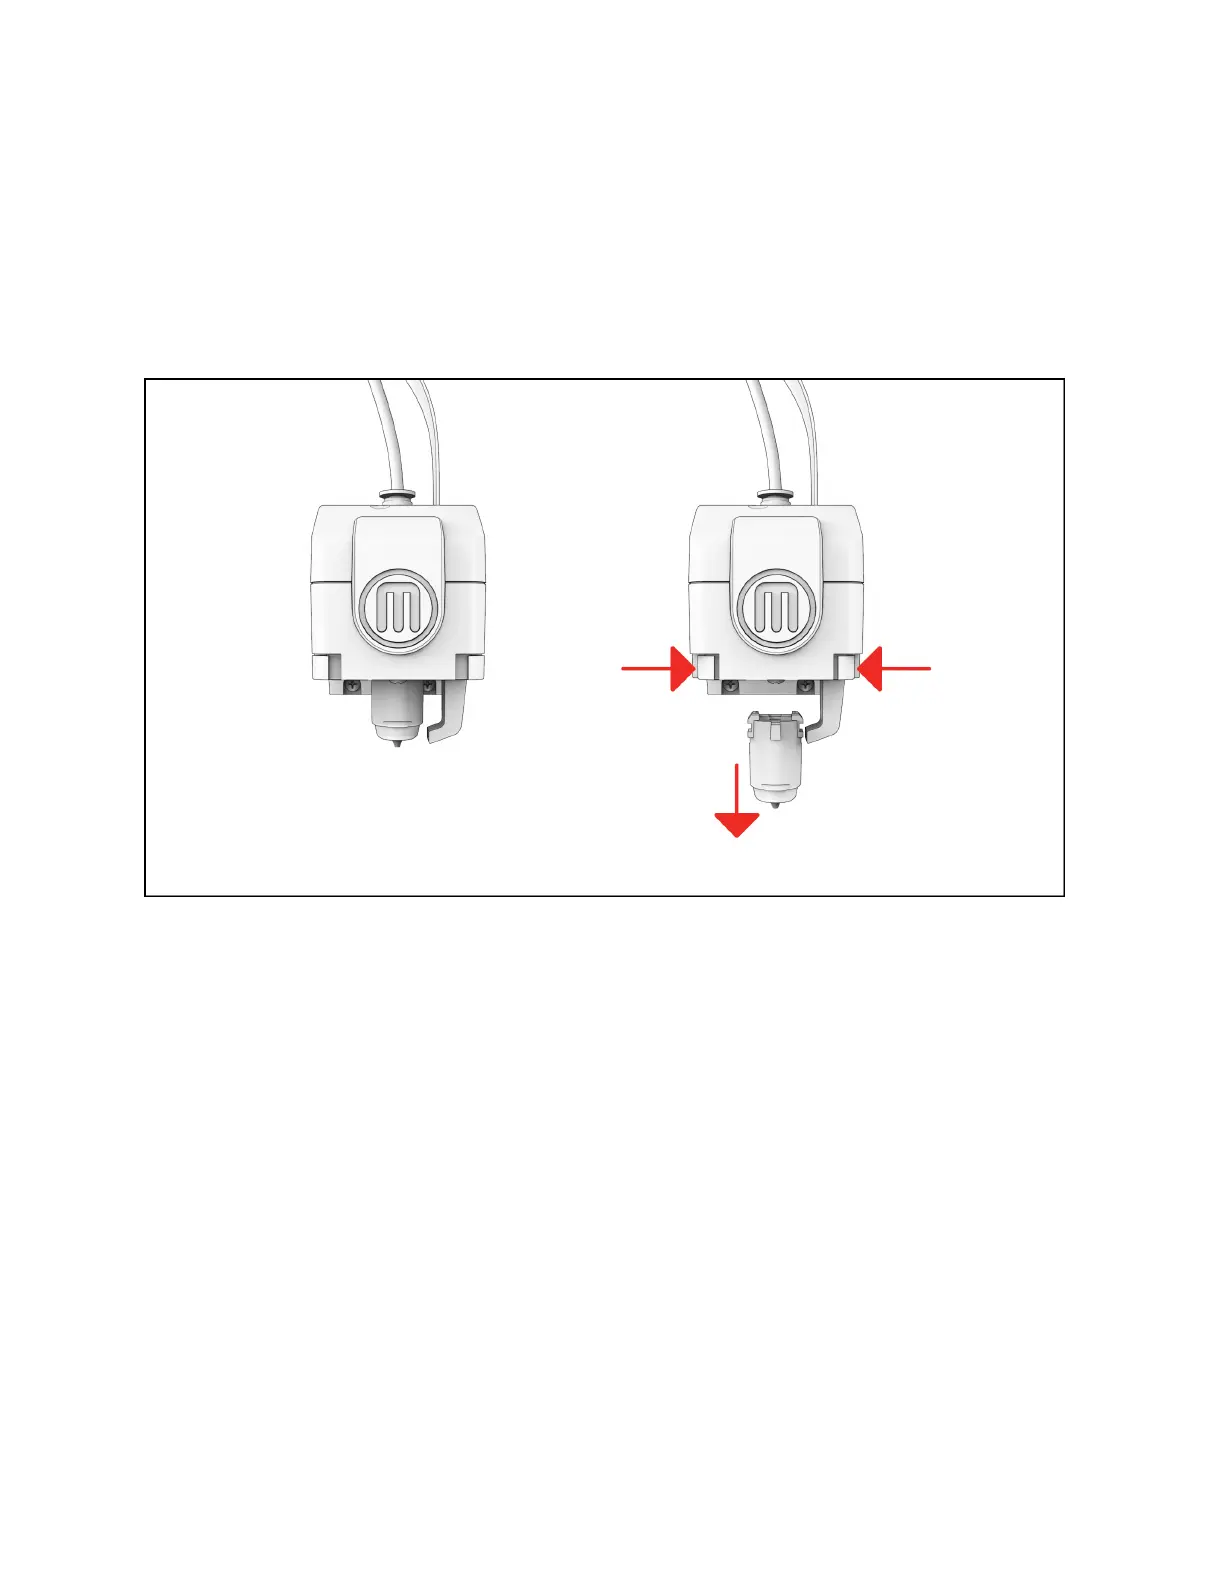
REMOVING THE EXTRUDER
The extruder can be removed with material still inside (it will have to be cut from the spool). We recommend
unloading the material before removal. Be sure to power o the printer before removing or installing an extruder. To
remove or swap the extruder follow the instructions below.
1. While pressing the le and right clips pull down on the extruder until it releases. Depending on your printer this may
require a more secure grip on the extruder. Gloves can be used to prevent pinching.
2. If material is still inside the extruder, pull the extruder down and leave several inches of material still attached aer
cutting it. Then rotate the material spool in order for end of the material to be back in the guide tube.
INSTALLING A NEW EXTRUDER
1. Be sure the printer is powered o, then push the new extruder into place until you hear a click.
2. Check that the extruder detachment buttons are reset.
3. You may need to calibrate the extruder.