Do you have a question about the Making Memories Slice and is the answer not in the manual?
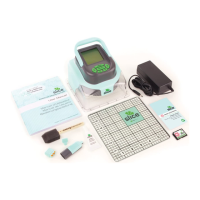
Instructions for charging the Slice™ Cordless Design Cutter™ using the power adapter and outlet.
Guidance on applying and drying repositionable adhesive on the glass cutting mat for optimal use.
Steps to properly place and flatten paper on the cutting mat for accurate cutting.
Procedure for powering on the Slice™ design cutter via the back panel button.
Instructions for inserting and removing design cards into the unit's back slot.
Process to home the Slice™ blade for initial use, ensuring correct starting position.
Guide on navigating menus to select designs, categories, and adjust size on the Slice™ unit.
Steps for initiating and holding the unit during the cutting process and completion.
Instructions on how to gently peel the cut paper design from the cutting mat.
Detailed steps and illustrations for safely removing and replacing the blade on the Slice™ unit.
Guidelines for cleaning the exterior of the Slice™ unit, specifying safe cleaning agents.
Instructions for maintaining the glass cutting mat, including adhesive and cleaning methods.
Supplementary advice for operating and storing the Slice™ unit safely and effectively.
| Brand | Making Memories |
|---|---|
| Product Name | Slice |
| Power Source | AC adapter |
| Category | Cutter |
| Compatible Materials | Paper, cardstock, vinyl, fabric, thin chipboard |
| Blade Types | Standard blade |