Do you have a question about the Makita DTD129 and is the answer not in the manual?
Makita's declaration that the Cordless Impact Driver conforms to EU Directives.
Precautions regarding electrical hazards and power tool connections.
Advice on operator alertness, PPE, and preventing accidents.
Crucial safety guidelines for handling and using battery cartridges.
Step-by-step guide for inserting and removing bits and sockets.
Important cautions to follow before performing tool inspection or maintenance.
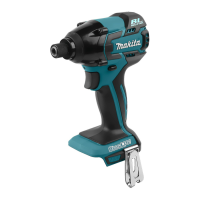
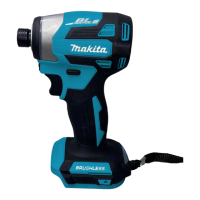
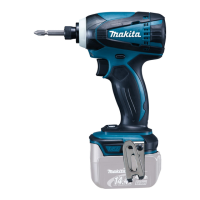
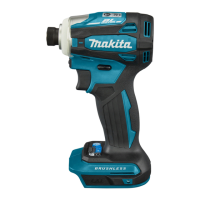
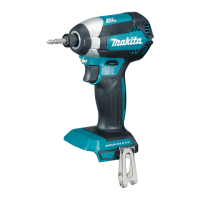
The Makita DTD129 is a cordless impact driver designed for screw driving in wood, metal, and plastic. This instruction manual provides essential information for safe and effective operation, including functional descriptions, usage features, and maintenance guidelines.
The impact driver is equipped with a reversing switch to change the direction of rotation. Depressing the switch lever from the 'A' side enables clockwise rotation, while depressing it from the 'B' side enables counterclockwise rotation. When the reversing switch lever is in the neutral position, the switch trigger cannot be pulled, preventing unintentional starting. Always check the direction of rotation before operation and ensure the tool comes to a complete stop before changing direction to avoid damage. For safety, set the reversing switch lever to the neutral position when not operating the tool.
The tool features a switch trigger for operation. To start the tool, simply pull the switch trigger. The tool speed increases with increasing pressure on the trigger. Releasing the switch trigger stops the tool. Before inserting the battery cartridge, always verify that the switch trigger actuates properly and returns to the "OFF" position when released.
For illumination, the tool includes a lamp that lights up when the switch trigger is pulled and remains lit as long as the trigger is held. The lamp goes out shortly after the trigger is released. When cleaning the lamp lens, use a dry cloth and avoid scratching it, as this may reduce illumination. Do not look directly into the light source.
The tool also incorporates a hook, which can be installed on either side of the tool housing using a screw. This hook is convenient for temporarily hanging the tool during use.
Always ensure the tool is switched off before installing or removing the battery cartridge. Hold both the tool and the battery cartridge firmly to prevent them from slipping, which could cause damage or personal injury. To remove the battery cartridge, slide it from the tool while simultaneously sliding the button on the front of the cartridge. For installation, align the tongue on the battery cartridge with the groove in the housing and slide it into place until it locks with a click. If the red indicator on the upper side of the button is visible, the cartridge is not fully locked. Always ensure the red indicator cannot be seen to prevent accidental detachment and potential injury. Do not force the battery cartridge; if it doesn't slide in easily, it's likely not aligned correctly.
Lithium-ion batteries with a star marking are equipped with a protection system that automatically cuts off power to the tool to extend battery life. The tool may stop operation under certain conditions:
Press the check button on the battery cartridge to activate the indicator lamps, which will light up for a few seconds to show the remaining battery capacity. The indication may vary slightly depending on usage conditions and ambient temperature.
For tools with a deep bit hole, pull the sleeve in the direction of the arrow, insert the bit as far as it will go, and then release the sleeve to secure it. For certain types of bits (A=17mm, B=14mm), this procedure is sufficient. For other types (A=12mm, B=9mm), a bit-piece must also be inserted into the sleeve with its pointed end facing in, in addition to the standard procedure. Only use bits with the inserting portion shown in the figure. For tools with a shallow bit hole, only bits with A=12mm or B=9mm dimensions should be used, following the standard installation procedure without a bit-piece. To remove a bit, pull the sleeve in the direction of the arrow and pull the bit out. Ensure the bit is inserted deeply enough for the sleeve to return to its original position and secure the bit firmly. If it comes out, do not use it.
Hold the tool firmly and position the driver bit point in the screw head. Apply forward pressure to the tool to prevent the bit from slipping, then turn the tool on. Do not cover the vents during operation, as this can lead to overheating and tool damage. The proper fastening torque depends on the screw/bolt type and size, as well as the workpiece material. When fastening M8 or smaller screws, select an appropriate impact force and carefully adjust pressure on the switch trigger to avoid damaging the screw. Hold the tool straight at the screw. Over-tightening can overstress, strip, or damage the screw or driver bit. Always perform a test operation to determine the correct fastening time for your specific screw before starting the job.
Always ensure the tool is switched off and the battery cartridge is removed before performing any inspection or maintenance, except for troubleshooting related to the lamp. Never use gasoline, benzine, thinner, alcohol, or similar substances, as they can cause discoloration, deformation, or cracks. To maintain the safety and reliability of the product, all repairs, maintenance, or adjustments should be performed by Makita Authorized Service Centers, using only genuine Makita replacement parts.
| Idle speed (max) | 2500 RPM |
|---|---|
| Screw diameter (max) | 14 mm |
| Maximum torque (hard applications) | 160 N⋅m |
| Reverse | Yes |
| Product color | Black, Blue |
| Power source | Battery |
| Battery voltage | 18 V |
| Weight | 1300 g |
|---|