Do you have a question about the Makita HP1500 and is the answer not in the manual?
Technical specifications for drilling capacities in concrete, steel, and wood.
Specifies the rotational speed of the drill when not under load.
Indicates the impact rate for hammer drilling operations.
The total physical length of the hammer drill.
The weight of the tool without accessories.
Guidelines for maintaining a safe working environment and preventing accidents.
Precautions related to the tool's electrical components and power source.
Rules to protect the operator from injury during use.
Instructions on how to use the tool correctly and safely for various tasks.
Guidelines for keeping the tool in good condition and storing it properly.
Emphasizes that repairs must be done by qualified personnel.
Guidance on choosing the correct gauge extension cord for the tool.
Specific safety measures for operating the hammer drill.
Warnings about leaving the tool running, touching hot parts, and material hazards.
A reminder to keep the manual for future reference.
Explanation of how the trigger switch and lock button function.
Details on how to change the drill's rotation direction.
How to switch between hammer drilling and rotation-only modes.
Instructions for attaching the auxiliary handle for better control.
Steps for inserting and removing drill bits for the HP1501 model.
Steps for inserting and removing drill bits for the HP1500 model using a chuck key.
How to set and use the depth gauge for consistent hole depth.
Guidance on performing hammer drilling tasks, including safety cautions.
Instructions for using the optional blow-out bulb to clear debris.
General advice and cautions for drilling various materials.
Specific techniques and tips for drilling effectively in wood.
Techniques for drilling metal, including lubricant use and starting holes.
Guidelines for checking and maintaining the tool's condition.
List of compatible accessories and safety advice for their use.
A list of authorized service centers for tool repair.
Information on hazardous chemicals in dusts and protective measures.
Terms and conditions of the manufacturer's limited warranty.
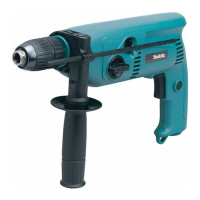
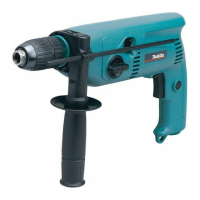
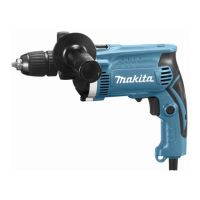
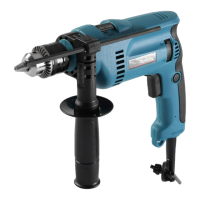
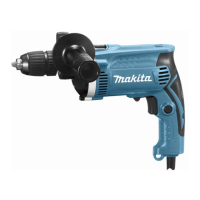
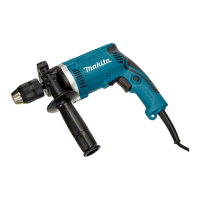
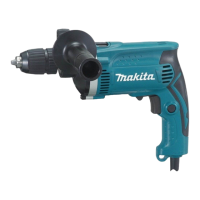
This document provides an instruction manual for the Makita Hammer Drill, models HP1500 and HP1501. It covers specifications, general and specific safety rules, functional descriptions, assembly, operation, maintenance, and accessories.
The Makita Hammer Drill is designed for drilling in various materials including concrete, steel, wood, metal, and plastic. It features an action mode changing button, allowing users to switch between "rotation with hammering" for concrete, granite, and tile, and "rotation only" for wood, metal, or plastic. The tool is equipped with a reversing switch to change the direction of rotation, which is useful for backing out stuck bits.
Both models, HP1500 and HP1501, share the following specifications:
Switch Action: The tool is started by pulling the switch trigger. Speed is increased by applying more pressure to the trigger. Releasing the trigger stops the tool. For continuous operation, the switch trigger can be pulled and then the lock button pushed in. To stop the tool from the locked position, the trigger must be pulled fully and then released. A caution is provided to ensure the switch trigger actuates properly and returns to the "OFF" position before plugging in the tool. Users are also warned to apply caution and maintain a firm grasp when the tool is locked in the "ON" position.
Reversing Switch Action: A reversing switch lever allows for changing the direction of rotation. Moving the lever to the "A" side enables clockwise rotation, while moving it to the "B" side enables counterclockwise rotation. It is crucial to check the direction of rotation before operation and to only use the reversing switch after the tool has come to a complete stop to prevent damage.
Selecting the Action Mode: The hammer drill has an action mode changing button. For "rotation with hammering," the button should be depressed fully from the side with the hammer symbol. For "rotation only," the button should be depressed fully from the side with the drill symbol. A caution emphasizes depressing the button all the way to the desired mode position, as operating the tool with the button halfway between symbols may cause damage.
Installing Side Grip (Auxiliary Handle): The side grip is essential for operating safety. It is installed on the tool barrel and tightened by turning clockwise. The grip can be swung 360 degrees to be secured at any position.
Installing or Removing Drill Bit:
Depth Gauge: A depth gauge is provided for drilling holes of uniform depth. It is inserted into a hole in the side grip after loosening the side grip. The gauge is adjusted to the desired depth, and the side grip is then tightened. Note that the depth gauge cannot be used if it strikes against the tool body.
Hammer Drilling Operation: When drilling in concrete, granite, or tile, the action mode changing button should be depressed to the hammer symbol for "rotation with hammering." A tungsten-carbide tipped bit must be used. Users are cautioned about the tremendous twisting force during hole break-through, especially when hitting reinforcing rods. The side grip (auxiliary handle) must always be used, and the tool held firmly with both hands to prevent loss of control and injury. Light pressure is recommended for best results, and the tool should not be forced. If the hole clogs with chips, the tool should be run at idle and the bit partially removed to clear debris.
Blow-out Bulb (Optional Accessory): After drilling, an optional blow-out bulb can be used to clean dust from the hole.
Drilling Operation (General): Excessive pressure will not speed up drilling and can damage the bit, decrease performance, and shorten tool life. Firmly holding the tool is critical during hole break-through. A stuck bit can be removed by setting the reversing switch to reverse rotation, but caution is advised as the bit may back out abruptly. Small workpieces should always be secured in a vise or similar device.
Drilling in Wood: For wood, the action mode should be set to "rotation only" (drill symbol). Wood drills with a guide screw are recommended as they pull the bit into the workpiece, making drilling easier.
Drilling in Metal: To prevent bit slipping, an indentation should be made with a center-punch and hammer at the drilling point. A cutting lubricant should be used for drilling metals, except for iron and brass, which should be drilled dry.
General Maintenance: Before any adjustments, accessory changes, or storage, the tool must be switched off and unplugged. This prevents accidental starting. Idle tools should be stored out of reach of children and untrained persons. Tools should be maintained with care, keeping cutting tools sharp and clean. Any misalignment, binding, breakage, or other conditions affecting operation should be serviced by qualified personnel before use.
Service: Tool service must be performed by qualified repair personnel using identical replacement parts, following instructions in the Maintenance section. Unauthorized parts or improper maintenance can lead to electric shock or injury.
Extension Cord: A proper extension cord must be used. It should be heavy enough to carry the product's current to avoid voltage drop and overheating. A table is provided to determine the minimum gauge for cords based on ampere rating and length.
Product Safety and Reliability: To maintain product safety and reliability, repairs, carbon brush inspection and replacement, and any other maintenance or adjustment should be performed by Makita Authorized or Factory Service Centers, using genuine Makita replacement parts.
The manual lists several recommended accessories and attachments for use with the Makita hammer drill:
Users are advised to contact their local Makita service center for assistance or more details regarding these accessories. The use of any other accessories or attachments might present a risk of injury.