8
7. DISASSEMBLY
7.1 CABINET DISASSEMBLY
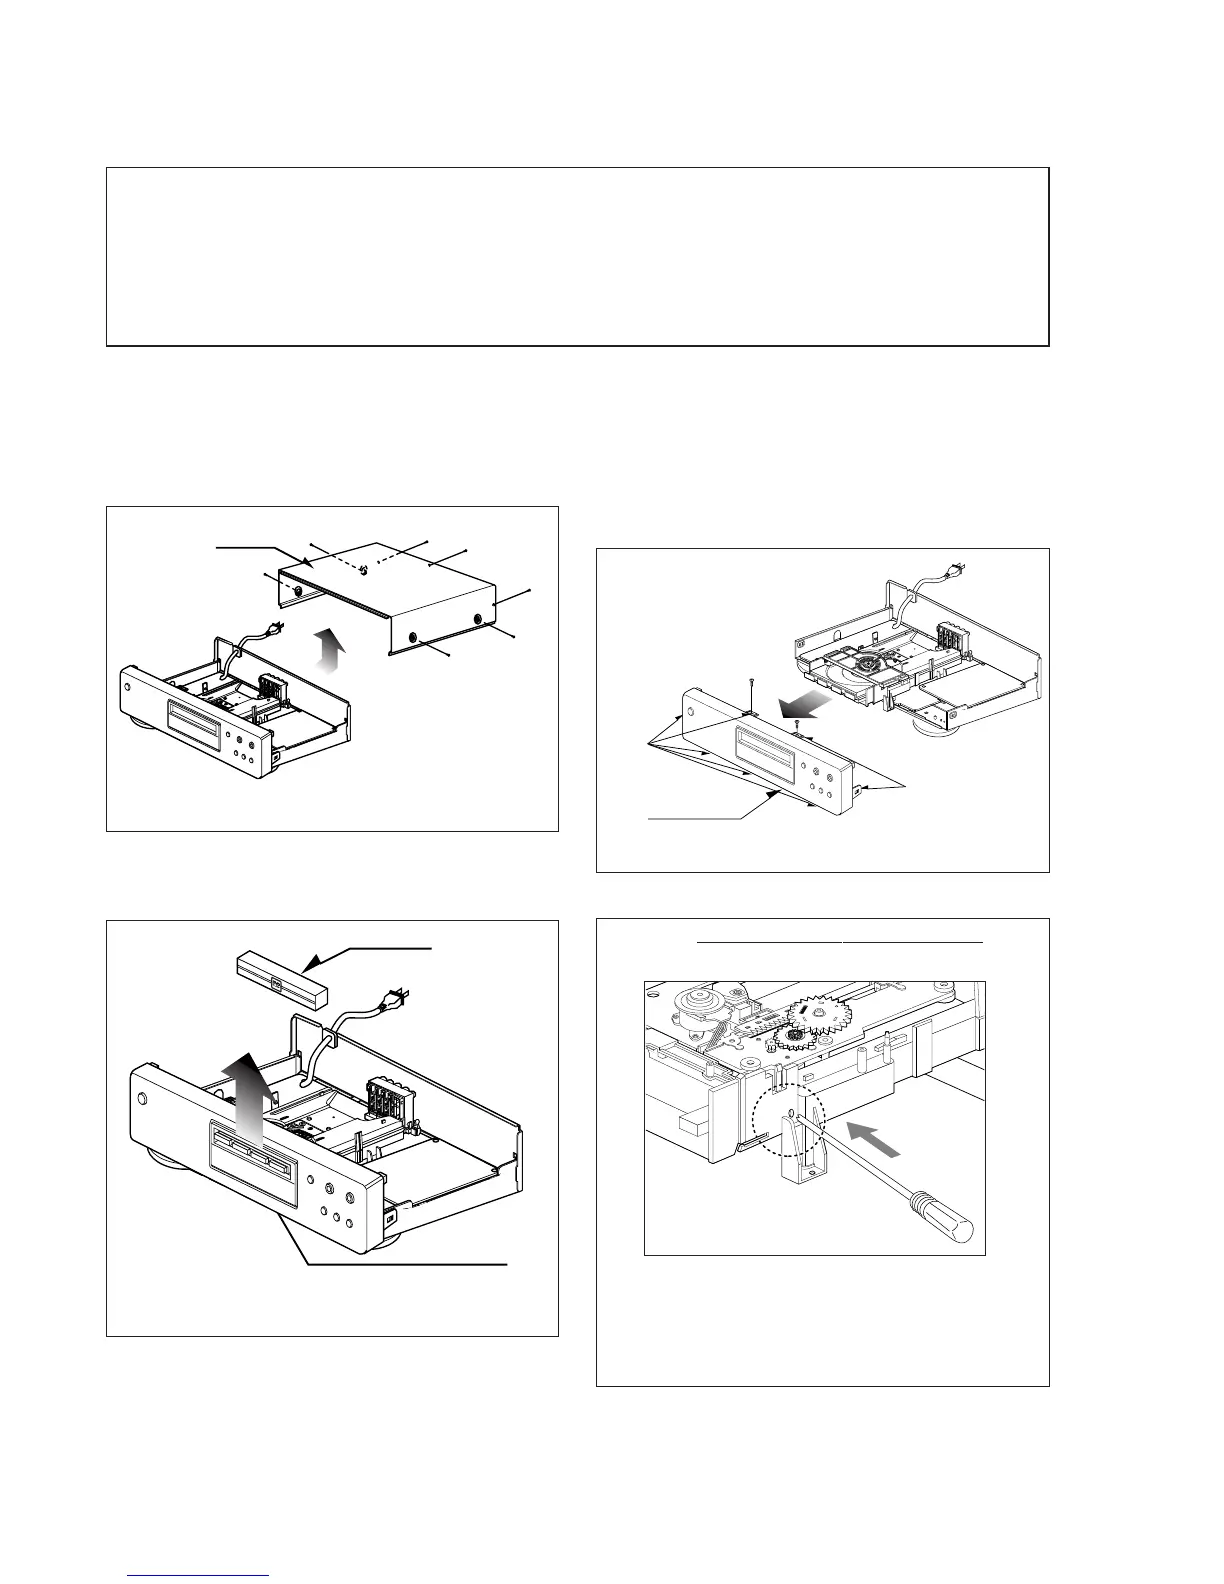
7.1.1 Top Case
1. Release 7 screws (A). (See Fig. 2-1)
2. Lift the top case with holding the back of it, and remove it
in the direction of the arrow
Top Case
(A)
(A)
(A)
(A)
(A)
(A)
(A)
Fig. 2-1
7.1.2 Tray Door
1. Eject the disc tray.
2. Lift up the tray door in the direction of the arrow.
Tray Door
Disc Tray
Fig. 2-2
7.1.3 Front Panel
1. Eject the disc tray. (See Fig. 2-2)
2. Remove the tray door. (See Fig. 2-2)
3. Release 2 screws (B).
4. Pull the front panel toward you while pressing 7 stoppers
to disengage, and remove the front panel. (See Fig. 2-3)
Front Panel
Stopper
Stopper
(B)
(B)
Fig. 2-3
(A)
REMARK: Before disassemble the front panel.
Press open/close button to open the tray. If the tray doesn't
work, insert and push a small screwdriver in the emergency
eject hole (A) at the right side. Then the tray comes out.
After the first centimeter it is possible to pull the tray out by
hand. Release the door cover of the tray.
CAUTION BEFORE STARTING SERVICING
Electronic parts are susceptible to static electricity and may easily damaged, so do not forget to take a proper
grounding treatment as required.
Many screws are used inside the unit. To prevent missing, dropping, etc. of the screws, always use a magnetized
screw driver in servicing. Several kinds of screws are used and some of them need special cautions. That is,
take care of the tapping screws securing molded patrs and fine pitch screws used to secure metal parts. If
they are used improperly, the screw holes will be easily damaged and the parts can not be fixed.