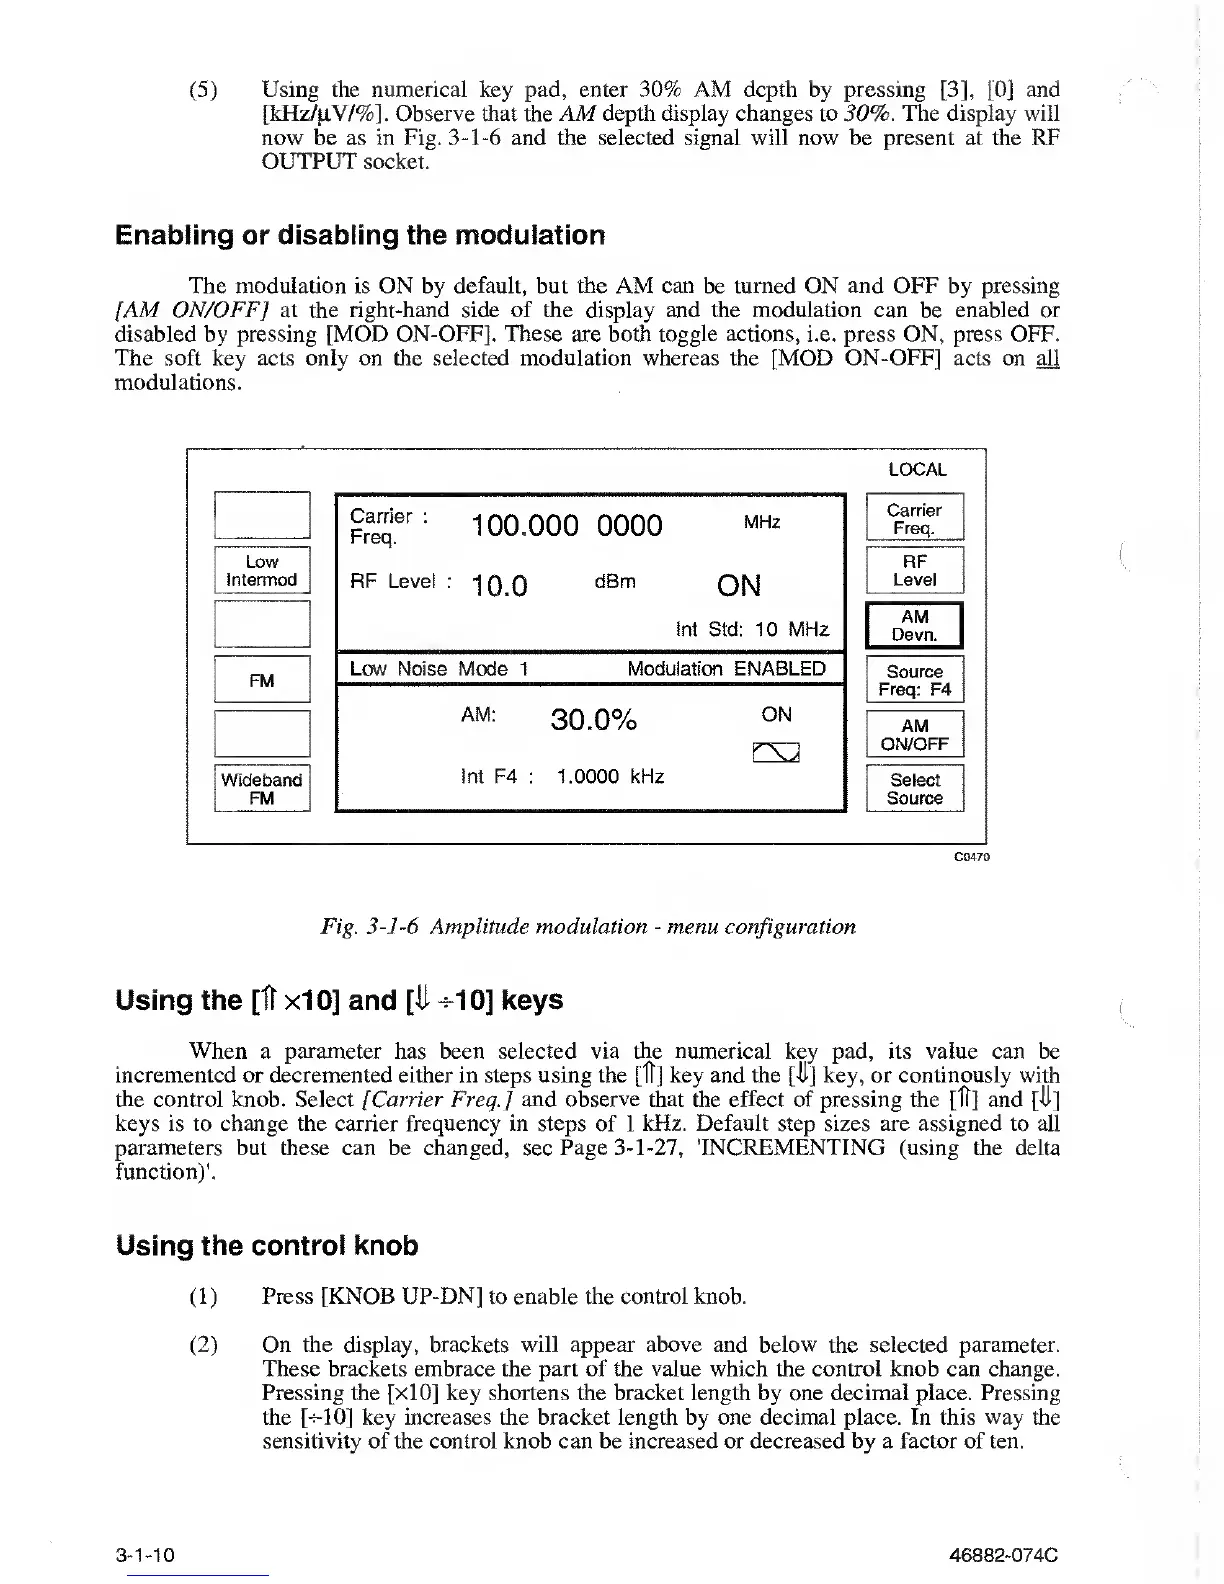
(5)
Using the numerical key pad, enter 30% AM depth by pressing
[3],
[Oj
and
[kHz
/
jiV/%].
Observe
that the AM depth display changes to 30%. The display will
now be as in Fig.
3-1-6
and the selected
signal will now be present at the RF
OUTPUT
socket.
Enabling or disabling the modulation
The modulation is ON
by
default, but the AM can be turned ON and OFF by pressing
[AM ON/OFF] at
the right-hand
side of the display and the modulation can be
enabled
or
disabled by pressing [MOD ON-OFF]. These are both toggle actions, i.e. press ON, press OFF.
The soft key acts only on the selected
modulation whereas
the [MOD ON-OFF] acts on all
modulations.
C0470
Fig.
3-1-6
Amplitude modulation
-
menu configuration
Using the [It
xIO]
and
[It
+10]
keys
When a parameter
has
been selected via the numerical key pad,
its
value can be
incremented or decremented either in steps using the [IT] key and the
[-it]
key, or continously with
the control knob. Select [Carrier Freq.] and observe that the effect of pressing
the
[ft] and [-it]
keys is to change
the
carrier frequency in steps of 1 kHz. Default step sizes are assigned to all
parameters
but
these can
be
changed,
see
Page
3-1-27,
'INCREMENTING (using the delta
function)'.
Using the control knob
(1)
Press
[KNOB UP-DN]
to
enable the control knob.
(2)
On the display, brackets will appear above and below the selected parameter.
These brackets embrace the part of the
value
which the control knob can change.
Pressing the [xIO] key shortens the bracket length by one decimal place. Pressing
the
[-5-10]
key increases the bracket length by one decimal place. In this
way
the
sensitivity of the control knob can be increased or decreased by a factor of ten.
3-1-10
46882-074C