10
N
0
52 RefeReNce PReamPlifieR / Quick-Start Guide
Polarity
Button
Balance
Button
Setup
Button
IR
Transmitter
Standby
Button
Enter
Button
Display
Button
Mute
Button
Volume +/–
Buttons
Select +/–
Buttons
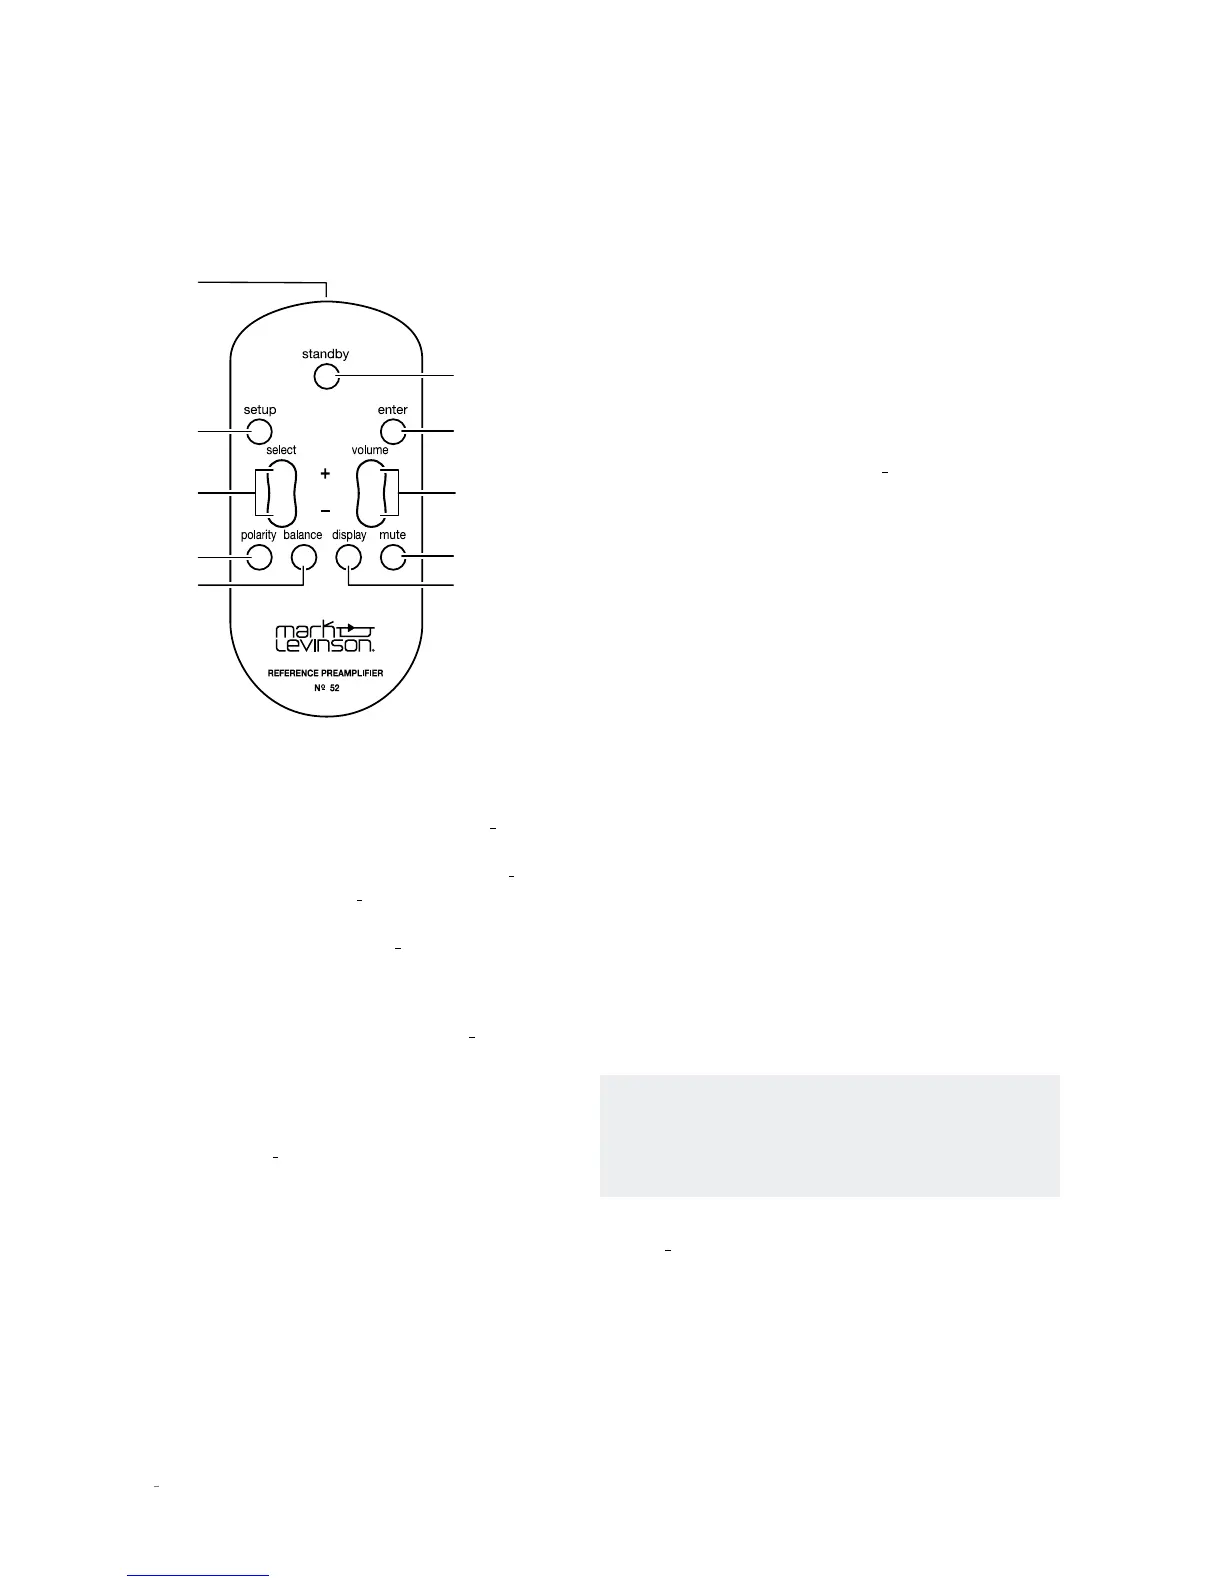
IR transmitter:
This transmitter sends infrared signals to
the IR receiver on the Controller’s front-panel display
Standby button:
Press this button to put the N
0
52 into
and out of the Standby mode. The Standby LED on the
Controller front panel illuminates fully when the N
0
52 is
On, illuminates dimly when the N
0
52 is in either the Green
or Power Save Standby mode, and flashes slowly in unison
with the Preamplifier LED when the N
0
52 is in the Normal
Standby mode.
Setup button:
Press this button to display the Setup
menu, which you can use to customize the N
0
52 to suit
your individual preferences, listening space and other
system components. The Setup LED on the Controller front
panel lights when the Setup menu is active. For complete
information about the settings parameters available in the
Setup menu, see the
N
0
52 User Guide.
Enter button:
Press this button to select or deselect a menu
item when the Setup menu is displayed. The Enter button
does not function during normal operation.
Select +/– buttons:
Press these buttons to select the desired
input to send to the Main output connectors. The name
and volume level of the selected input are indicated on the
front-panel display. (Note: The Select buttons will bypass
any input for which Input Name Setup menu parameter has
been set to “Unused.”)
Volume +/– buttons:
Press these buttons to adjust the
volume level of the Main outputs (and of the Aux outputs
if you have set them to Main Var[iable] in the Aux mode).
The volume changes in 1.0dB increments up to 23.0dB and
in 0.1dB increments above 23.0dB. The minimum volume
level is OFF; the maximum volume level is determined in
the Setup menu.
Whenever you select an input, the N
0
52 applies the volume
offset selected for it in the Setup menu to the Main output
volume level and to the Aux output volume level.
Polarity button:
This button controls the polarity of the
Main output signal, and of the Aux output signal if you have
set them to Main Var[iable] in the Aux mode.
There is no right or wrong setting for the signal polarity.
We recommend that you experiment with signal polarity
to determine the best sound for individual recordings. The
sonic difference between an output signal with inverted
and non-inverted polarity ranges from subtle to inaudible,
depending on the microphone technique and other factors
used in the original recording. In some cases, individual
recordings will just sound better one way than the other.
Mute button:
Press this button to mute and unmute the
level of the Main outputs by the amount determined in the
Setup menu. The Mute LED on the Controller chassis lights
when the mute function is active.
Balance button:
Press this button to set the left-to-right
channel balance of the Main output connectors. The
Balance LED on the Controller chassis lights when the
balance function is active.
NOTE: When the balance function is inactive, the
Balance LED on the Controller chassis remains lit if
the left-to-right channel balance of the Main output
connectors is offset.
Display button:
Press this button to change the intensity
of the N
0
52’s front-panel display characters and its front-
panel LEDs. Multiple presses of the Display button cycle
through the available brightness levels: High, Medium,
Low, and Off.
REMOTE CONTROL OVERVIEW
GettinG StaRted